Once a bill or credit is approved by all parties and synced with QuickBooks, the transaction type cannot be changed from a credit to a bill or vice versa. This article will guide you through the optimal workflow for saving time by copying the bill/credit and deleting the incorrect version.
Steps to Update Bill to Credit
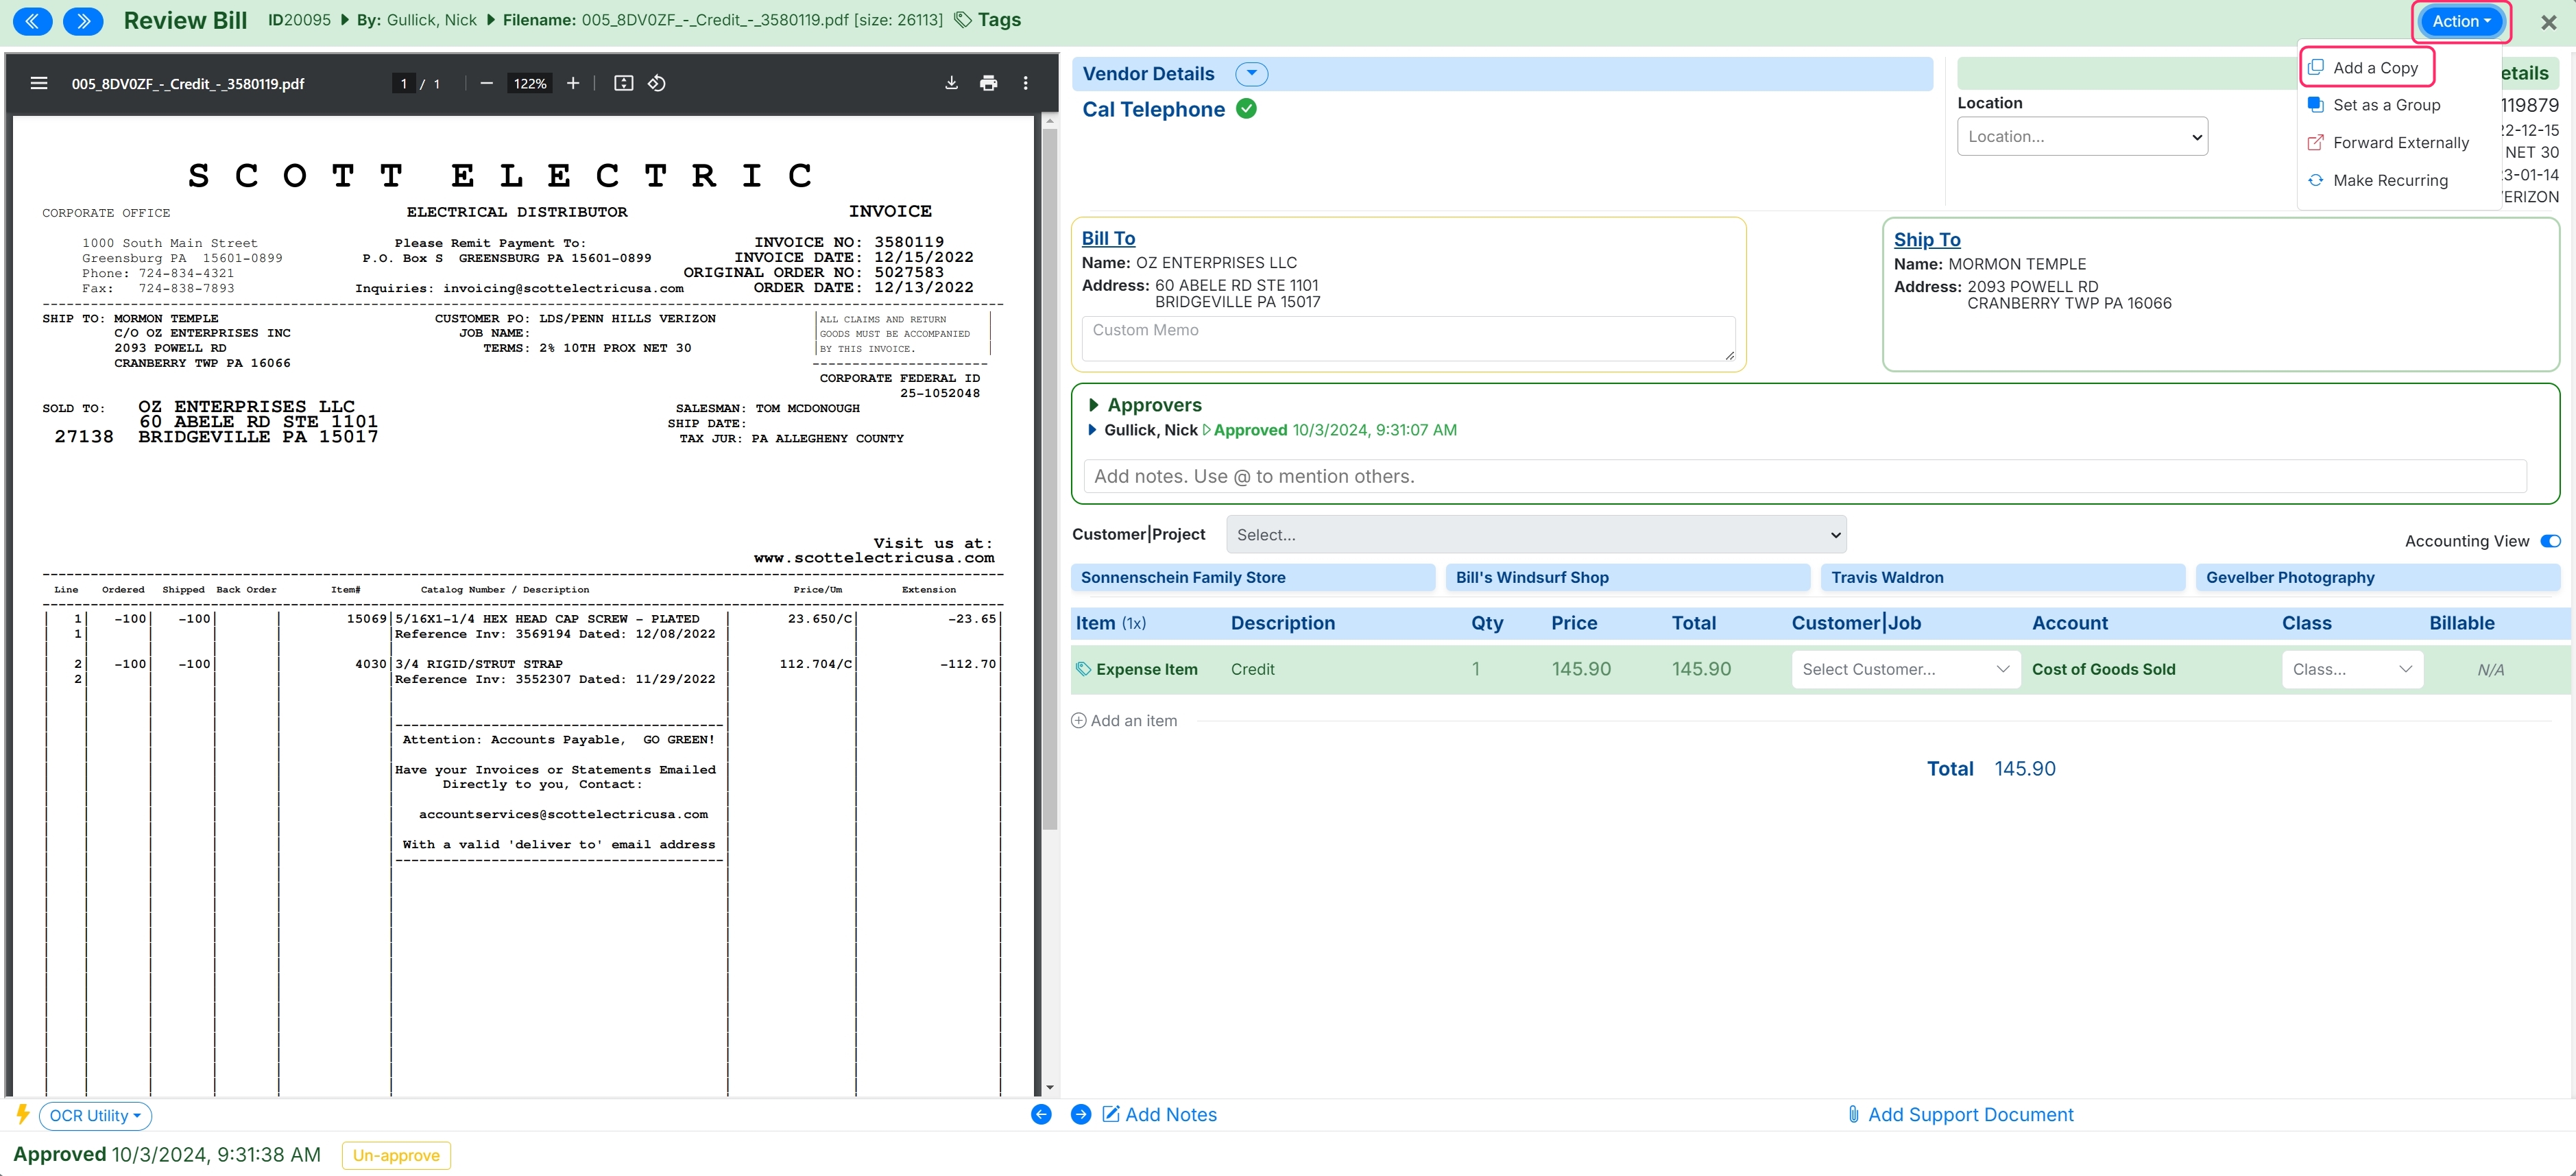
Go to the Archive Tab within MakersHub and select the bill that you want to change to a credit.

Click the Actions dropdown in the top right corner, then select Add a Copy. This will create a new copy of the transaction in the Bills tab.

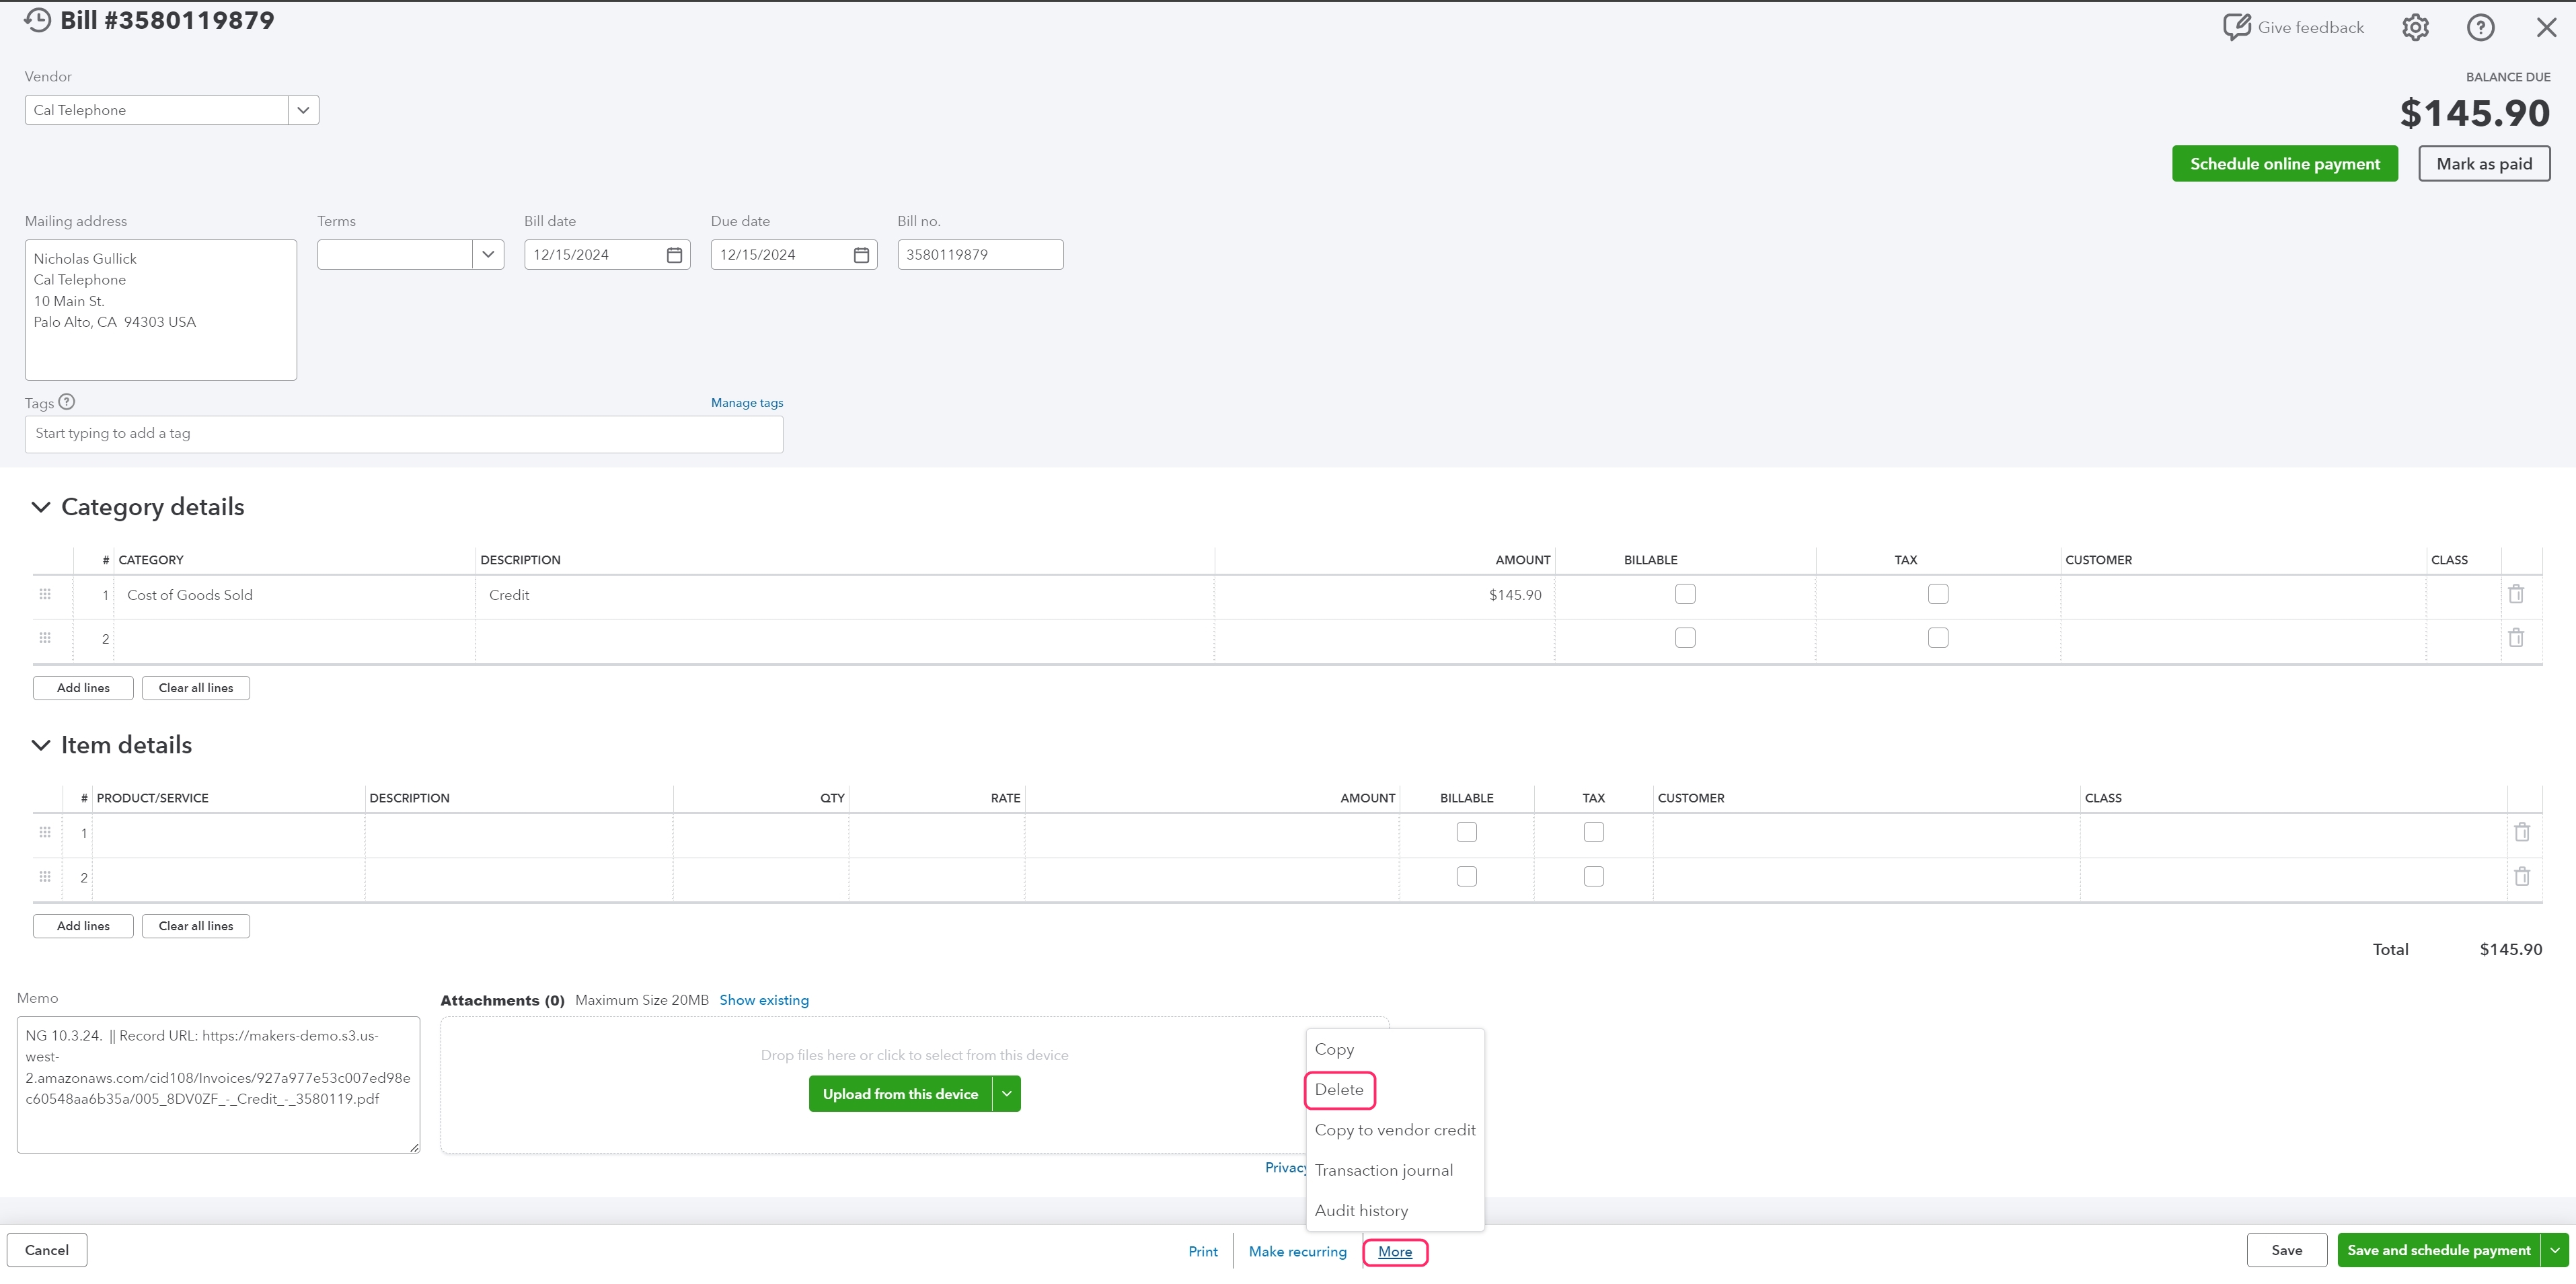
In QuickBooks Online, delete the original bill by clicking More at the bottom and then Delete. This will automatically remove the corresponding bill in MakersHub.

In QuickBooks Desktop find the bill and click the delete button at the top of the page. Once you re-run the Web Connector, MakersHub will delete the bill.

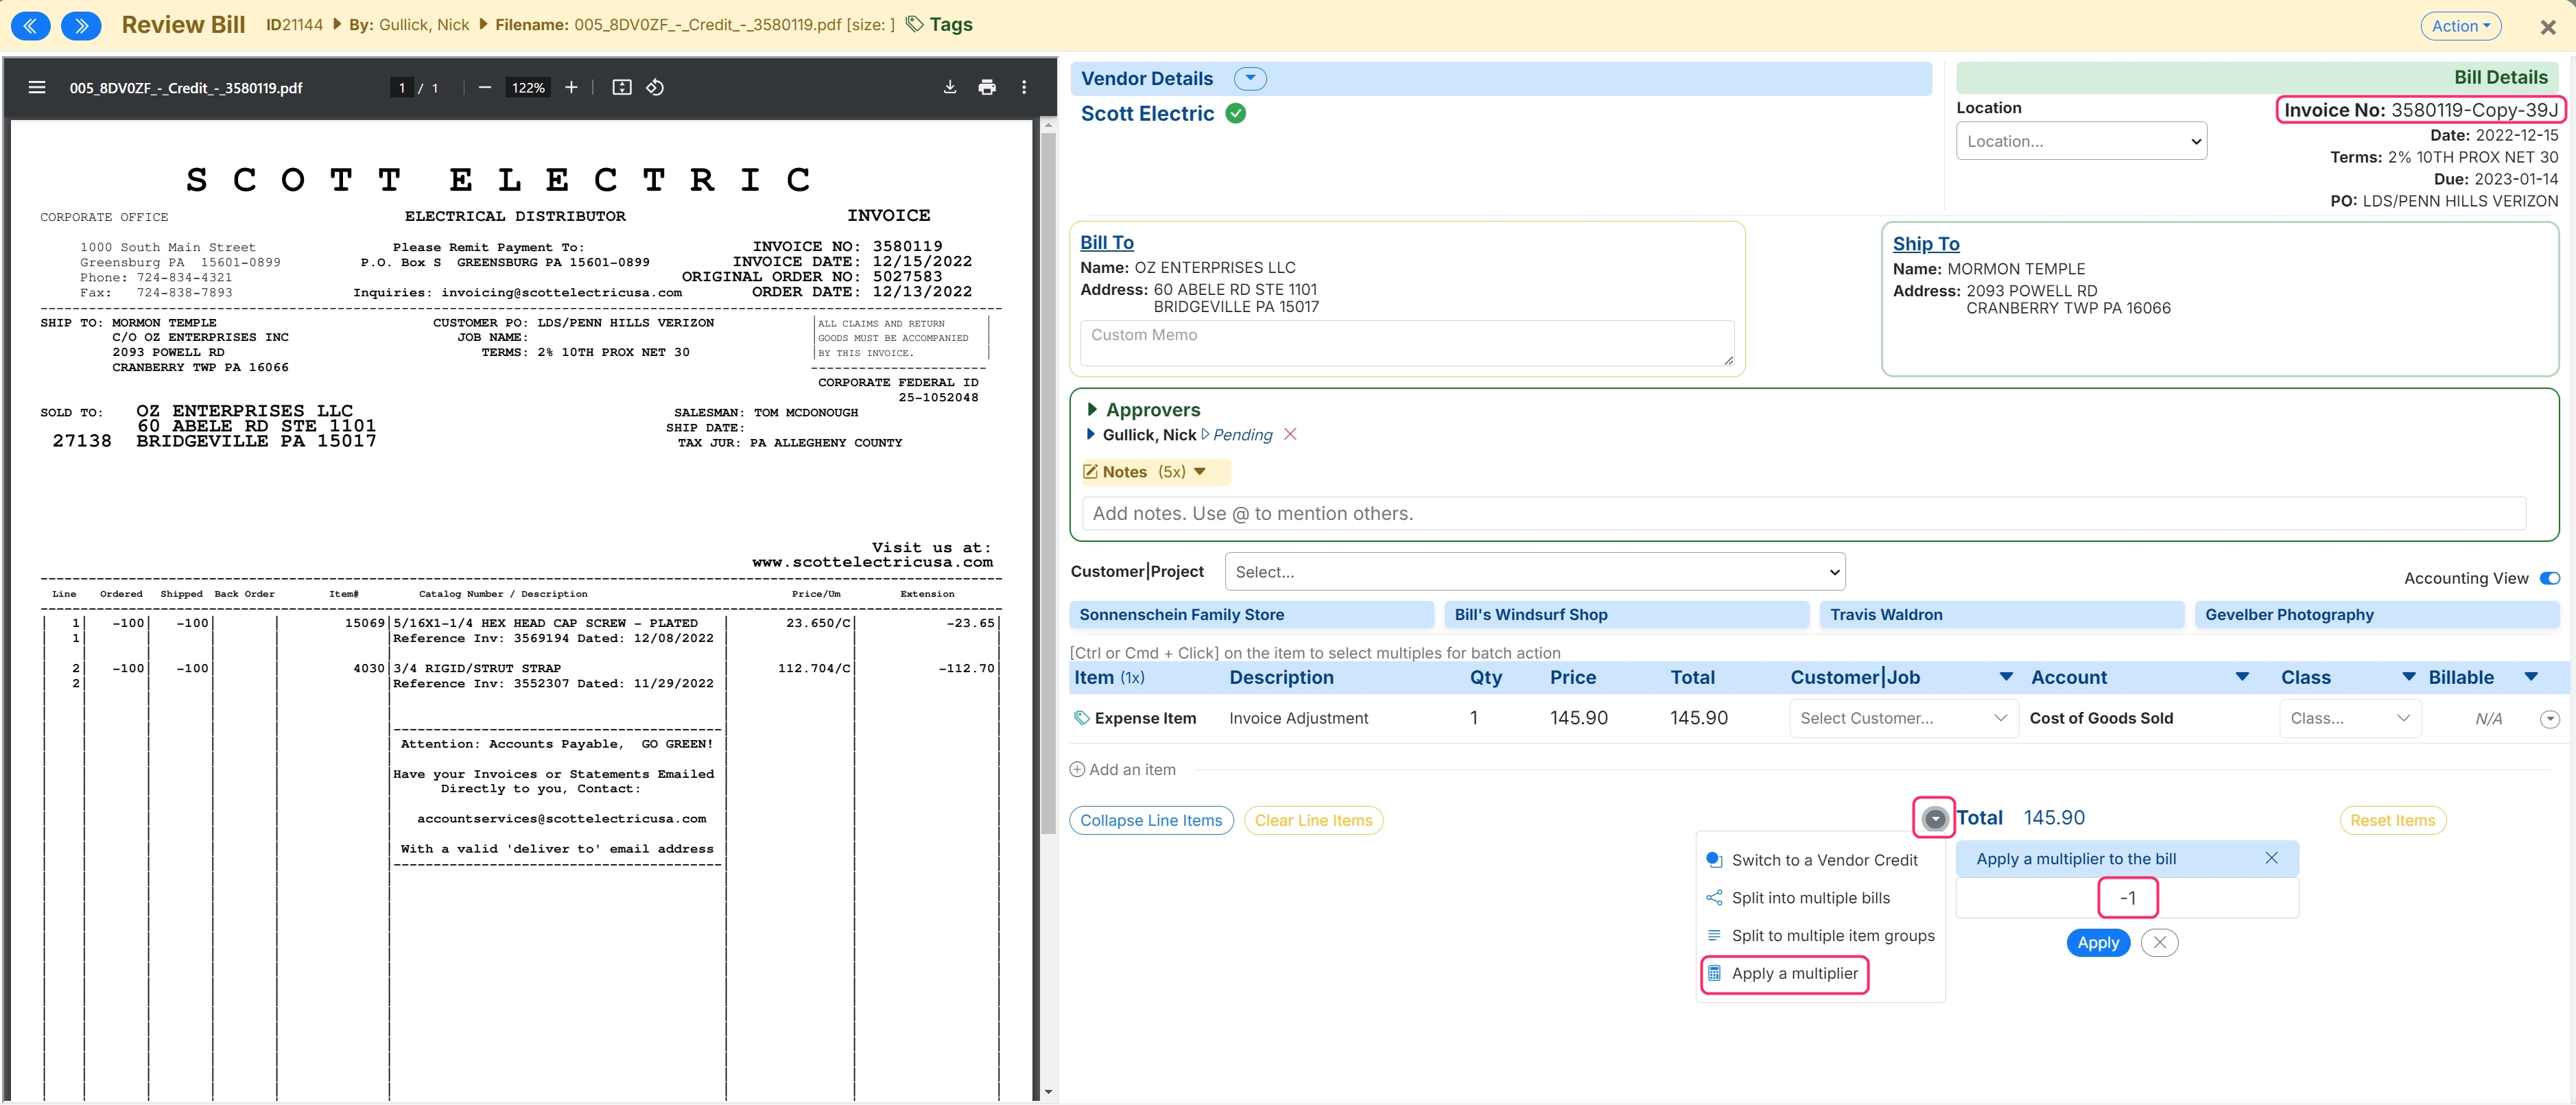
Go to the copied credit under the Bills tab, click the drop down next to the total, select Apply a Multiplier, update the multiplier to “-1”, and click Apply. This will adjust the line item and total to be negative turning it into a credit. Lastly, update the Invoice Number by removing everything after the first dash as MakersHub automatically updates the invoice number when a copy is made.

If the credit is correct, you can click approve, and it will proceed through your normal approval workflow.