Custom Integration Mapping by MakersHub supports spreadsheet-based import/export workflows for Accounting/ERP Systems without API access.
Setup Connection
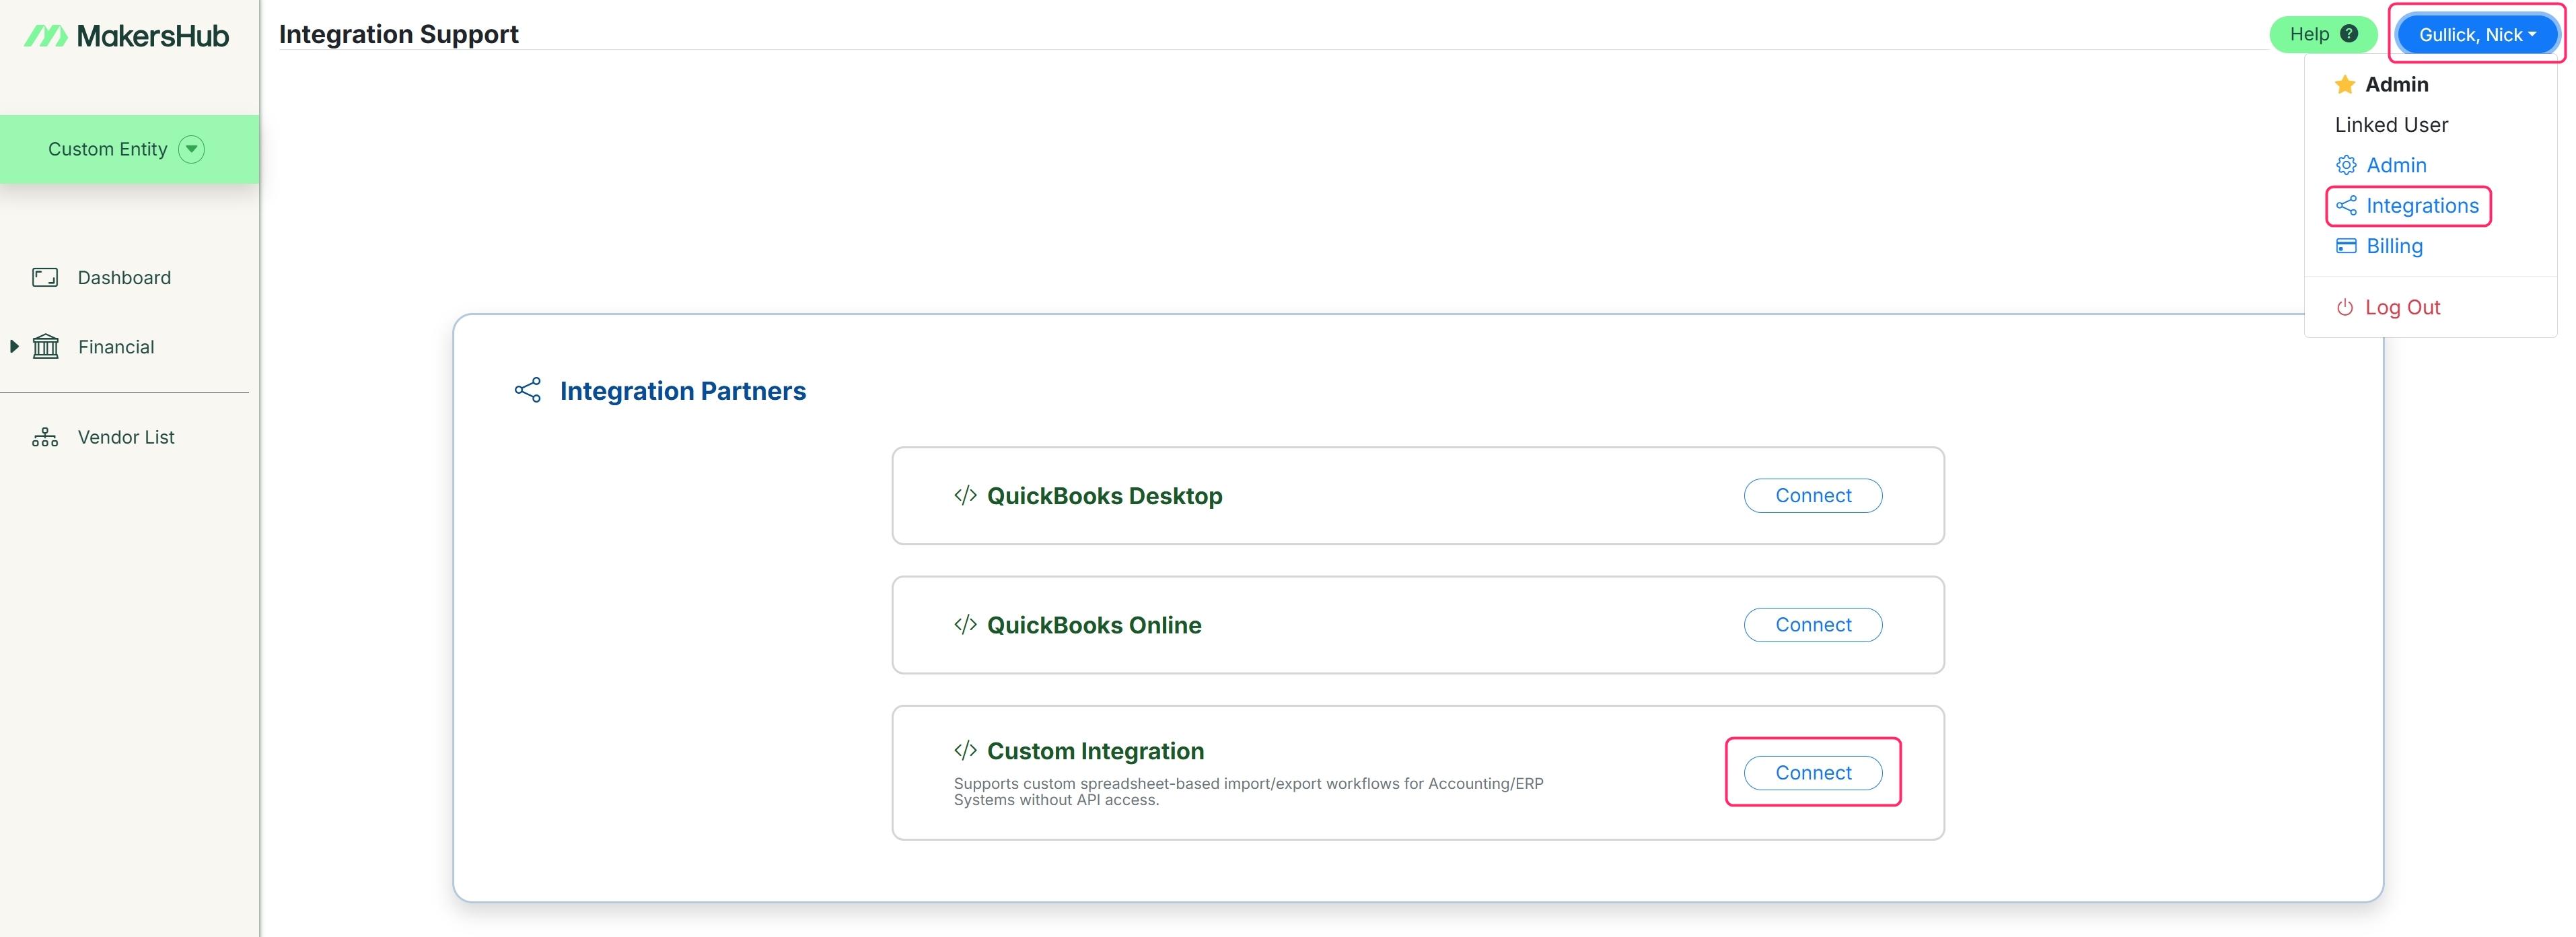
Go to your name in the upper right corner > Integrations > click Connect next to the Custom Integration tab. Then click create a custom integration connection.
Adding your Data
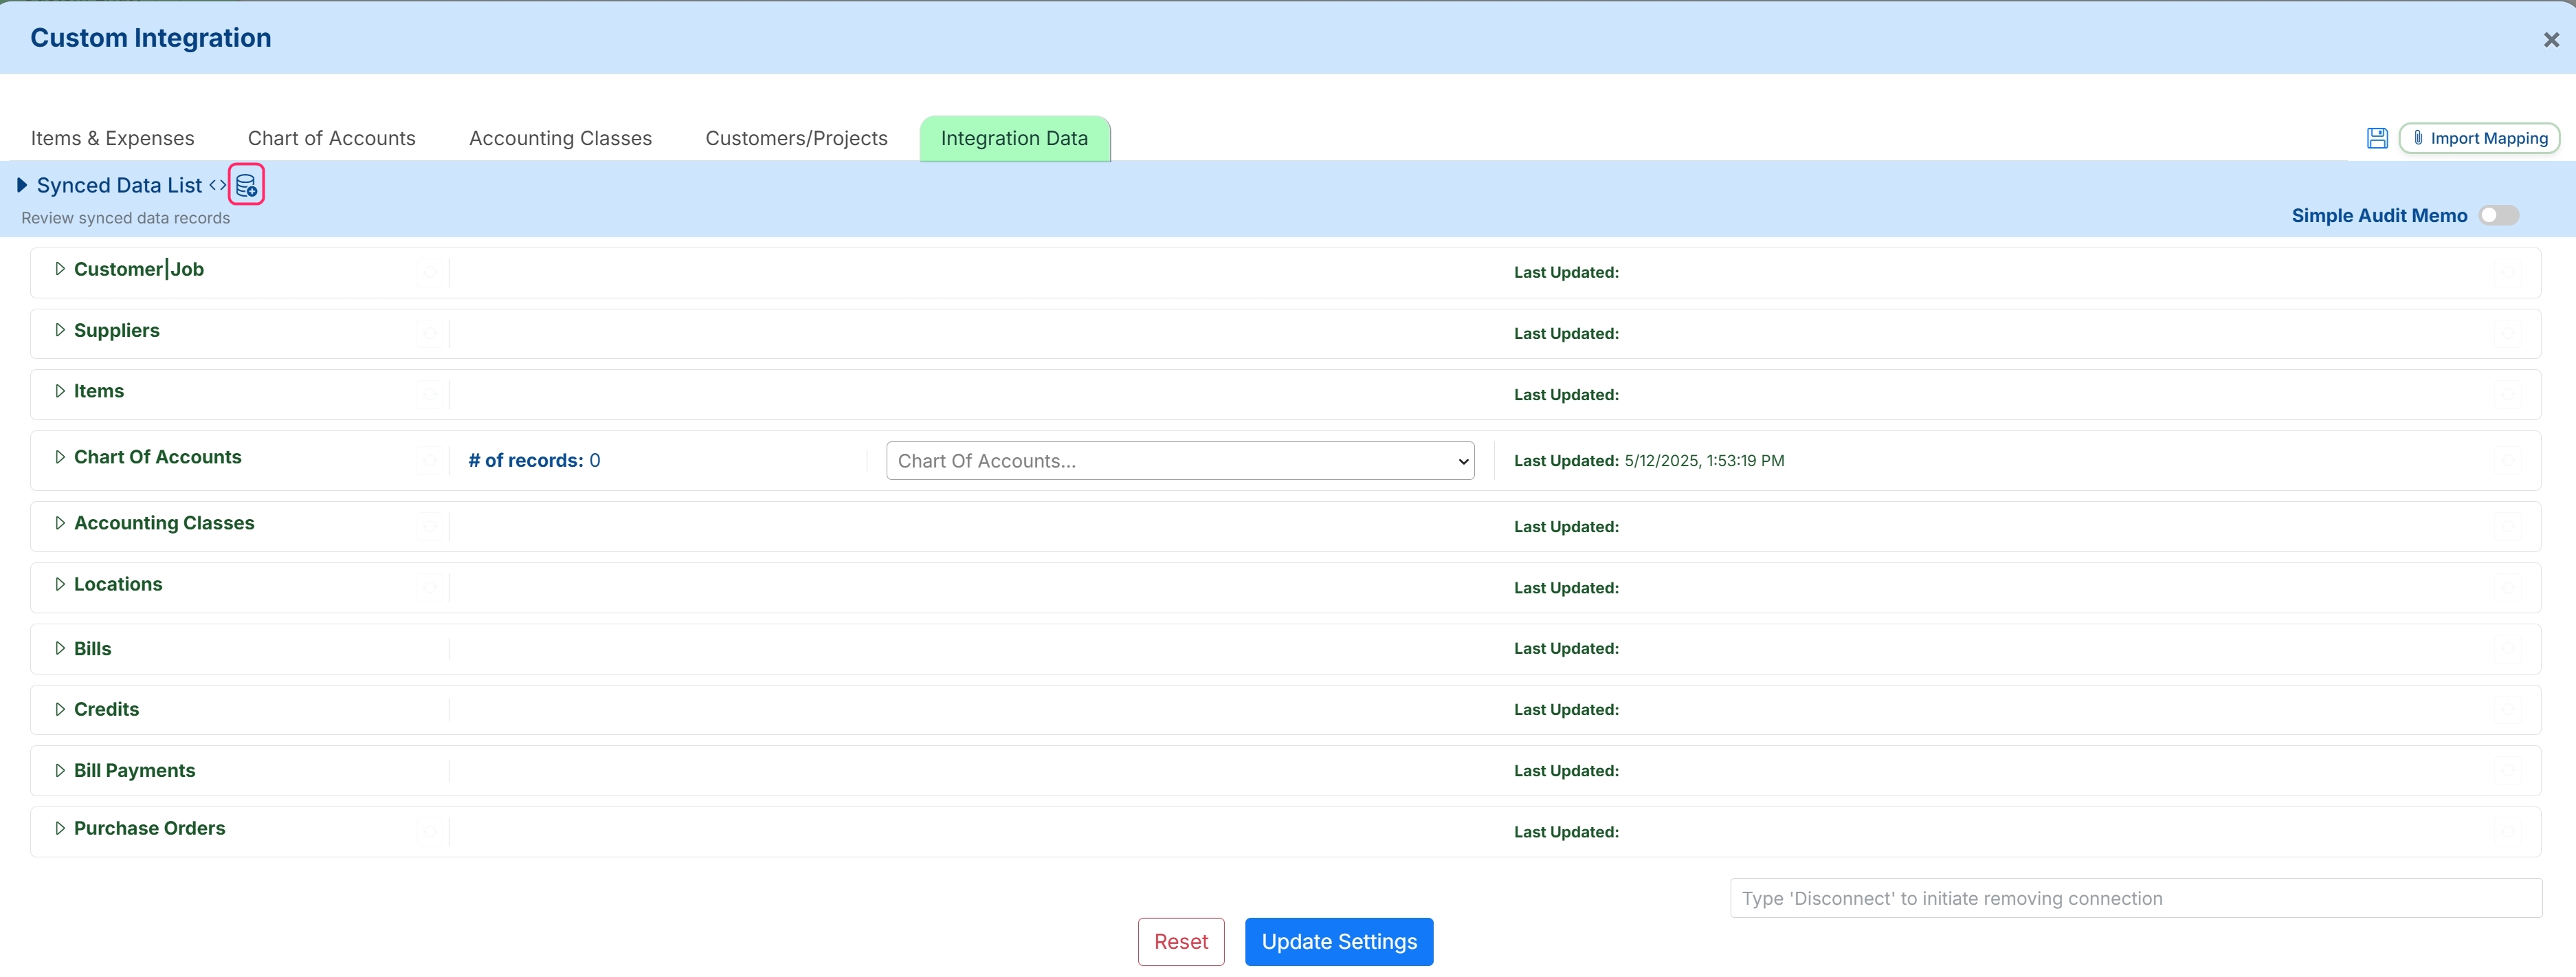
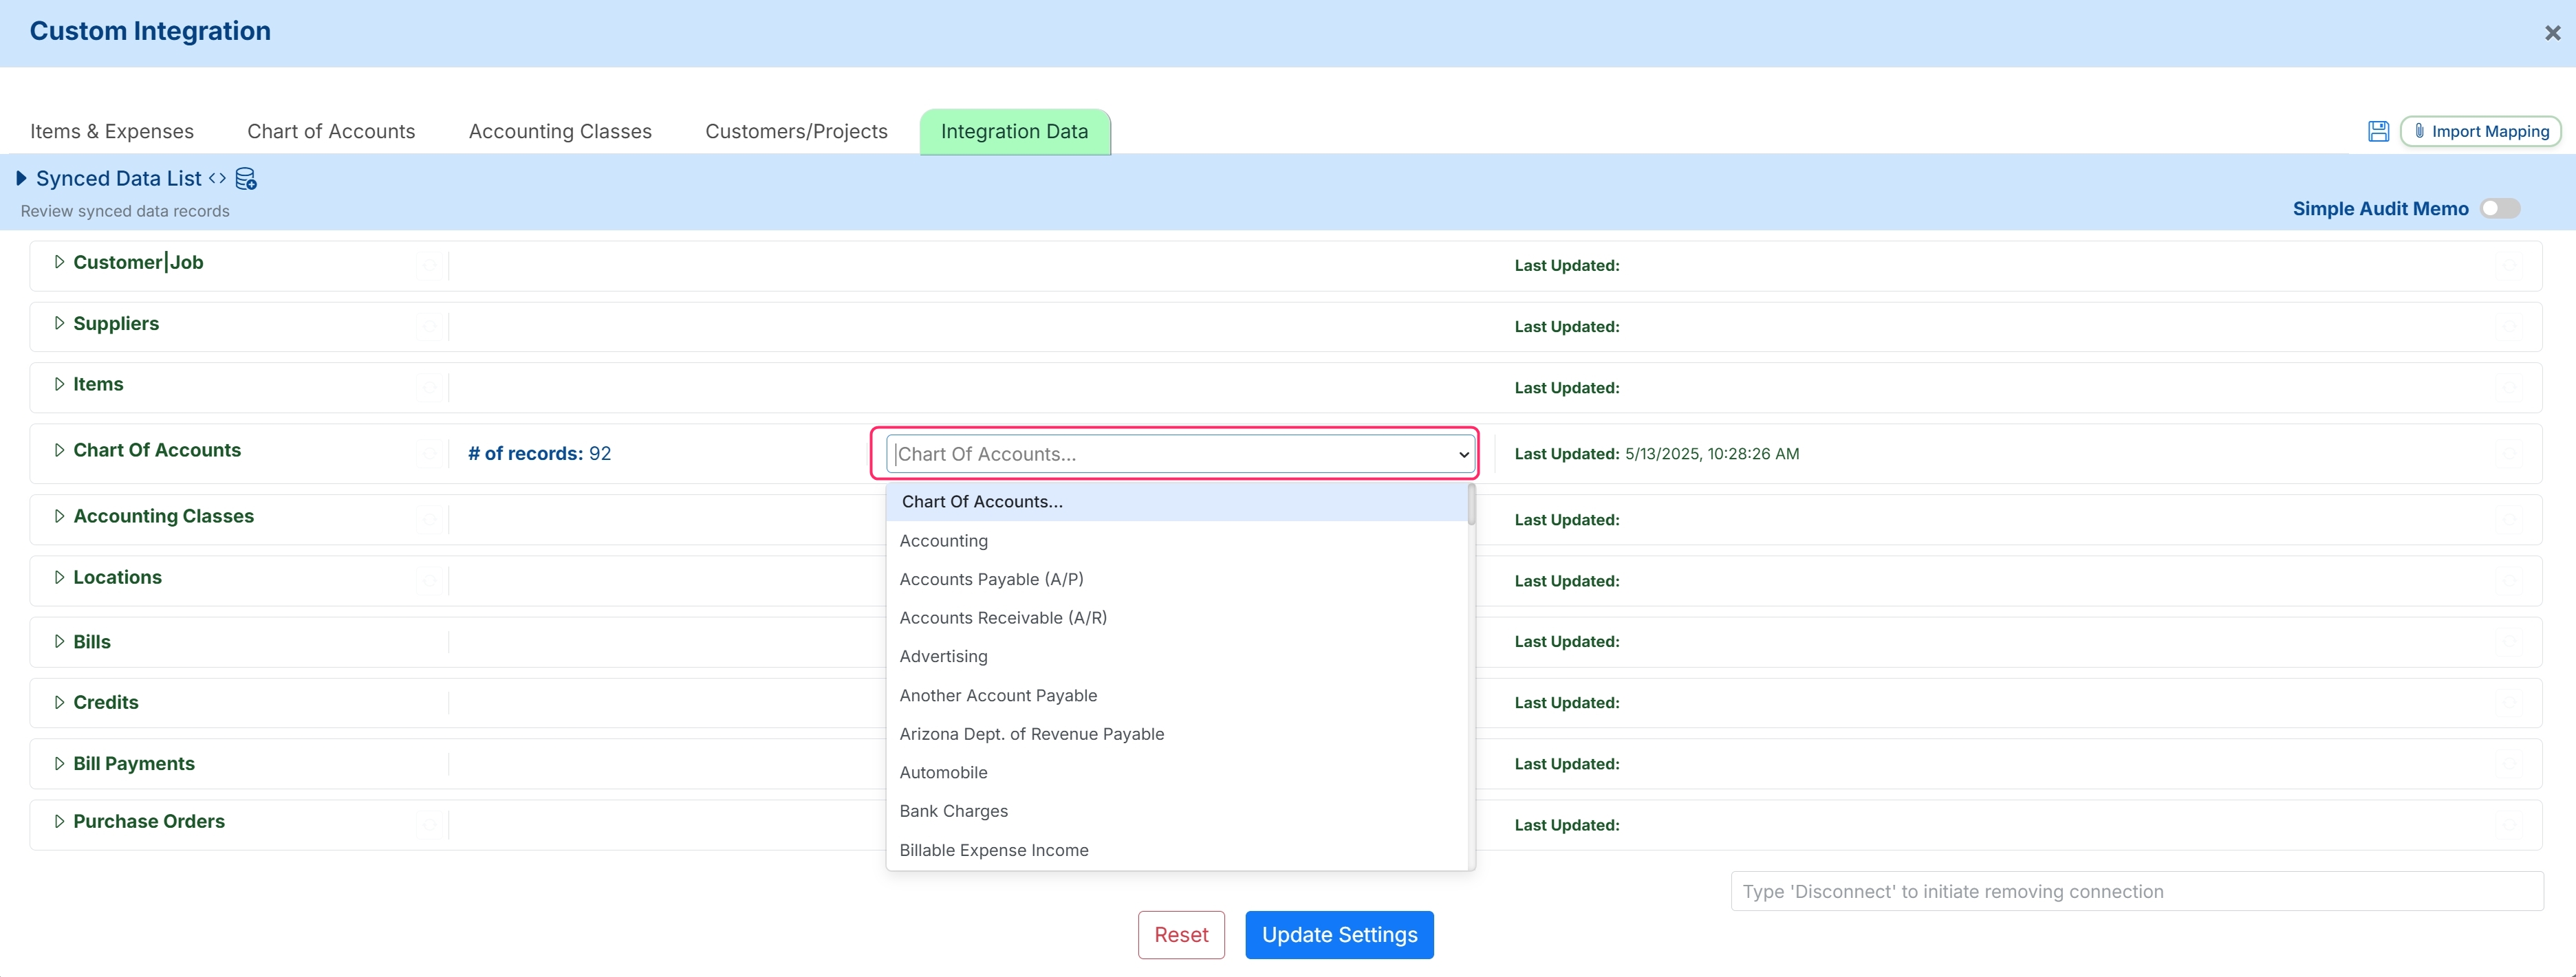
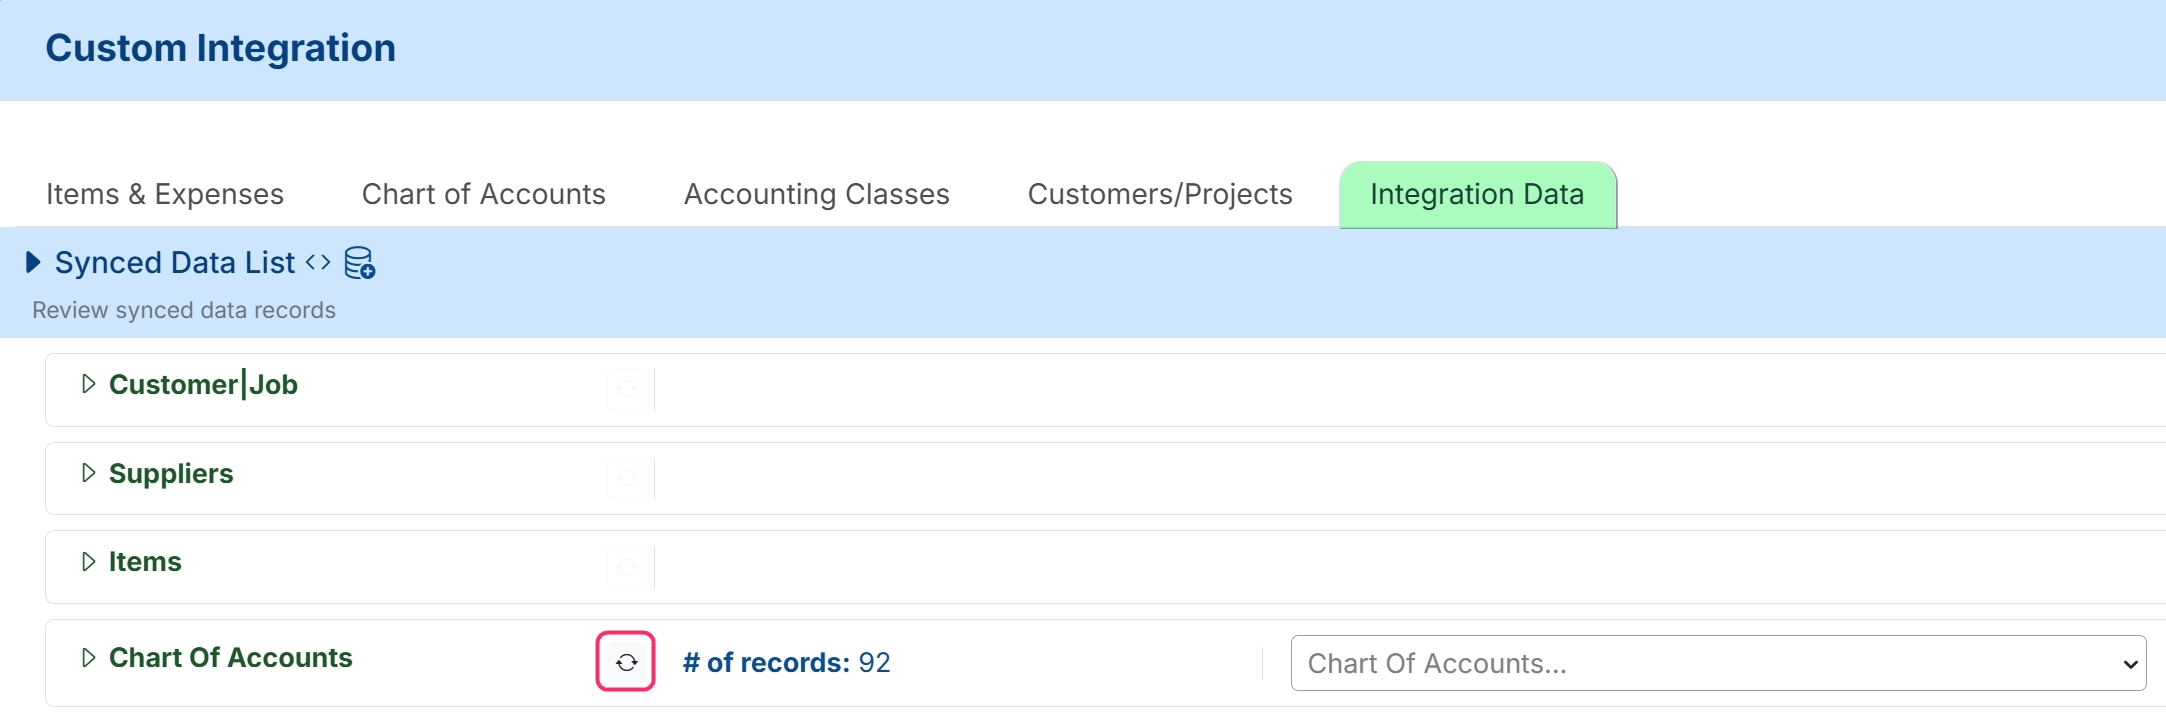
To add data such as the Chart of Accounts, go to the Integration Data tab and click the Stack Icon.
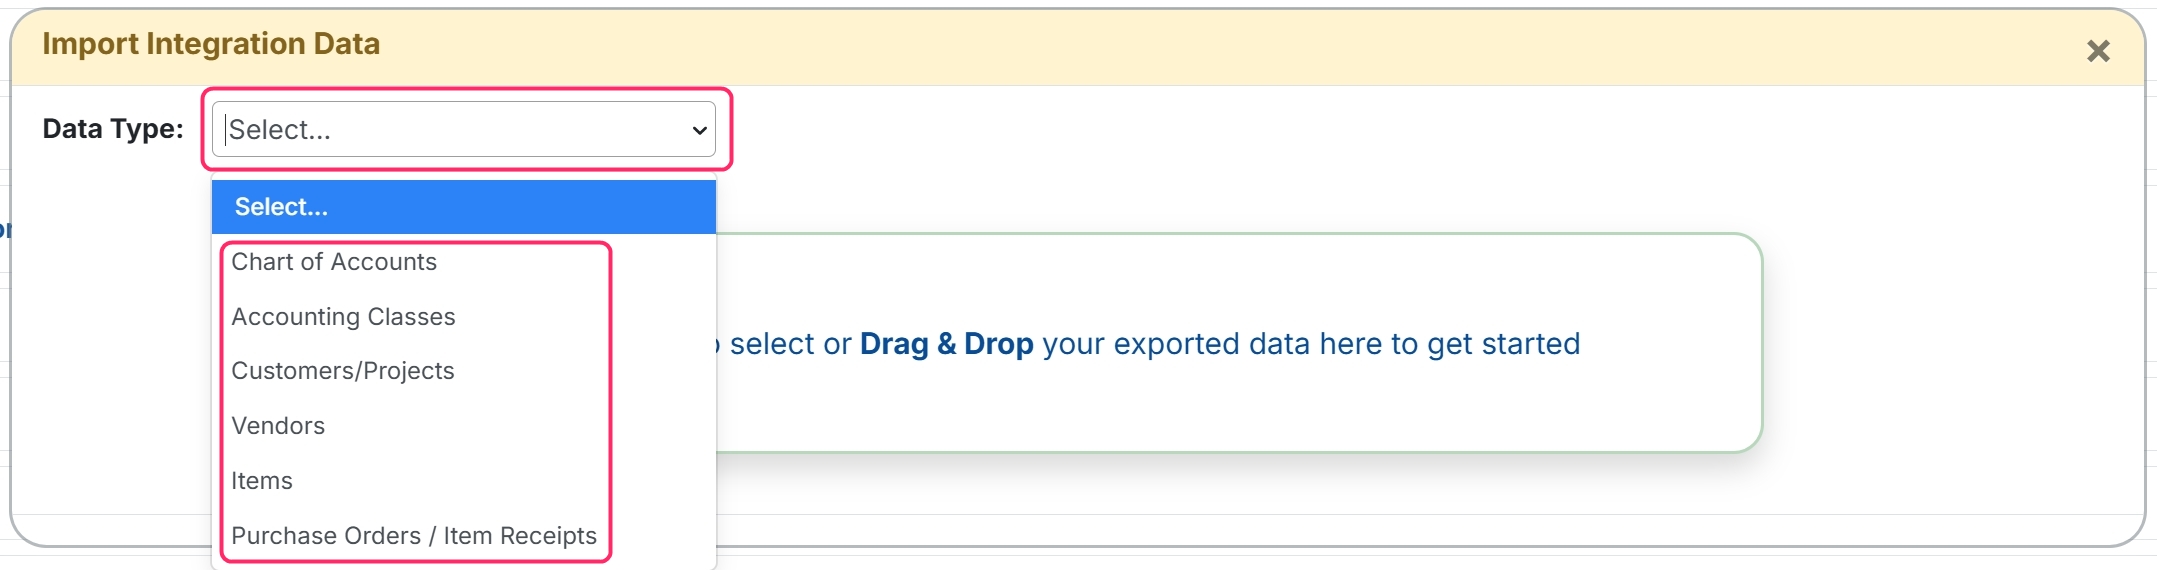
Select the data type you wish to add, then drag and drop or click to upload the data that you exported from your current system. See the example templates section below for sample data sets.
Data Types Supported
Customer / Project
Supplier / Vendor
Chart of Accounts
Accounting Classes
Items
Purchase Orders / Item Receipts
Once the file is selected, you can match the file headers to the corresponding data fields in MakersHub. When finished, select Import Data.
Note: The names in green represent the headers from your Excel sheet, and the drop-downs below allow you to match each header to the corresponding data field in MakersHub.
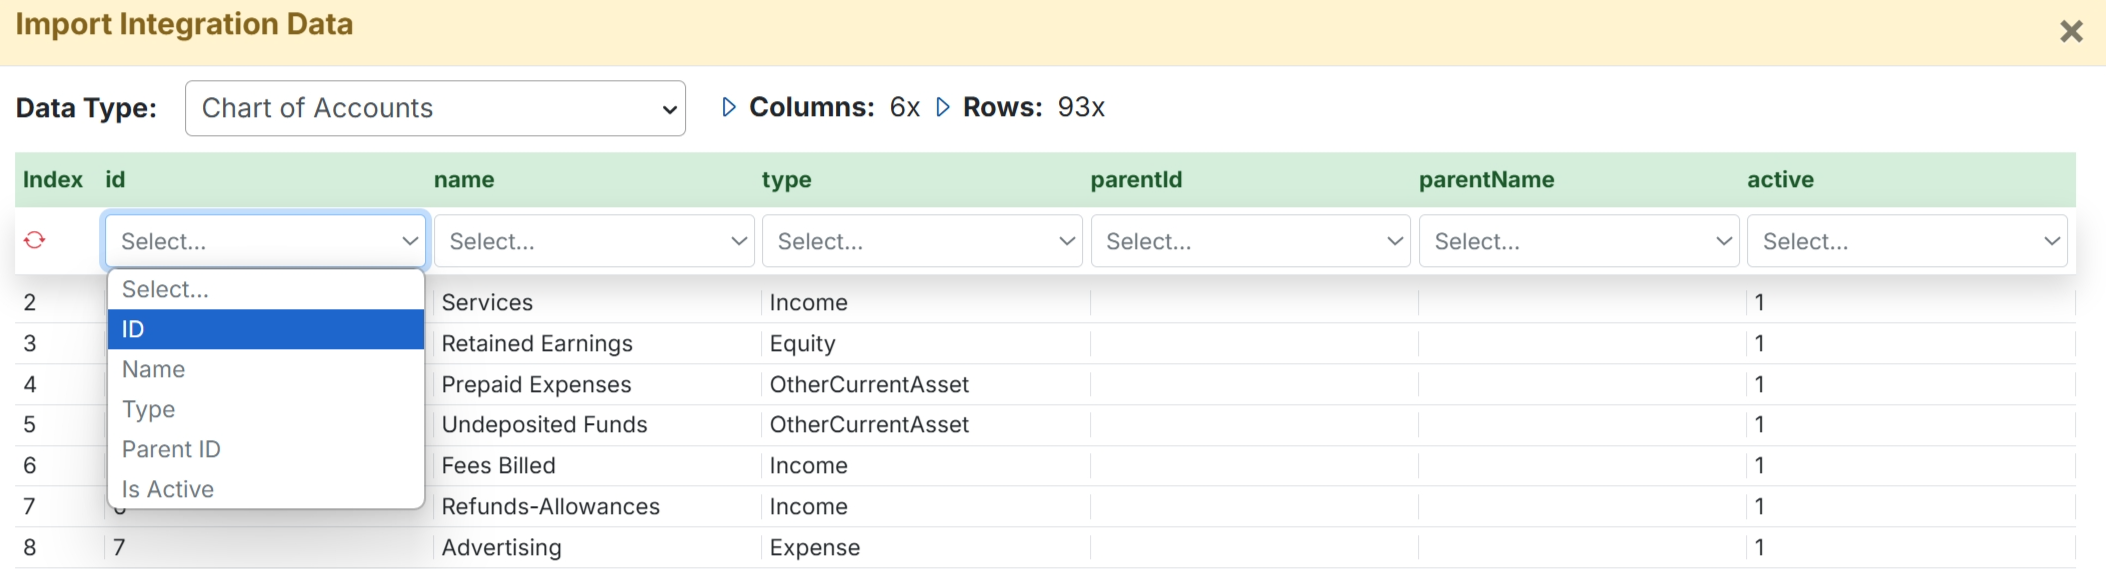
To reset the mapping on the columns you can select the red circle on the top left. Note: Your mappings will be saved for the next import.
.jpg)
You can check the data uploaded by going to the corresponding drop down in the Integration Data tab.
Example Templates
Troubleshooting
If you need to remove the data because of an error uploading or wrong data selected you can click the circle icon next to the name and delete the data.
Have complex or high-volume automation needs? Speak with your account representative to learn more about advanced API support.