In MakersHub, you have the ability to create new vendors and sync them directly with QuickBooks. This can be done while reviewing the bill/receipt for a new vendor or under the Vendor List tab.
Create a New Vendor While Reviewing a Bill
When a bill is uploaded into MakersHub, the system runs a language model to find a matching vendor in your QuickBooks. Should the vendor not exist in your QuickBooks, you can create the vendor in MakersHub.
Consider the following bill from a new vendor, Generic Company. You can see that MakersHub was not able to identify a matching vendor. To create a new vendor in QuickBooks, select Add a new Vendor.
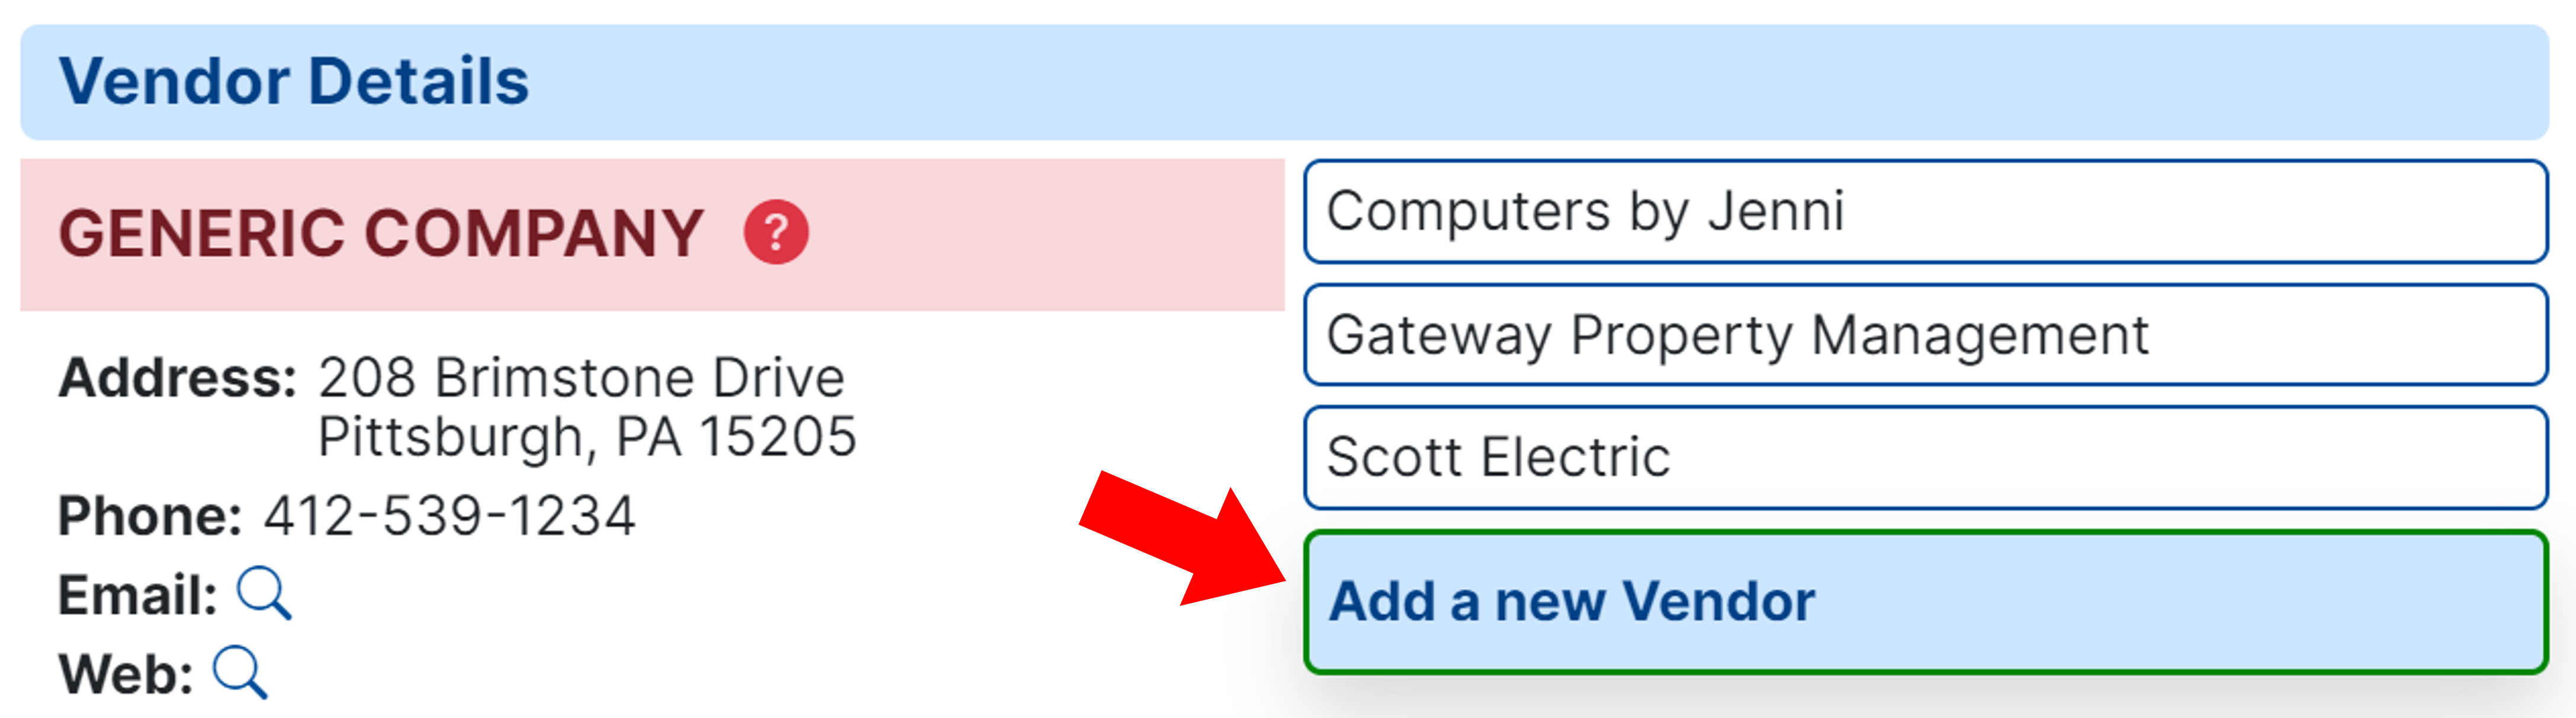
A window will appear to create Generic Company as a vendor. The fields within this window will be populated based on the information MakersHub extracts from the bill. You may edit these fields before you create the vendor in QuickBooks:
Vendor Name - Corresponds with Vendor Display Name in QuickBooks.
Legal Business Name - Corresponds with the Company Name and Name to print on checks field in QuickBooks.
Business Address - This is the business address and the default address that is shown on checks, but can be changed when assigning a payment method.
Contact Information - Contacts that will receive the payment details request and remittance details. Select the Add button to add multiple contacts.
1099 Contractor - Check this box if the vendor is a contractor. This will then populate the vendor under the Contractors tab in QuickBooks.
Website - URL of the business will populate under your vendor information in QuickBooks.
Tags - Corresponds to the QuickBooks tags you can create for each vendor.
Once done, select Add a New Vendor at the bottom.
.png "Vendor Details(1).png")
A new section will appear in the top right corner titled QuickBooks Online Connection with a Post successful status.
Sync Updates to QuickBooks Desktop
Updates made to the QuickBooks will be added to the queue and pushed through on the next sync. To push updates to QuickBooks Desktop, you must run the Web Connector.
.png "Vendor Successfully Created(2).png")
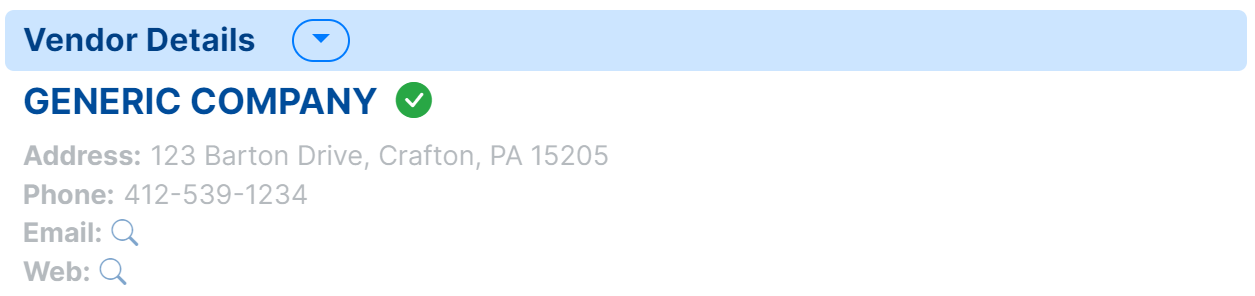
Now you may close the window. When you return to the bill, you will see a green check mark beside the vendor name, indicating a matching vendor was identified. You may proceed to review and approve the bill.
Create a New Vendor from Vendor List
You can also add a vendor within the Vendor List page.
Select Add Vendor in the top left portion of the screen.

A similar window will appear where you can input the vendor information that will appear in QuickBooks:
Vendor Name - Corresponds with Vendor Display Name in QuickBooks.
Legal Business Name - Corresponds with the Company Name and Name to print on checks field in QuickBooks.
Business Address - This is business address and the default address that is shown on checks from MakersHub, but can be changed when assigning a payment method.
Contact Information - Contacts that will receive the remittance details with the payment. Select the Add button to add multiple.
1099 Contractor - Check this box if the vendor is a contractor. This will then populate the vendor under the Contractors tab in QuickBooks.
Website - URL of the business will populate under your vendor information in QuickBooks.
Tags - Corresponds to the QuickBooks tags you can create for each vendor.
Select Add a New Vendor.
Once the vendor information is synced, a new window will appear titled QuickBooks Online Connection with a message that says Post successful.
Sync Updates to QuickBooks Desktop
Updates made to the QuickBooks will be added to the queue and pushed through on the next sync. To push updates to QuickBooks Desktop, you must run the Web Connector.