This article will cover the steps to connect MakersHub with your NetSuite account. There are two main steps to setting up the connection with MakersHub:
Set up and gather the required information from NetSuite.
Entering the information from NetSuite into MakersHub and testing the connection.
NetSuite
Create MakersHub Role
Bundle Installation of Role
You may follow the below to manually create the role within NetSuite, however you may also request access to our bundle “MakersHub Integration Role” that will install the role into your NetSuite environment. Please reach out to Support@makershub.com for access along with your NetSuite account Id.
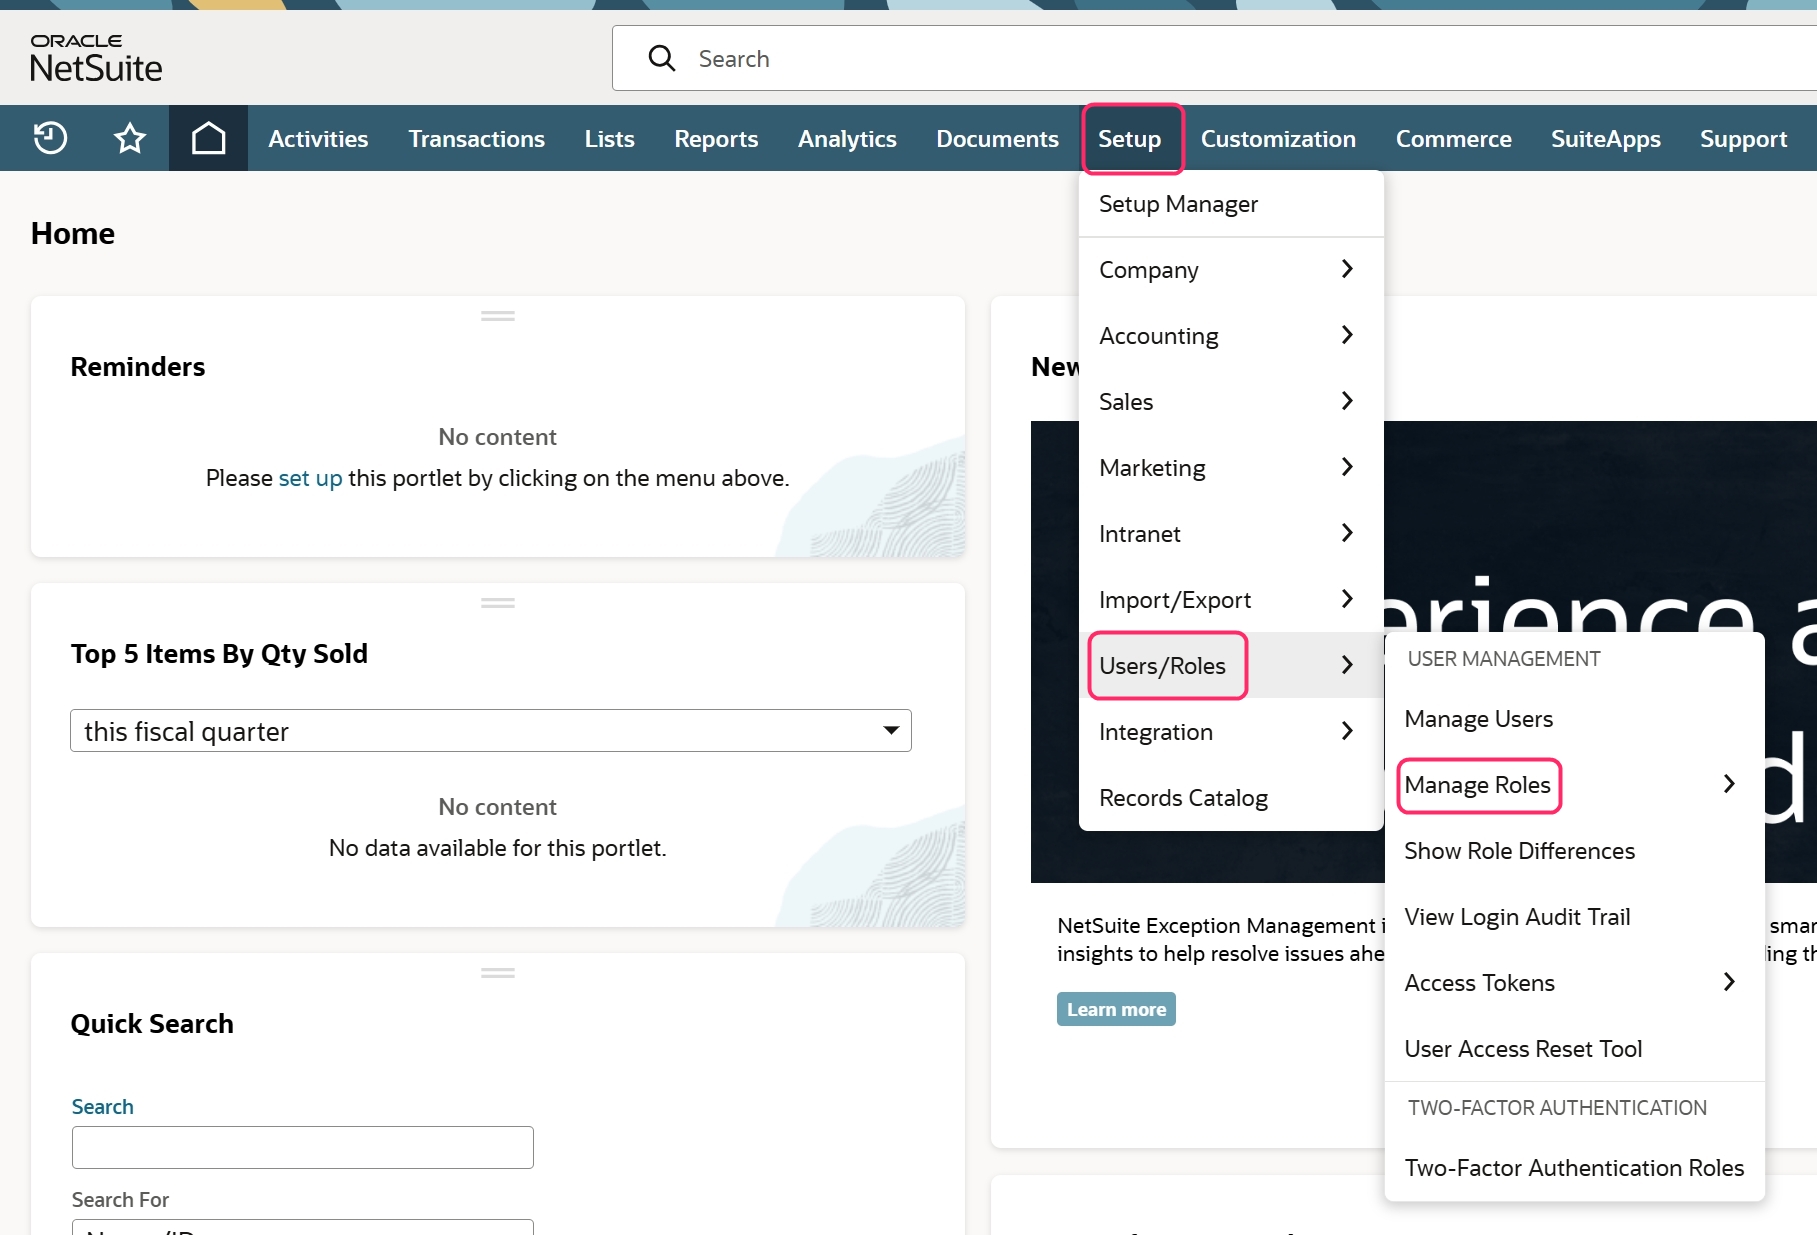
Go into Setup > Users/Roles > Manage Roles.
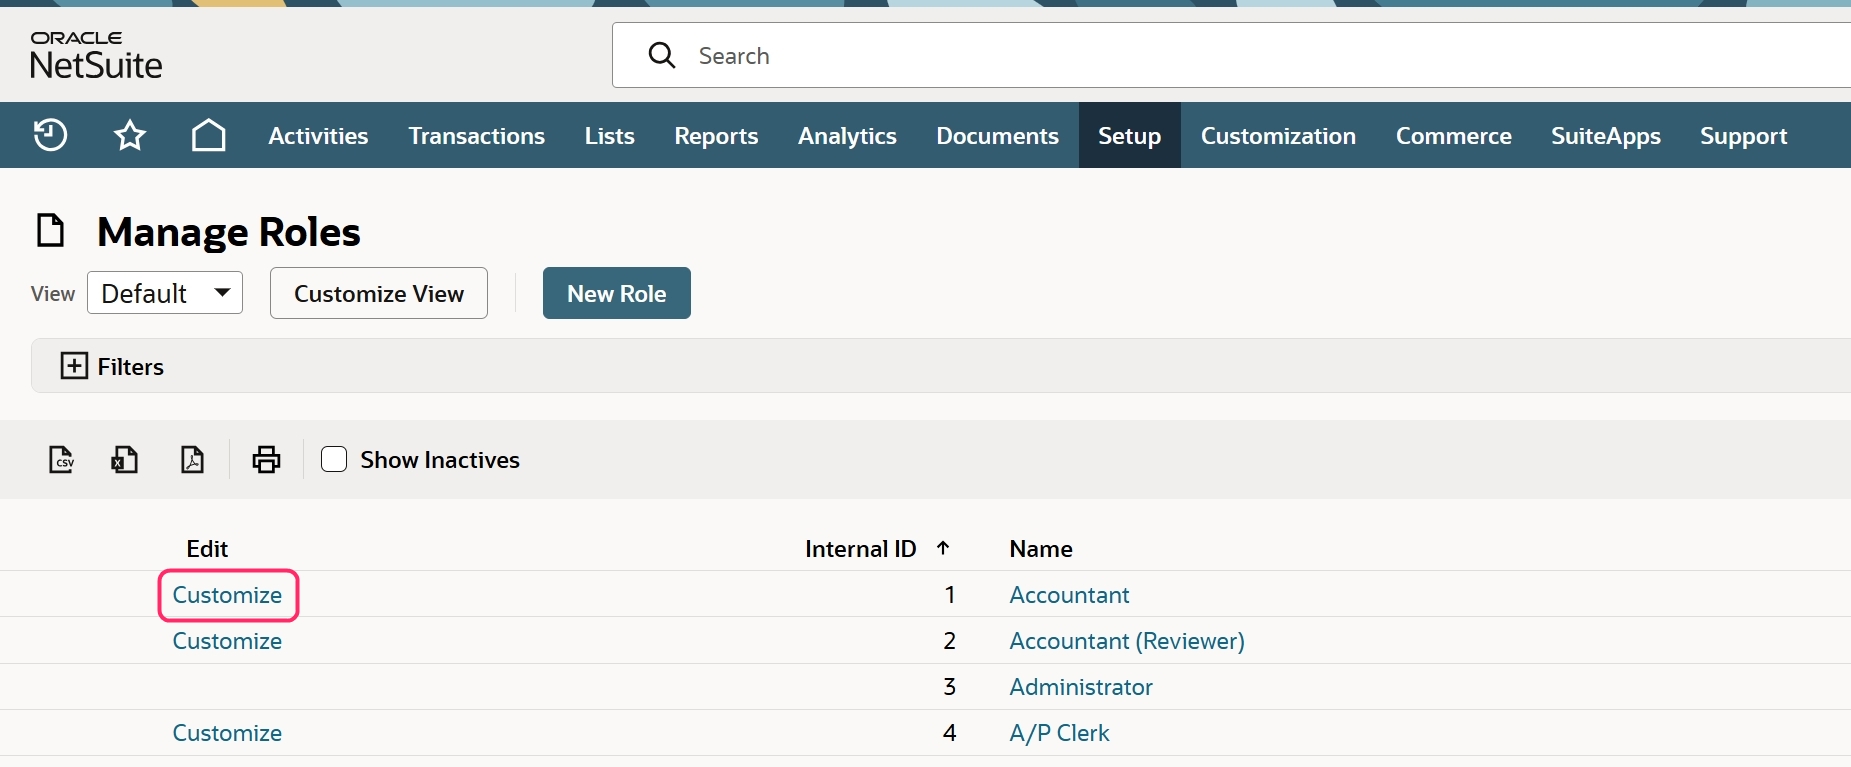
Click into Customize next to the Accountant Role.
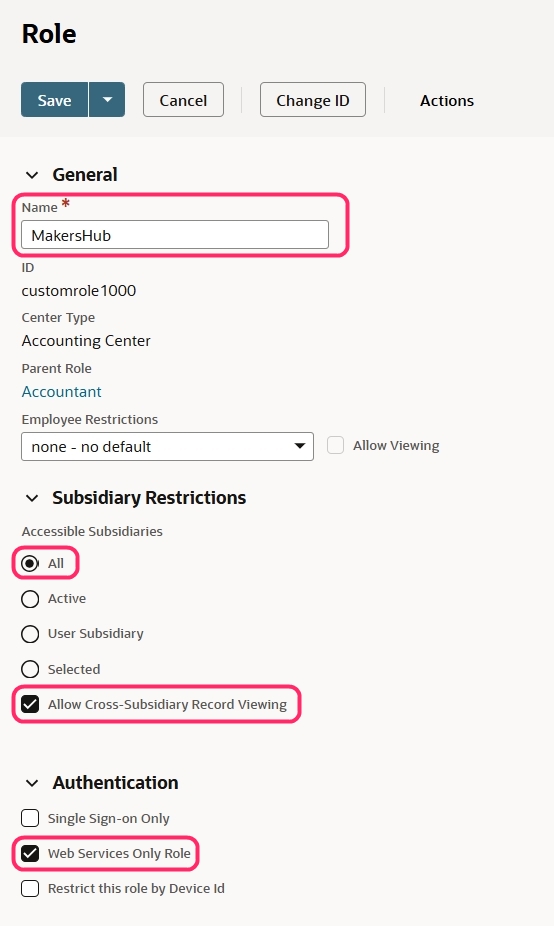
Rename to “MakersHub Agent”, check All Subsidiaries, check “ Allow Cross-Subsidiary Record Viewing” and check the box for Webservices Only Role.
Under permissions tab add the following permissions if they do not already exist then Save. Note: Some permissions may not apply to your account depending on your settings.
Lists > Currency = View
Lists > Subsidies = Full
Lists > Custom Segments = Full
Lists > Custom Records = Full
Setup > Access Token Management = Full
Setup > Login Using Access Token = Full
Setup > Custom Fields = Full
Setup > Custom Lists = Full
Setup > Records Catalog = View
Setup > Custom Column Fields = Full
Setup > Custom Body Fields = Full
Setup > Custom Event Fields = Full
Setup > Custom Record Types = Full
Setup > Rest Web Services = Full
Setup > User Access Tokens = Full
Reports > SuiteAnalytics Workbook = Full
Custom Record > Events = Full
Access Token Permissions Not Under Setup
If you do not see the “access token” permissions on the drop down, this will need to be enabled under Setup > Company > Enable Features > Suite Cloud > Check “Token-based Authentication”.
Custom Segments
If you are utilizing custom segments you will need to enable access into the custom segment for MakersHub to be able to access this. If you do not have custom segments please proceed to the next section.
Create integration User
Best Practice
This role can be assigned to any user, however best practice is to create a unique Integration User per integration.
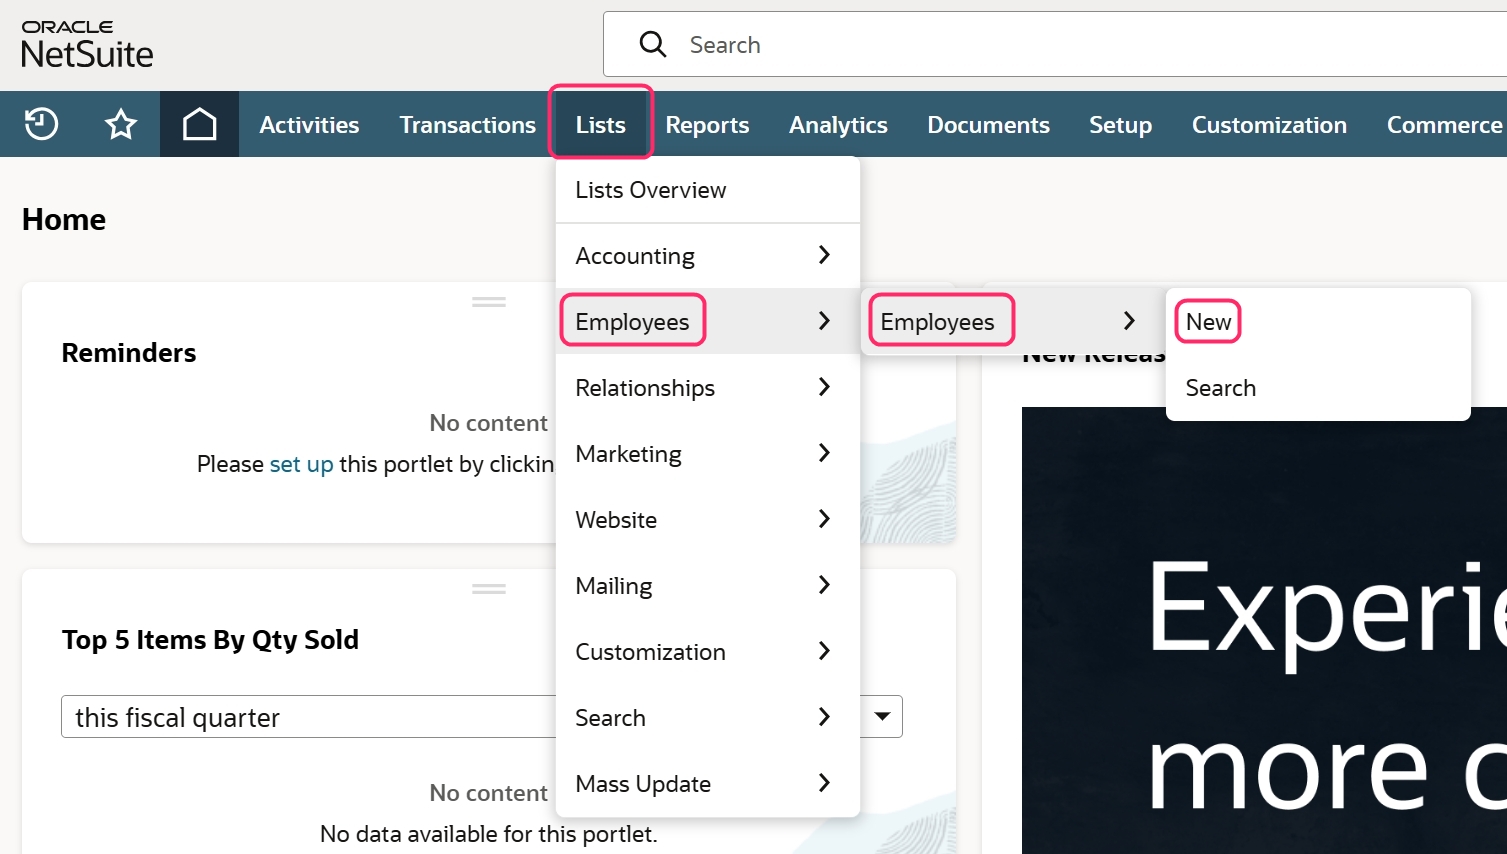
Go to Lists > Employees > Employees > New.
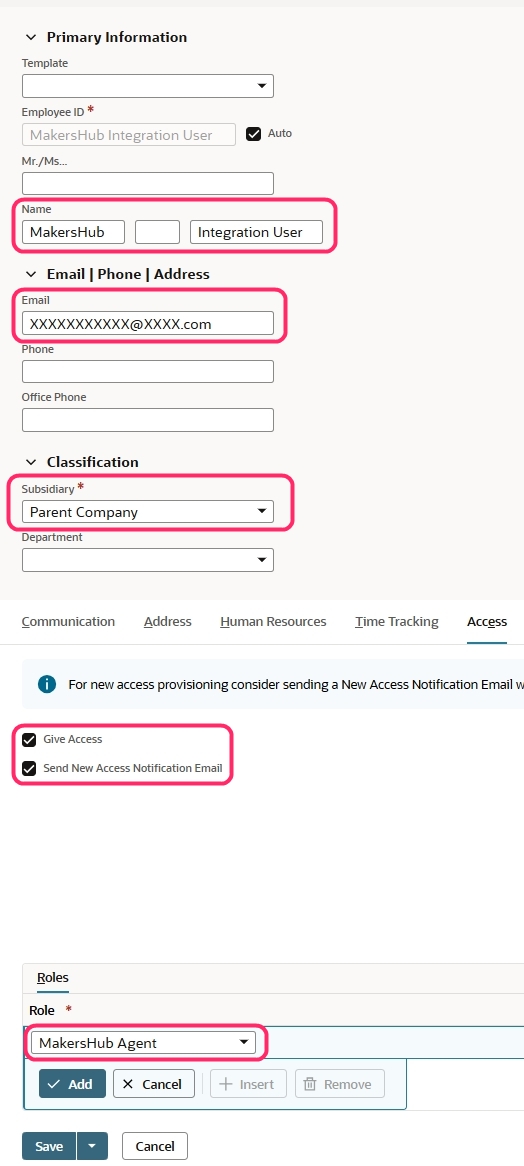
Fill in the following:
Name: “MakersHub Integration User”
Email: Enter an email for this user. We recommend using a general IT email as the role will be only accessible via Webservices and not tied to a specific user and if a user were to leave it would not interrupt the connection.
Subsidiary: Select your Parent/top level Subsidiary
Select Give Access
Manually assign password or send notification email
Assign the MakersHub Role we created in step 1
Save
Find your Company ID
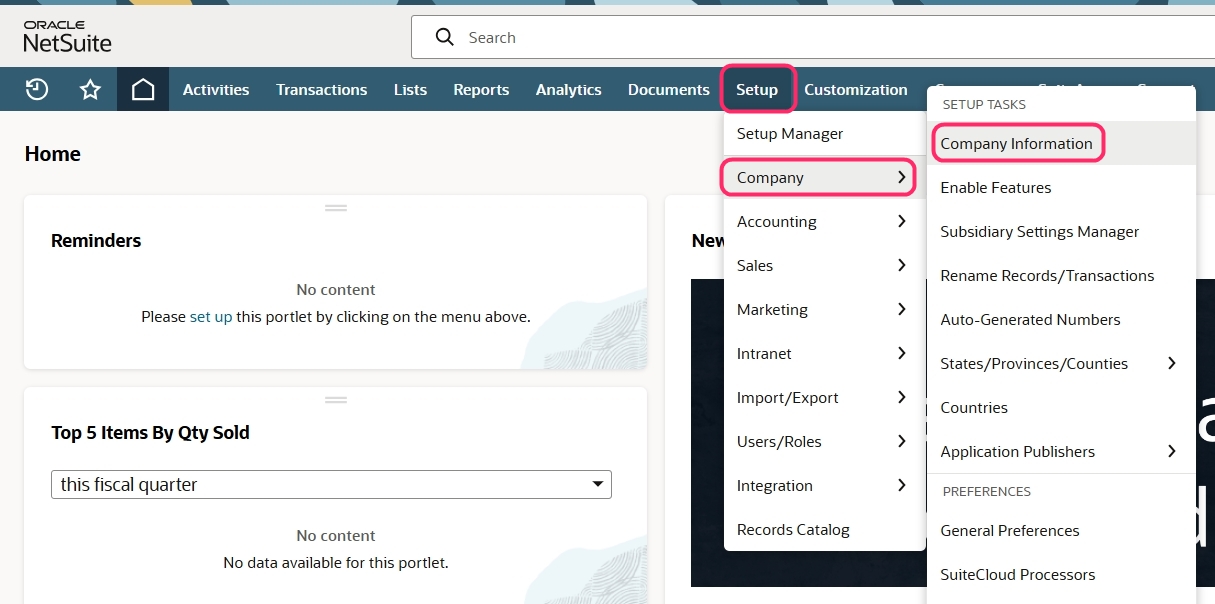
Go to Setup > Company > Company Information.
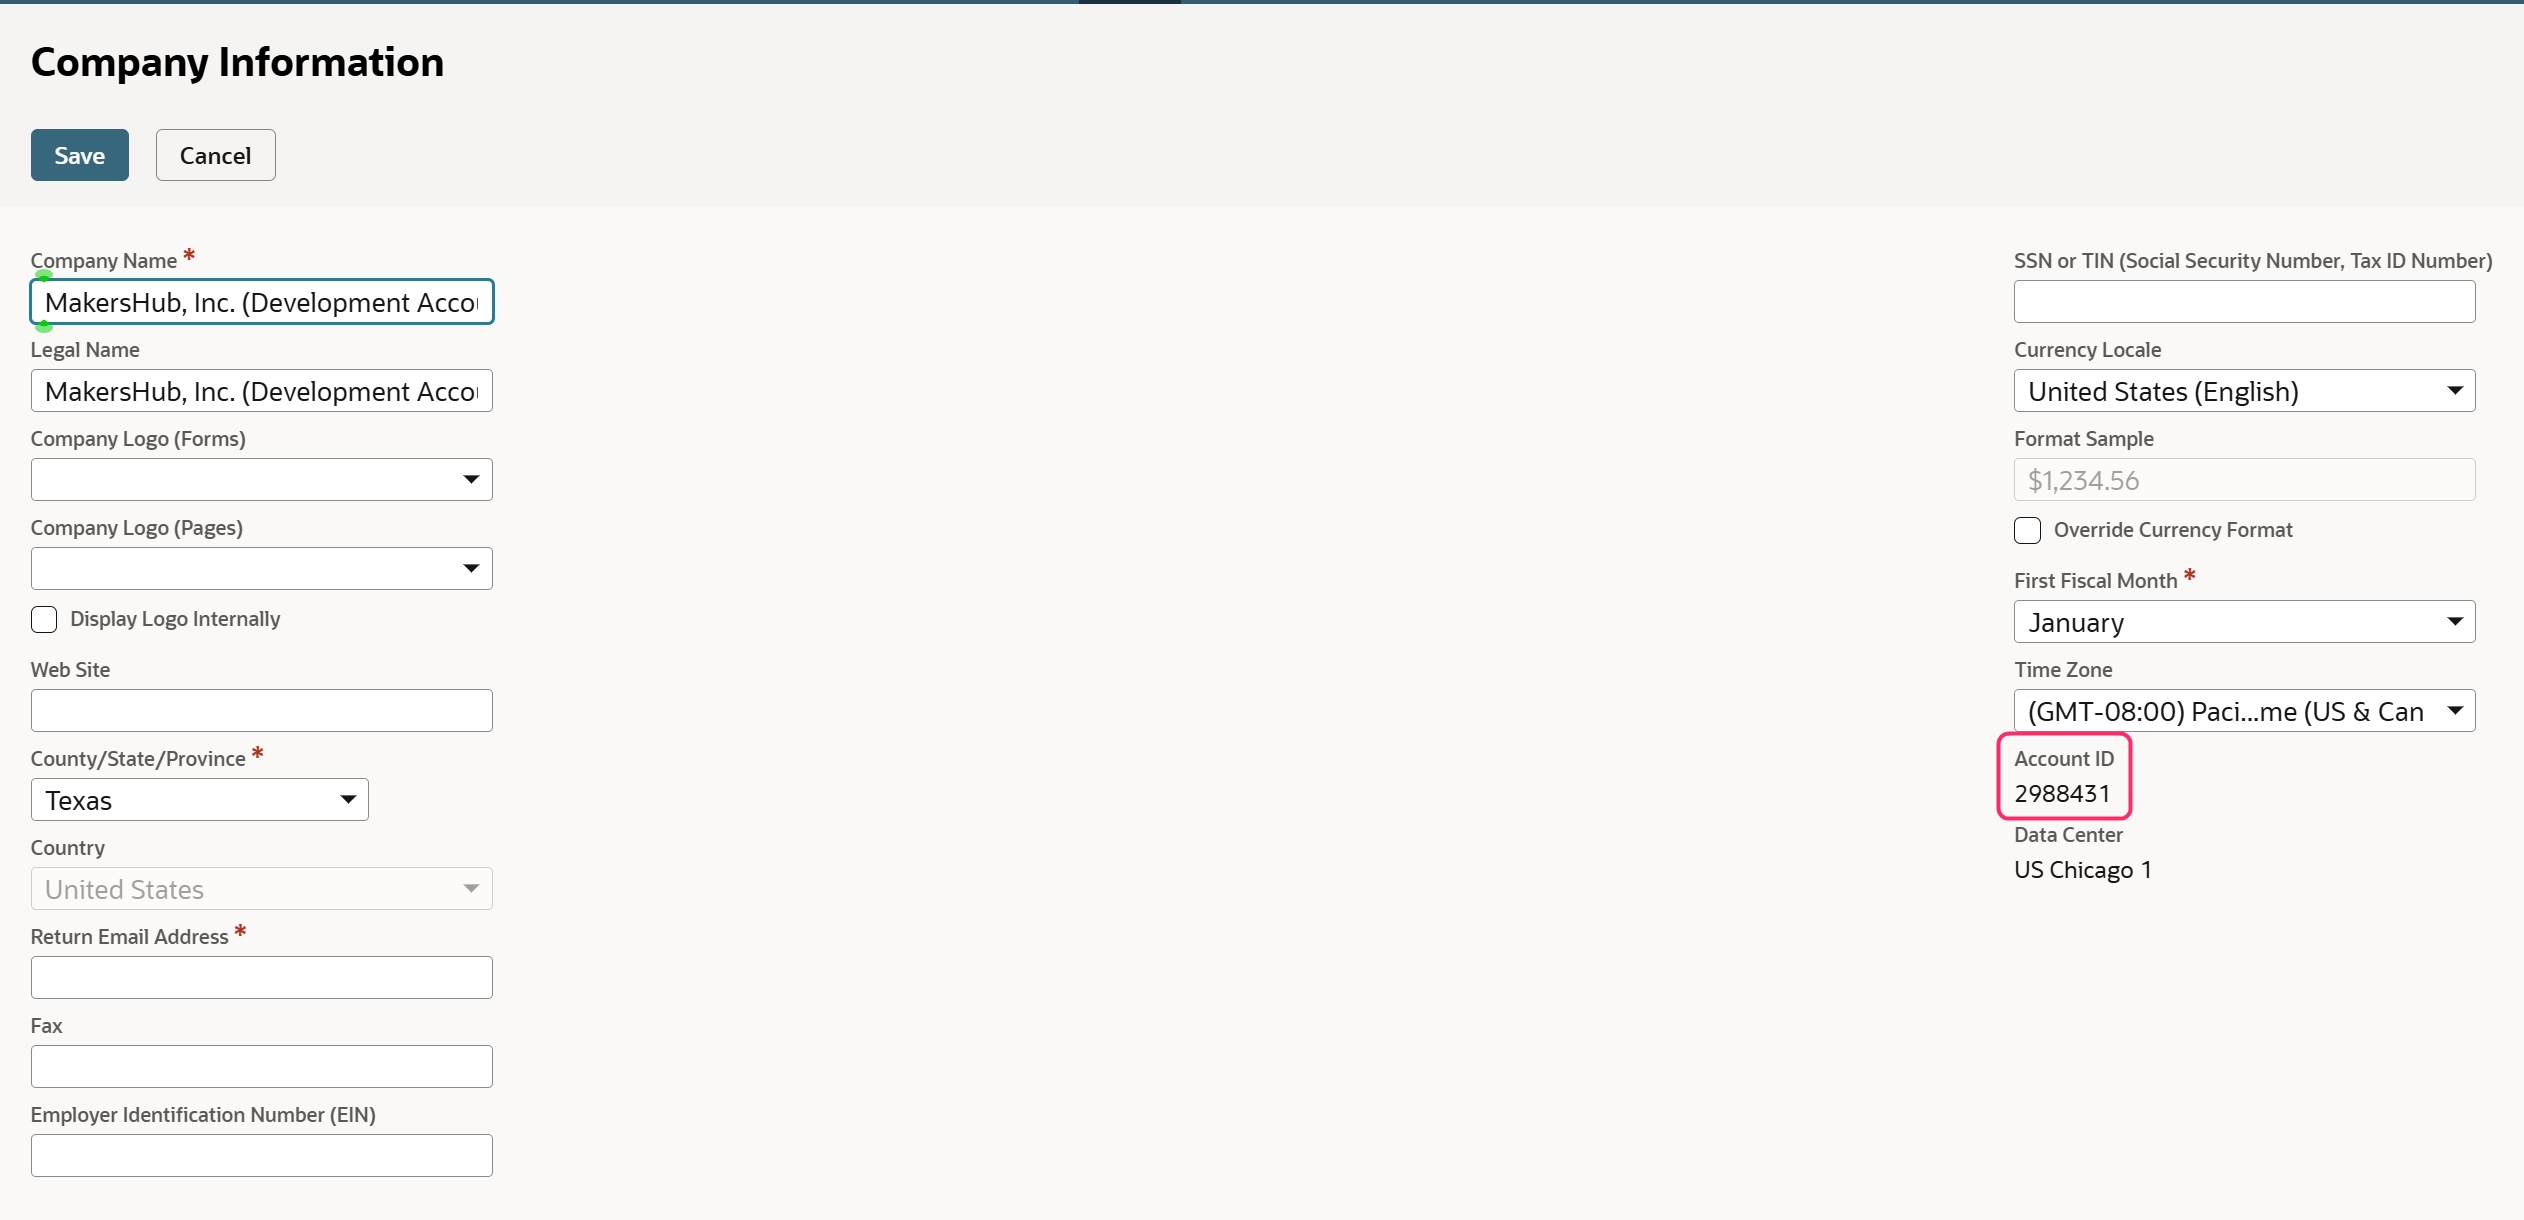
Find your Account ID and copy it down; we will utilize this later in MakersHub.
Create Integration Connection for App
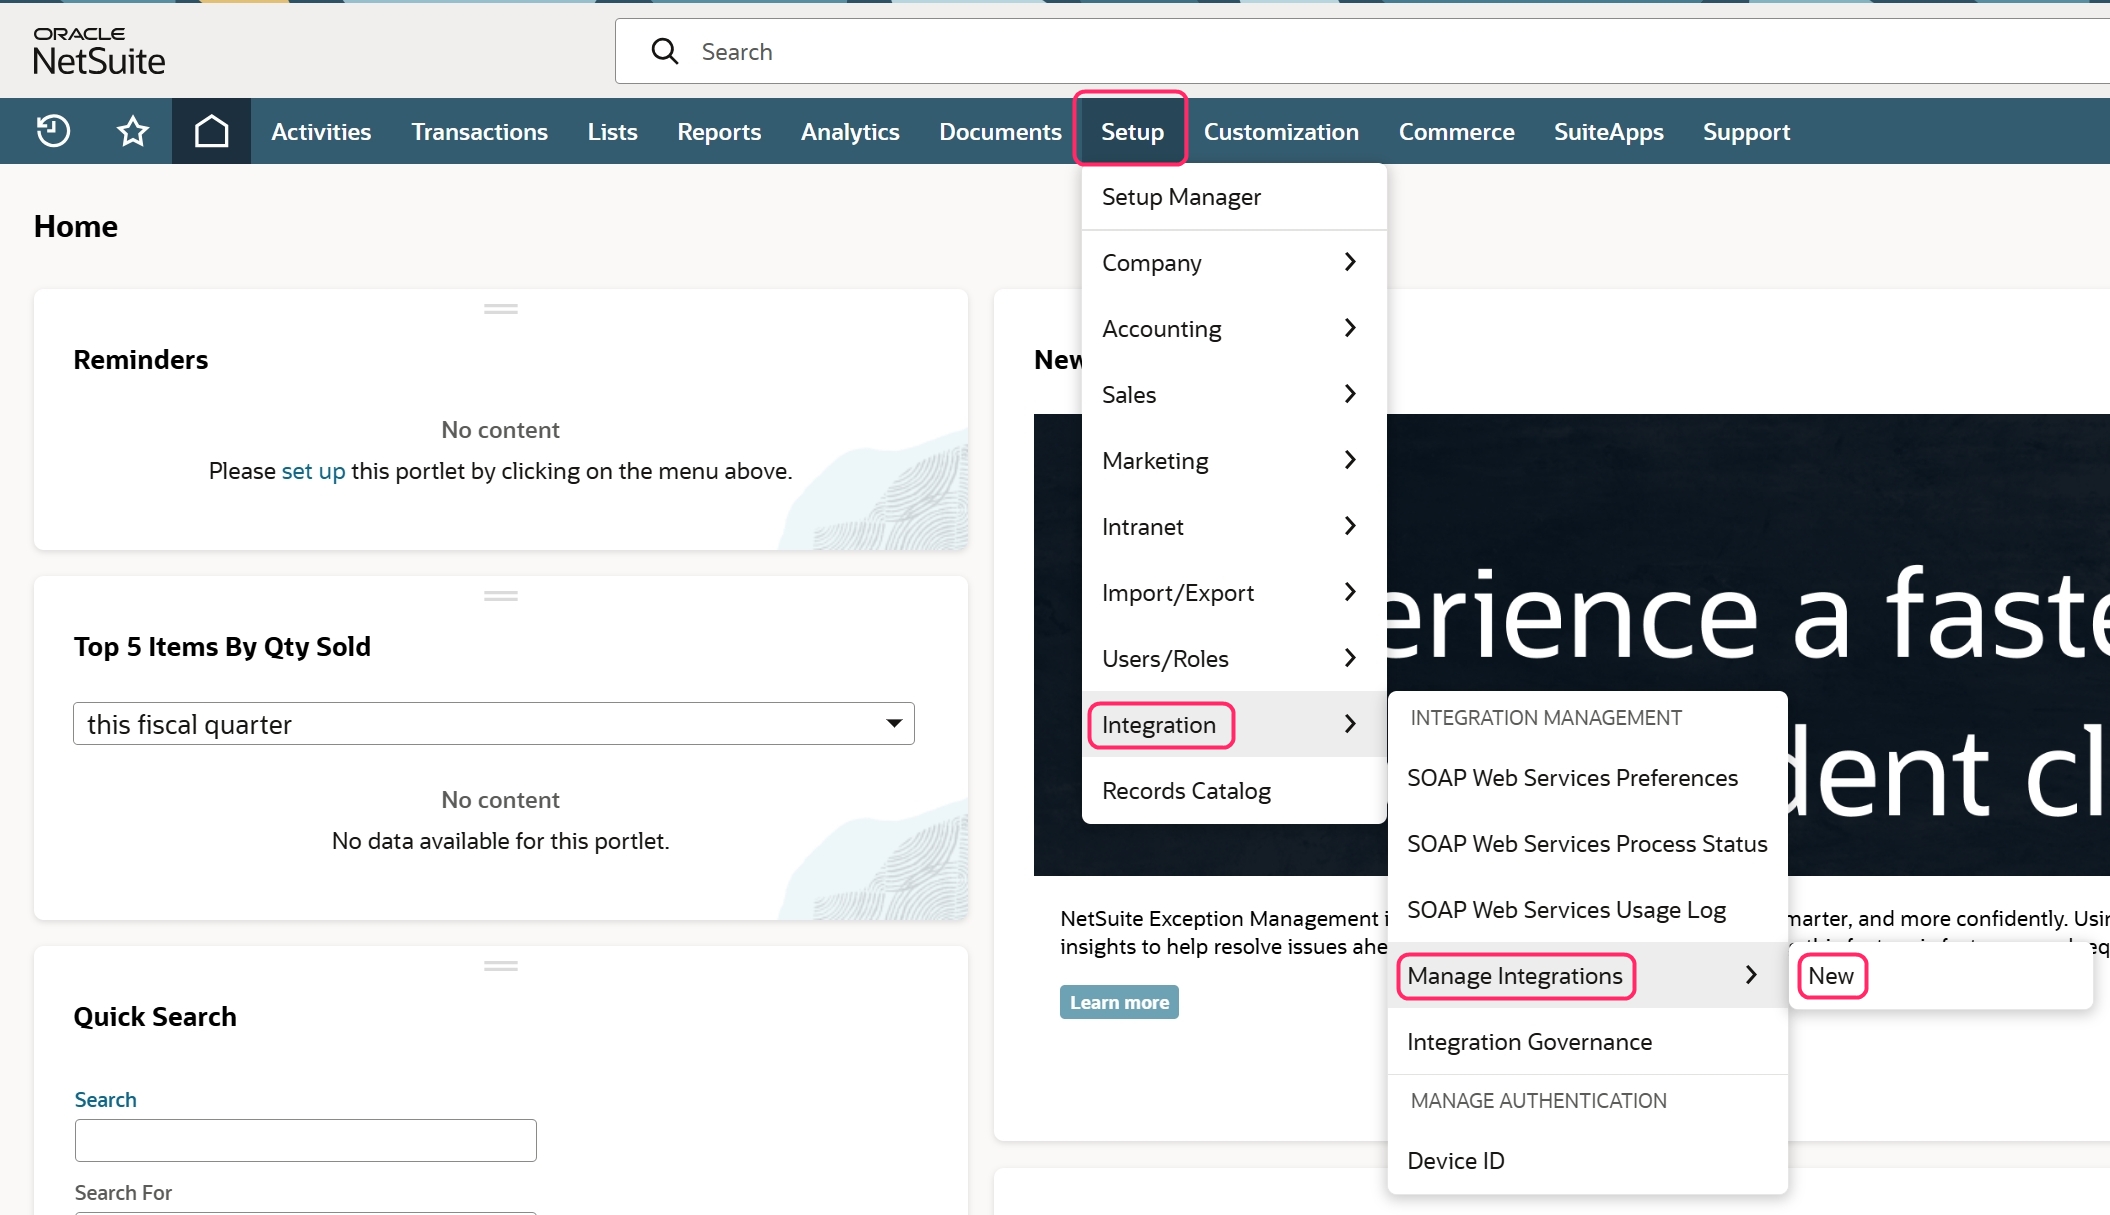
Go to Setup > Integrations > Manage integrations > New
Enter the name “MakersHub Connect” and select the two boxes for Token Based Authorization and TBA: Issue Token Endpoint. Turn off Authorization Code Grant and Save.
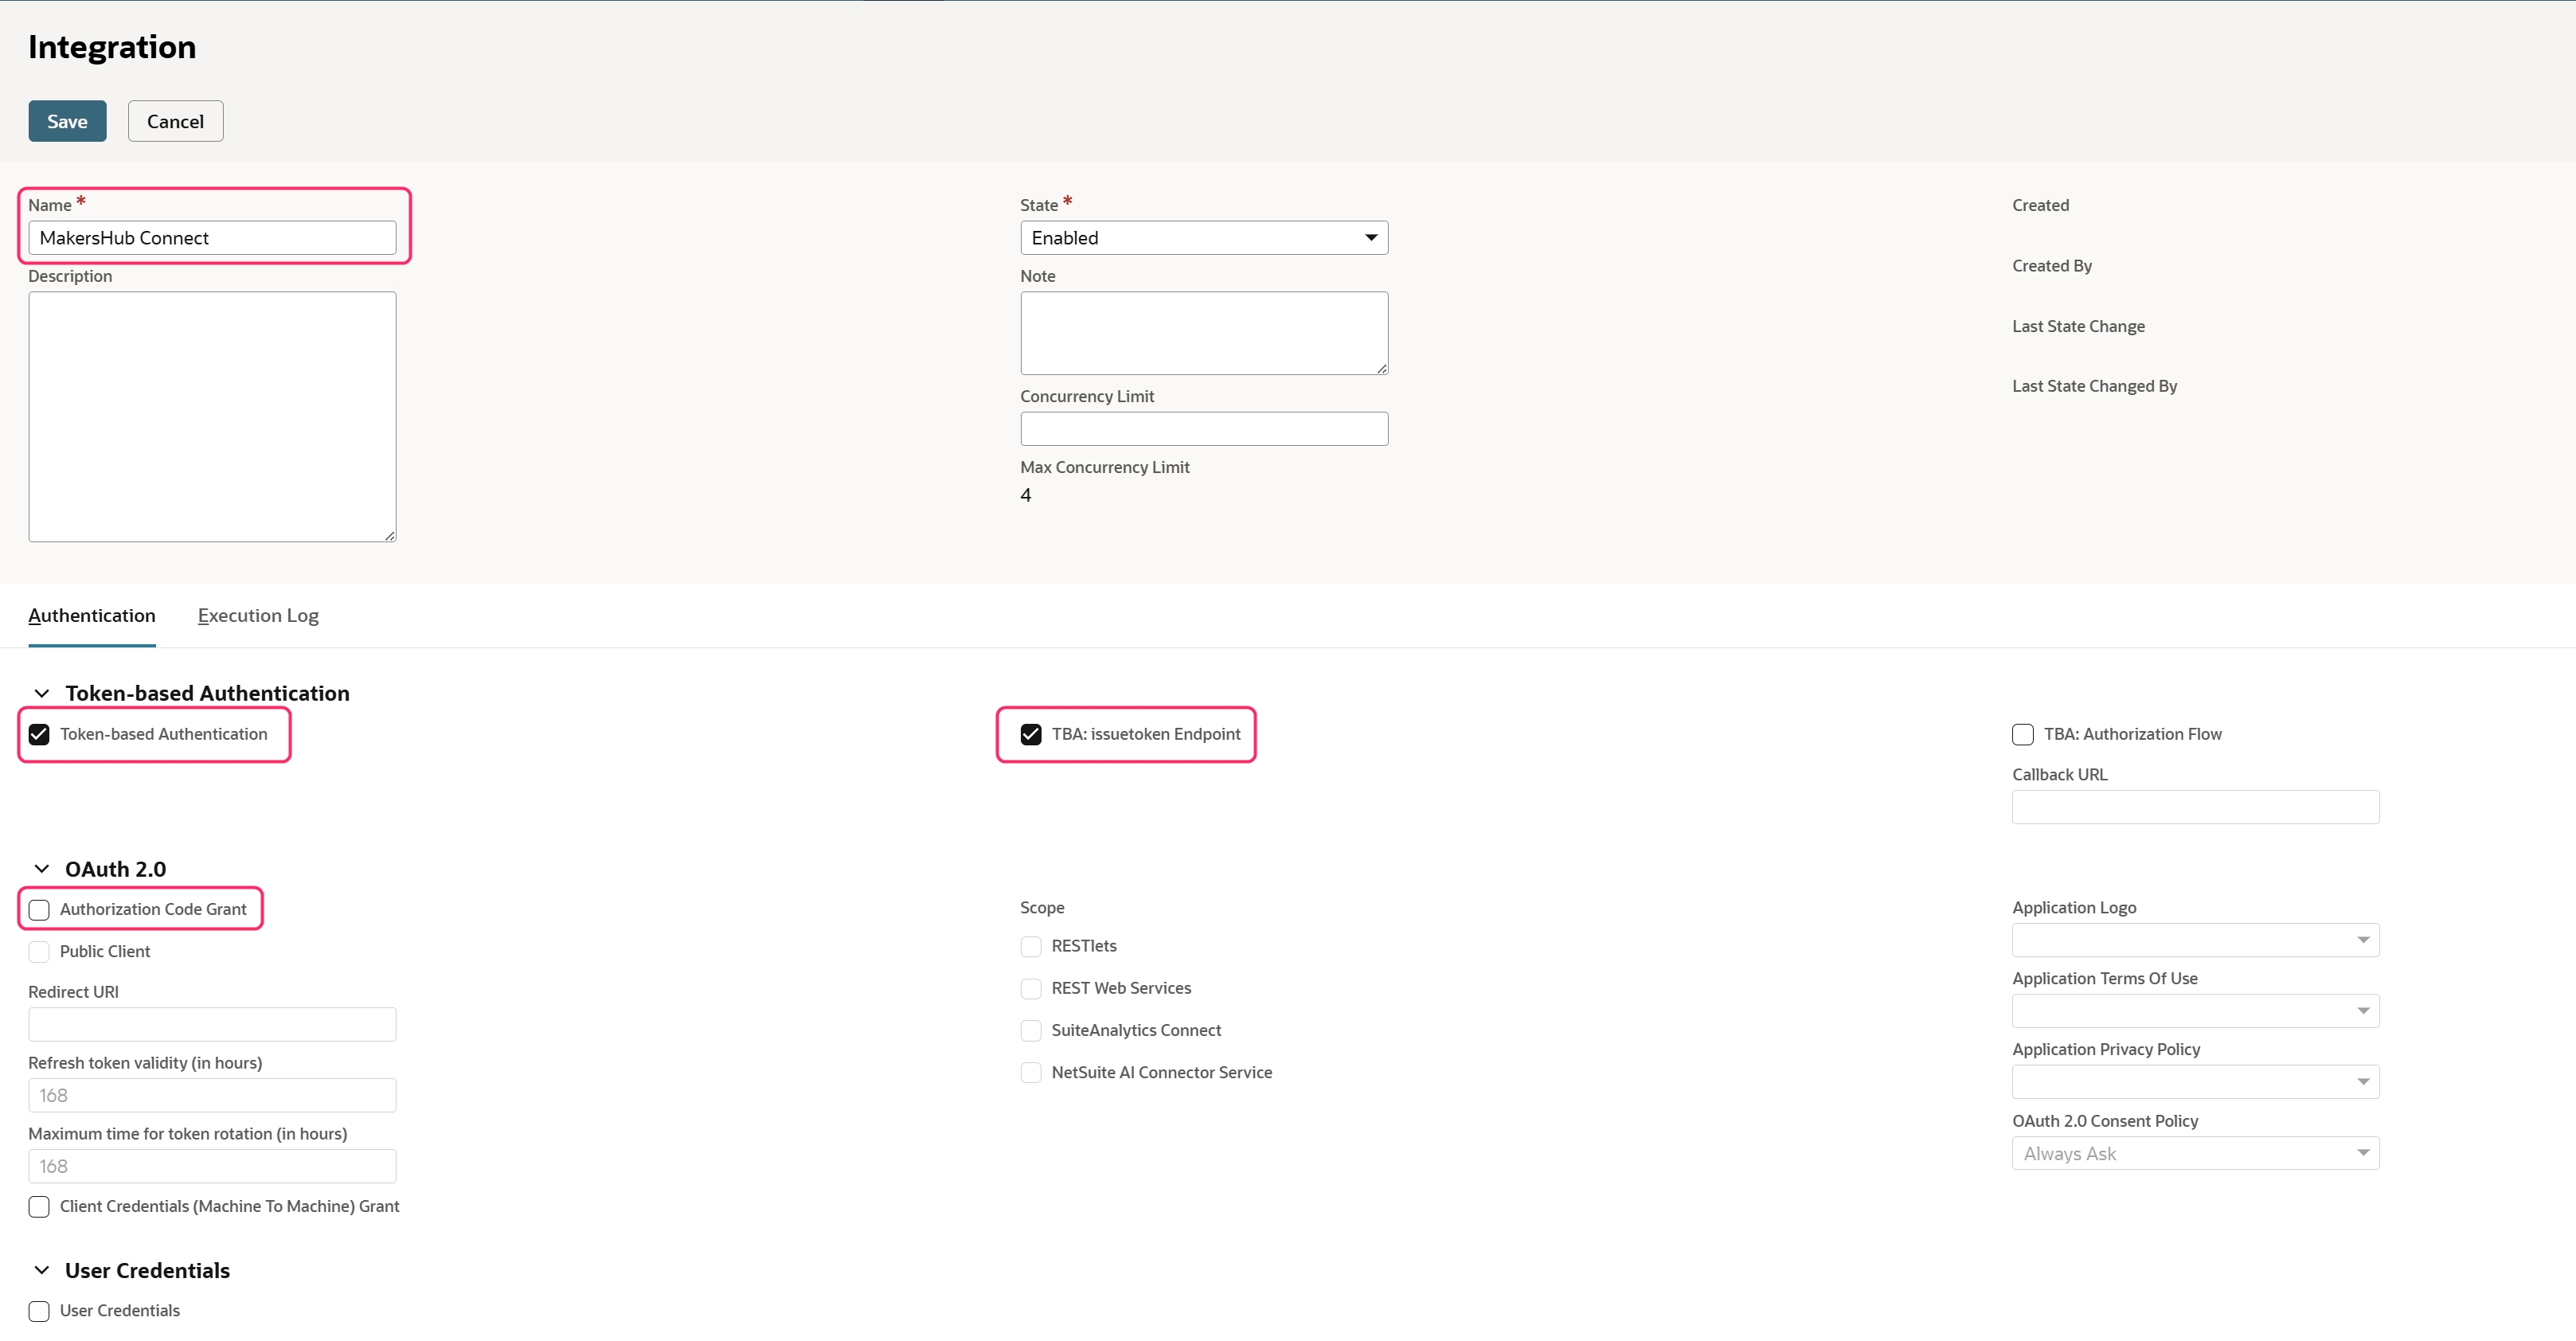
Copy down the Secret and Consumer Keys as we will need them for MakersHub.
Secret Key
Once you exit this screen the secret key will not be accessible again.
Create Integration User
Go to Setup > Users/Roles > Access Tokens > New.
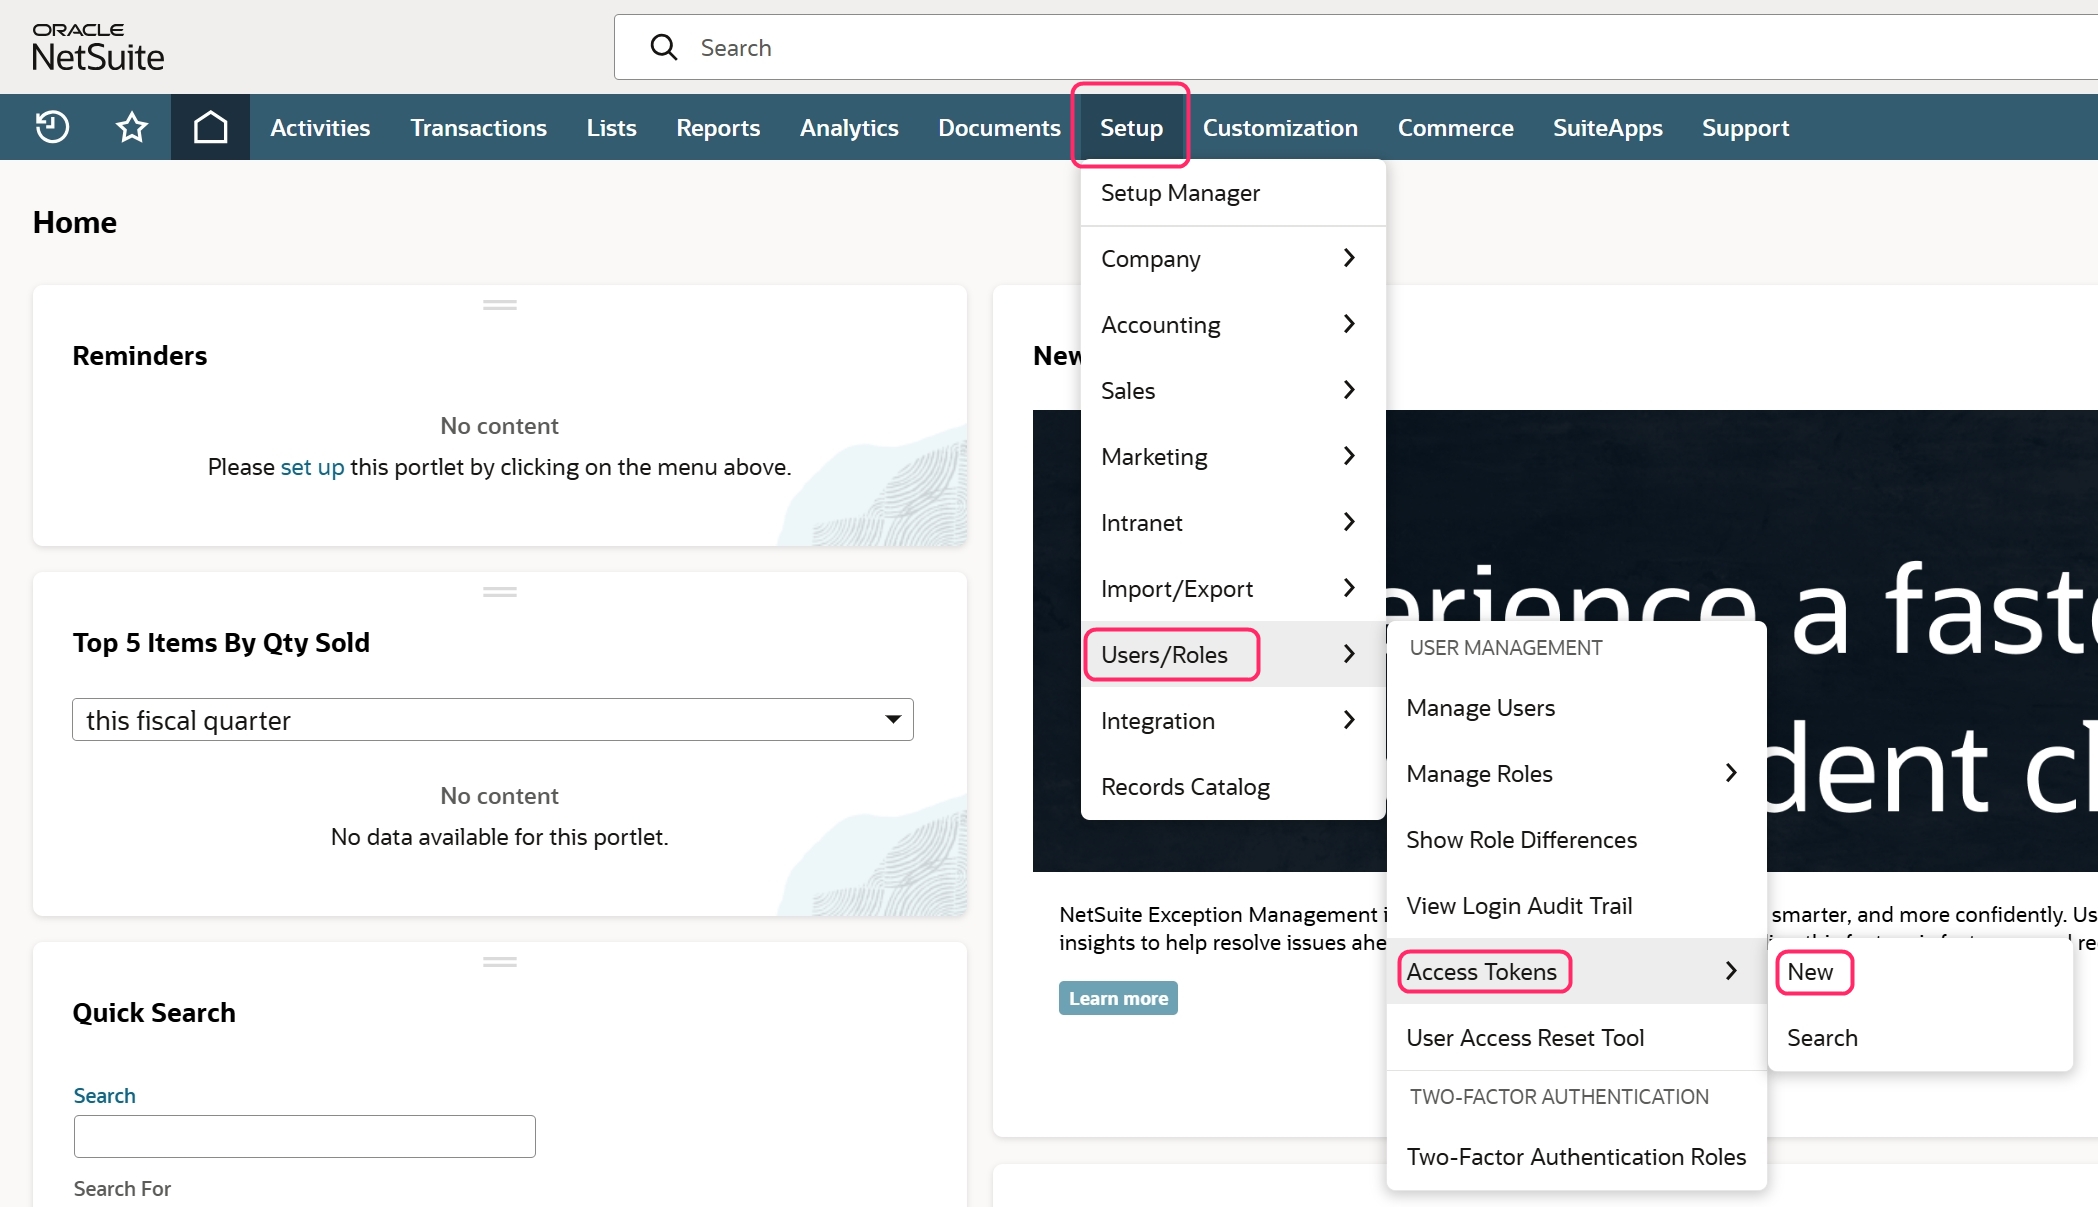
Access Token Not in Drop Down
If you do not see the “access token” on the drop down, this will need to be enabled under Setup > Company > Enable Features > Suite Cloud > Check “Token-based Authentication”.
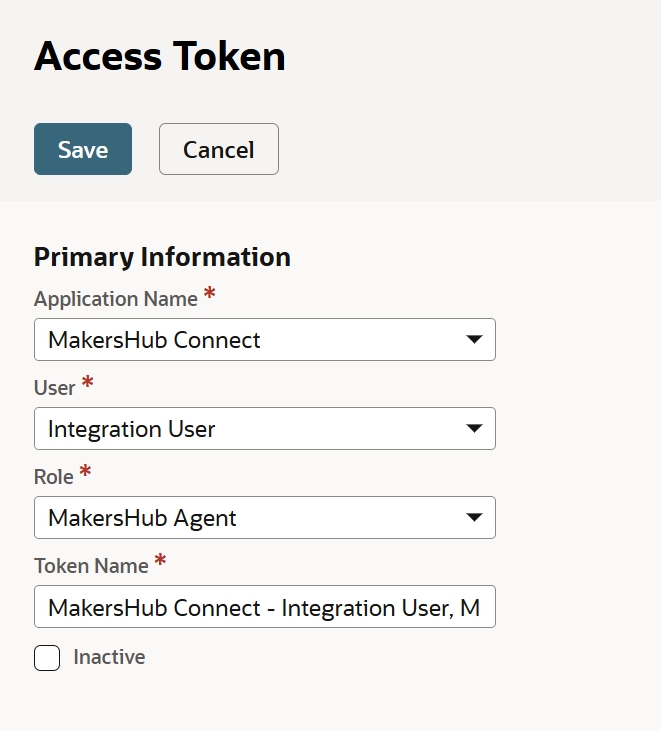
Fill in the following Information:
Application Name: Select the connection we created in last step - MakersHub Connect.
User: Integration User created in Step 1
Role: MakersHub Agent that we created in Step 1 and assigned in Step 2
Token Name: This will default to “MakersHub Connection – Integration”. We recommend leaving this name.
Copy down the Secret and Token Keys as we will need them for MakersHub.
Secret Key
Once you exit this screen the secret key will not be accessible again.
MakersHub
Setup Connection with MakersHub
Go to your Name in the upper right > Integrations and then click connect next to NetSuite.
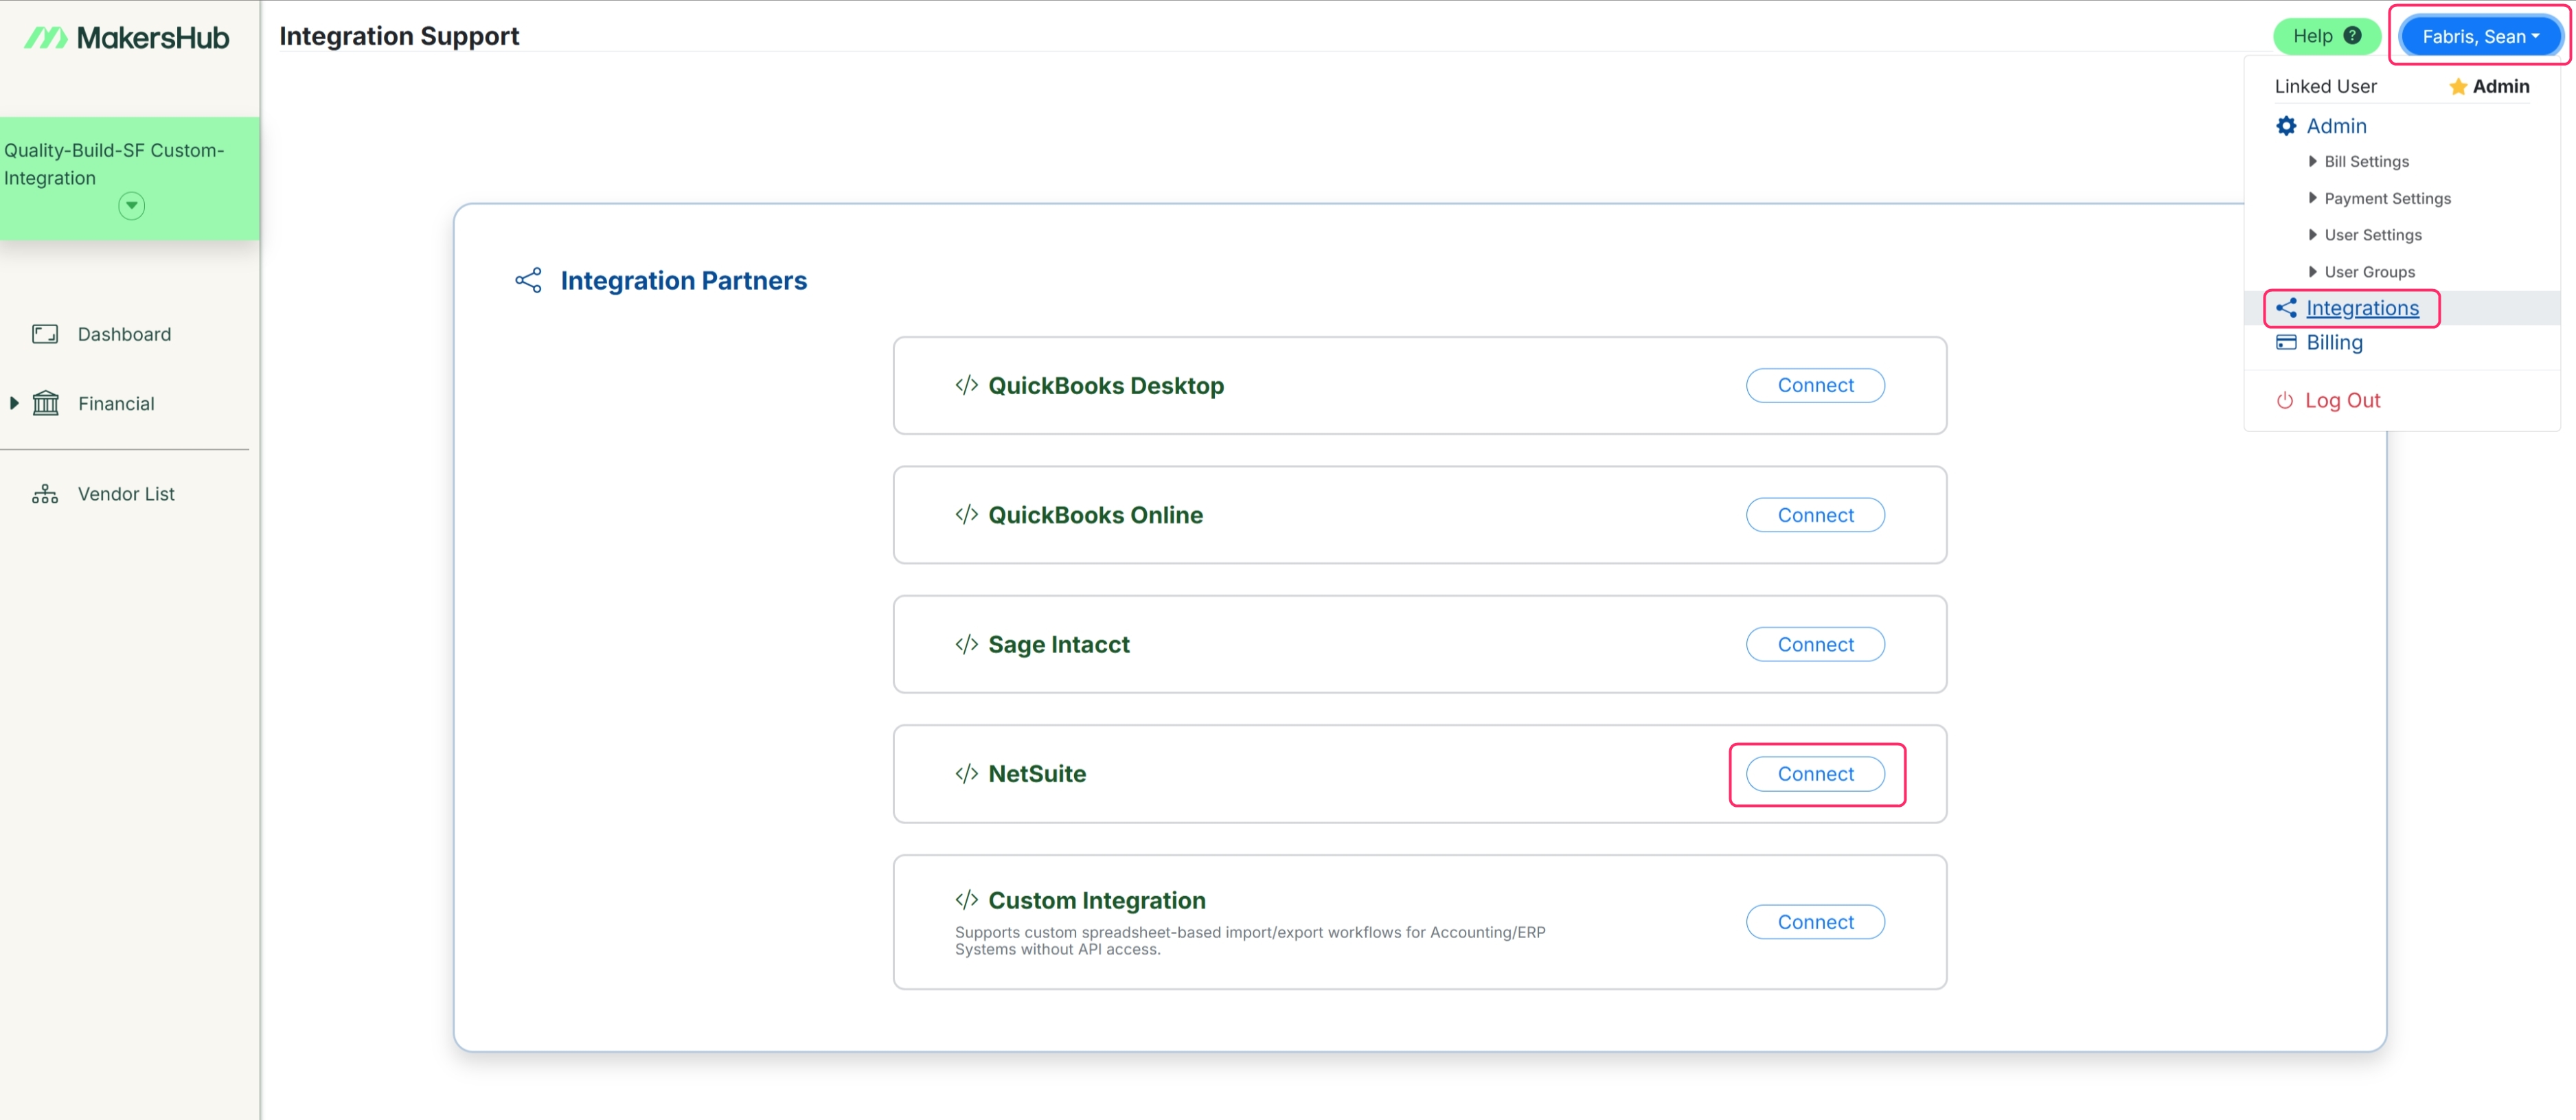
Enter the information copied from QuickBooks into the corresponding fields. The Integration Connection for App maps to the consumer keys, and the Integration User maps to the Token IDs.

Click the Test Connection button in the bottom left.

Once the test is successful click on the Sync Data with NetSuite.

Congratulations you have successfully created a connection between NetSuite and MakersHub.