Prefer to Watch a Video? Click here
In this document, we will outline the steps to connect MakersHub with QuickBooks Desktop. This integration will allow MakersHub to record changes and reference any updates in QuickBooks.
Before Getting Started
Log in to QuickBooks Desktop as an admin in single user mode
Step 1: Download the Web Connector File
In MakersHub, select the drop down next to your name in the top right corner. Go to Integrations and select Connect next to QuickBooks Desktop.

A popup will appear. Select Generate QuickBooks Connect File.
.png)
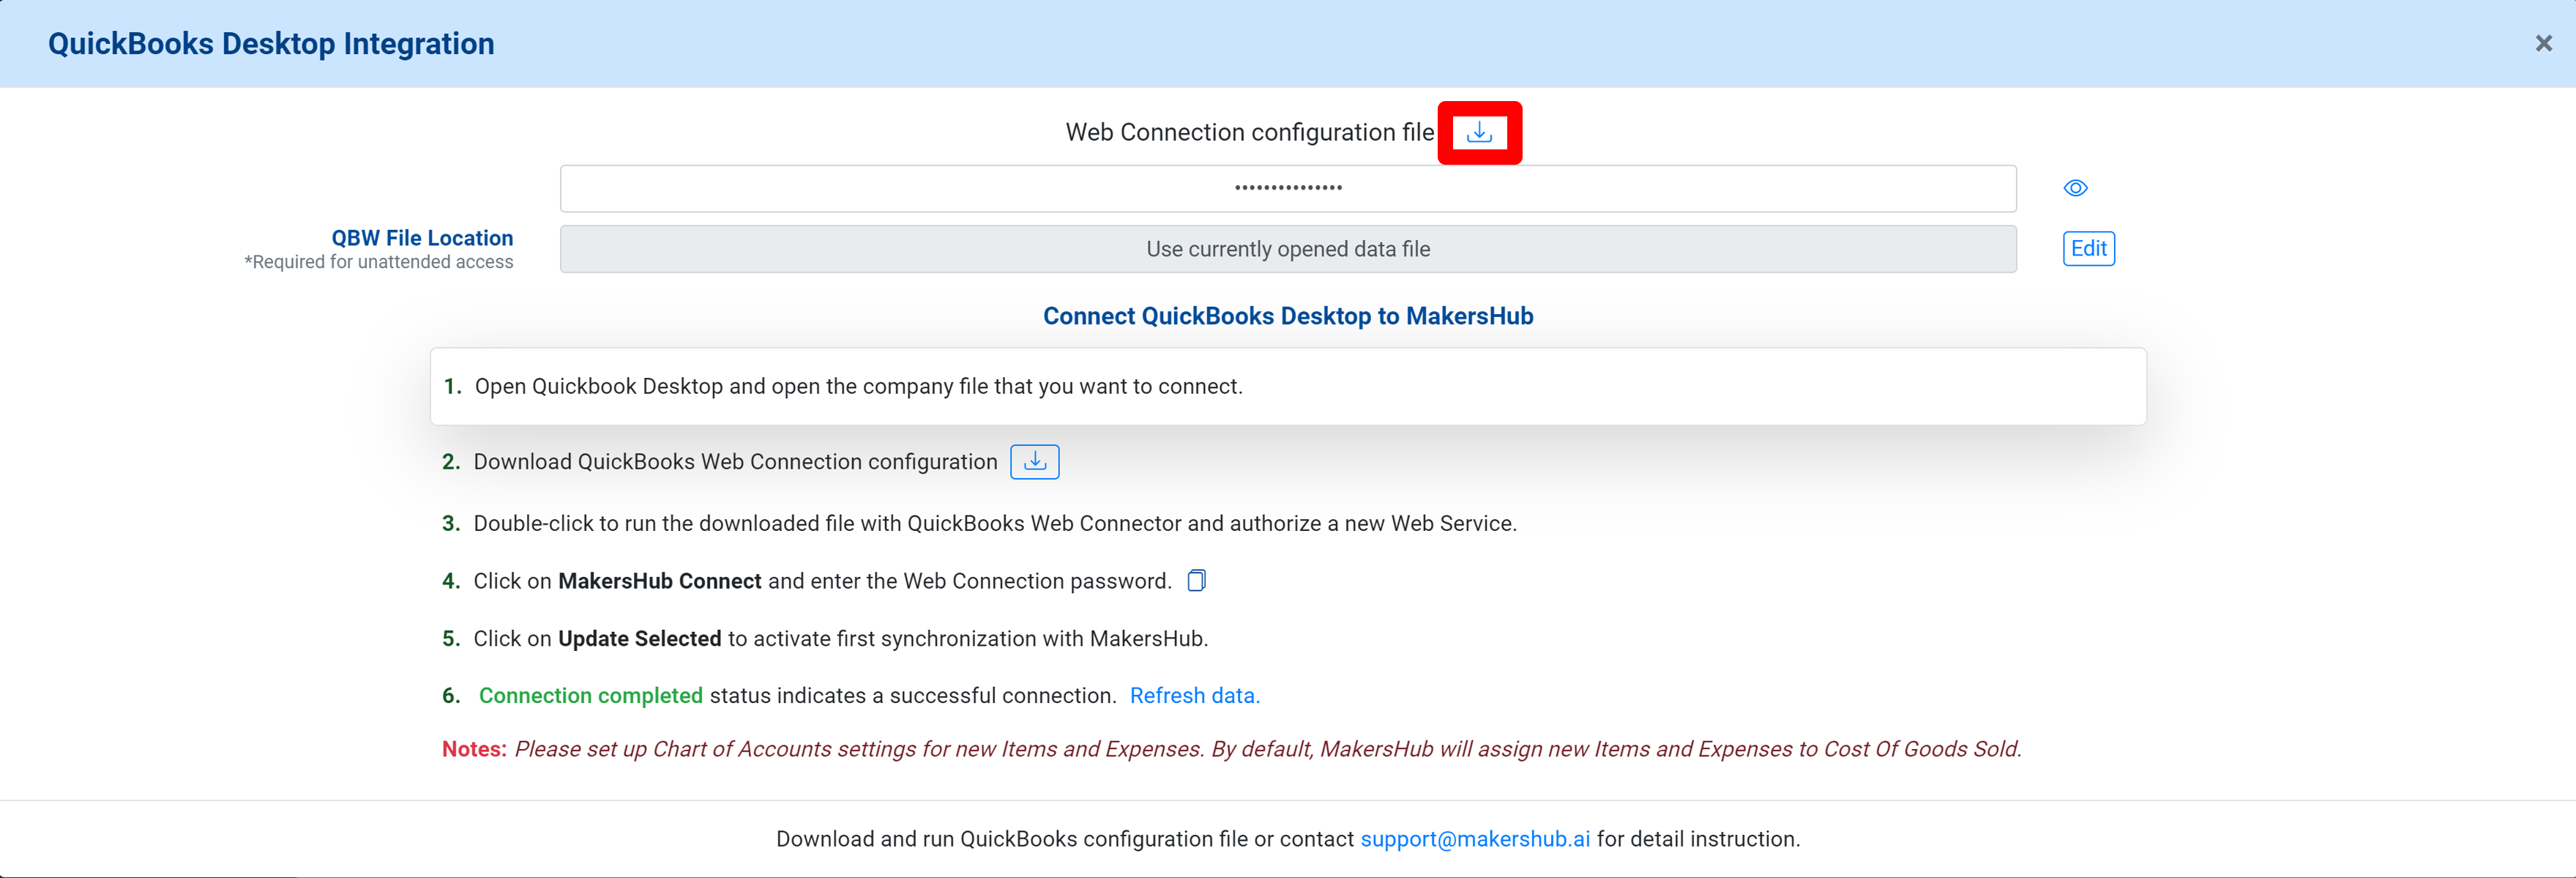
Select the download icon shown below in red and save the file on your computer in a place that is easily accessible as you will need it in the next step when we run the web connector.
Step 2: Run the Web Connector File
Now we are going to run the QuickBooks Web Connector so that MakersHub and QuickBooks can communicate with each other.
Navigate to QuickBooks. Go to File>App Management>Update Web Services.

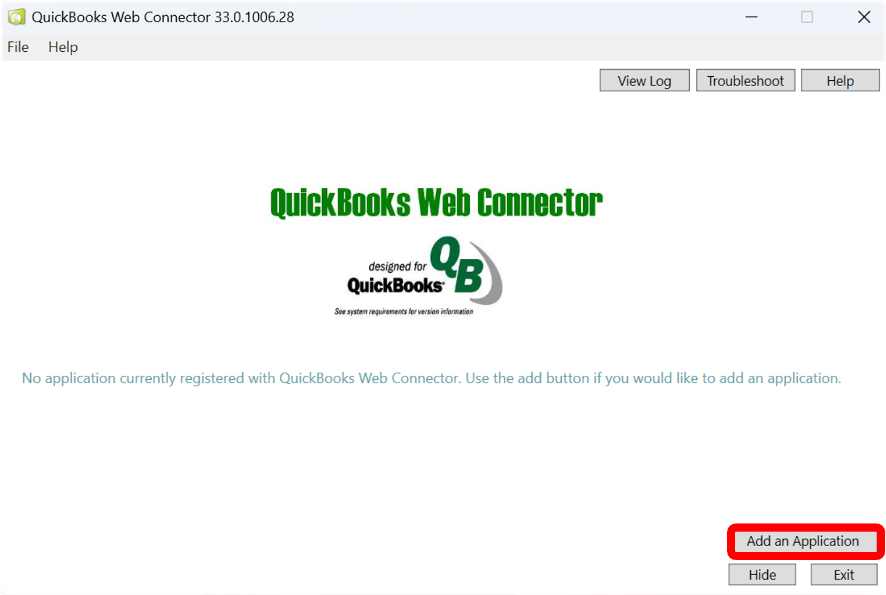
Next, the Web Connector window will appear. Select Add an Application.
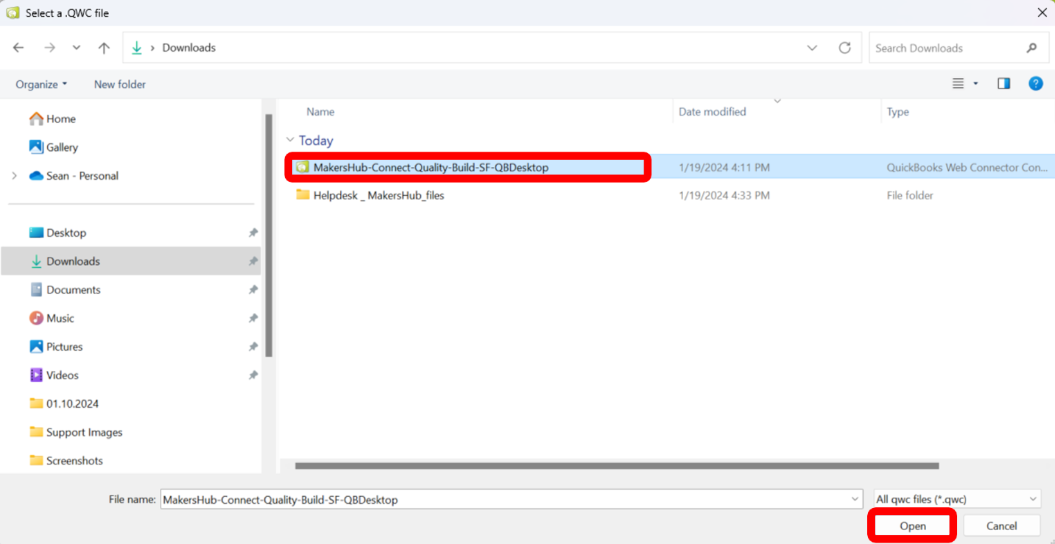
And select the web connector file we saved in the previous step and click Open.
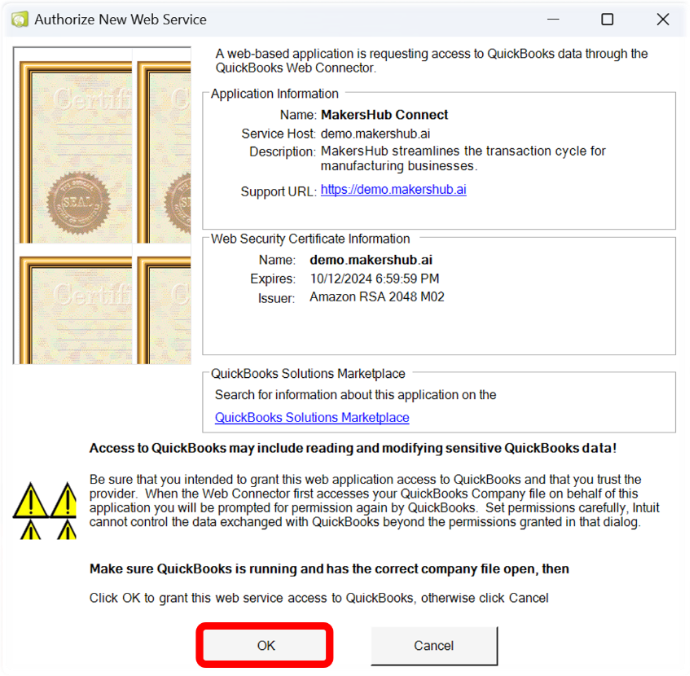
You will then be asked to authorize a new web service. Click OK.
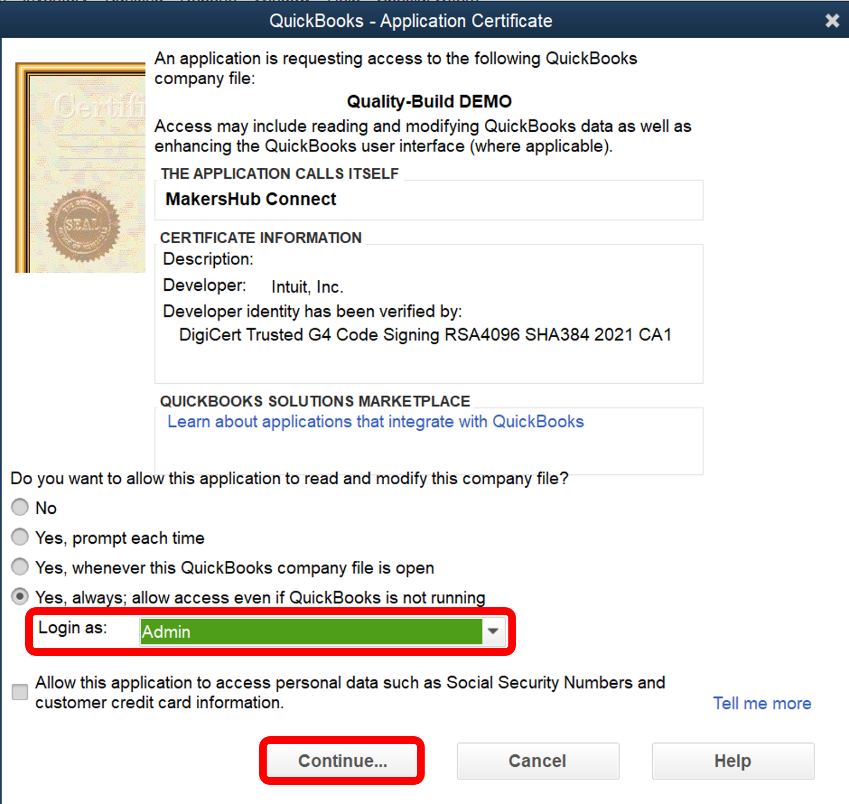
A new window will appear for the QuickBooks Application Certificate. Select Yes, always; allow access even if QuickBooks is not running. This allows us to log changes made even if QuickBooks is not open.

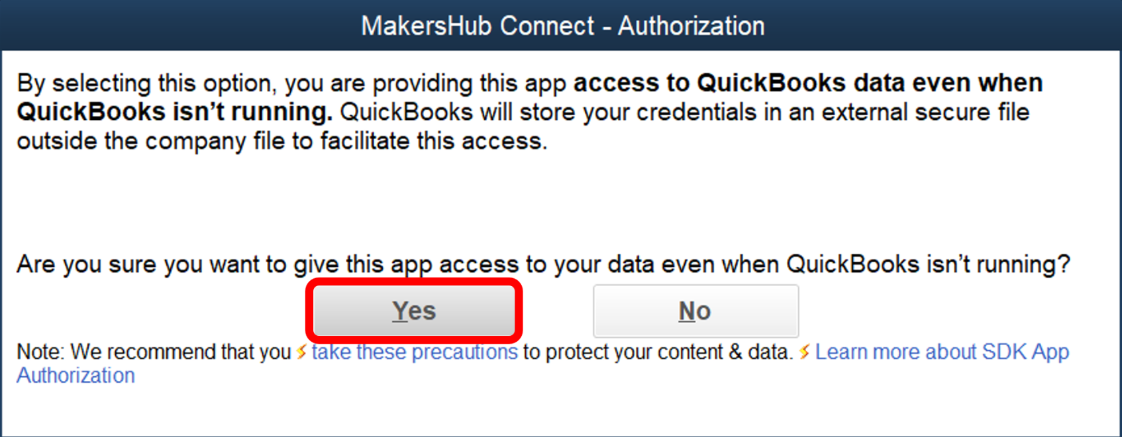
When asked are you sure, select Yes.
Now next to Login as select Admin. Then click Continue…
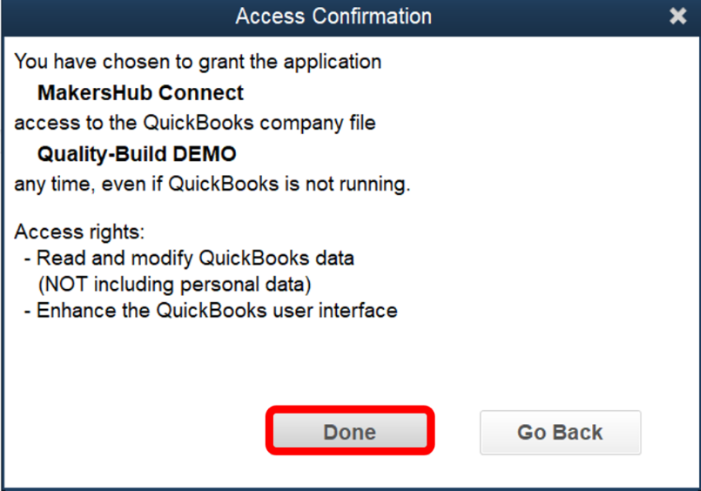
Then click Done.
Step 3: Update the Password
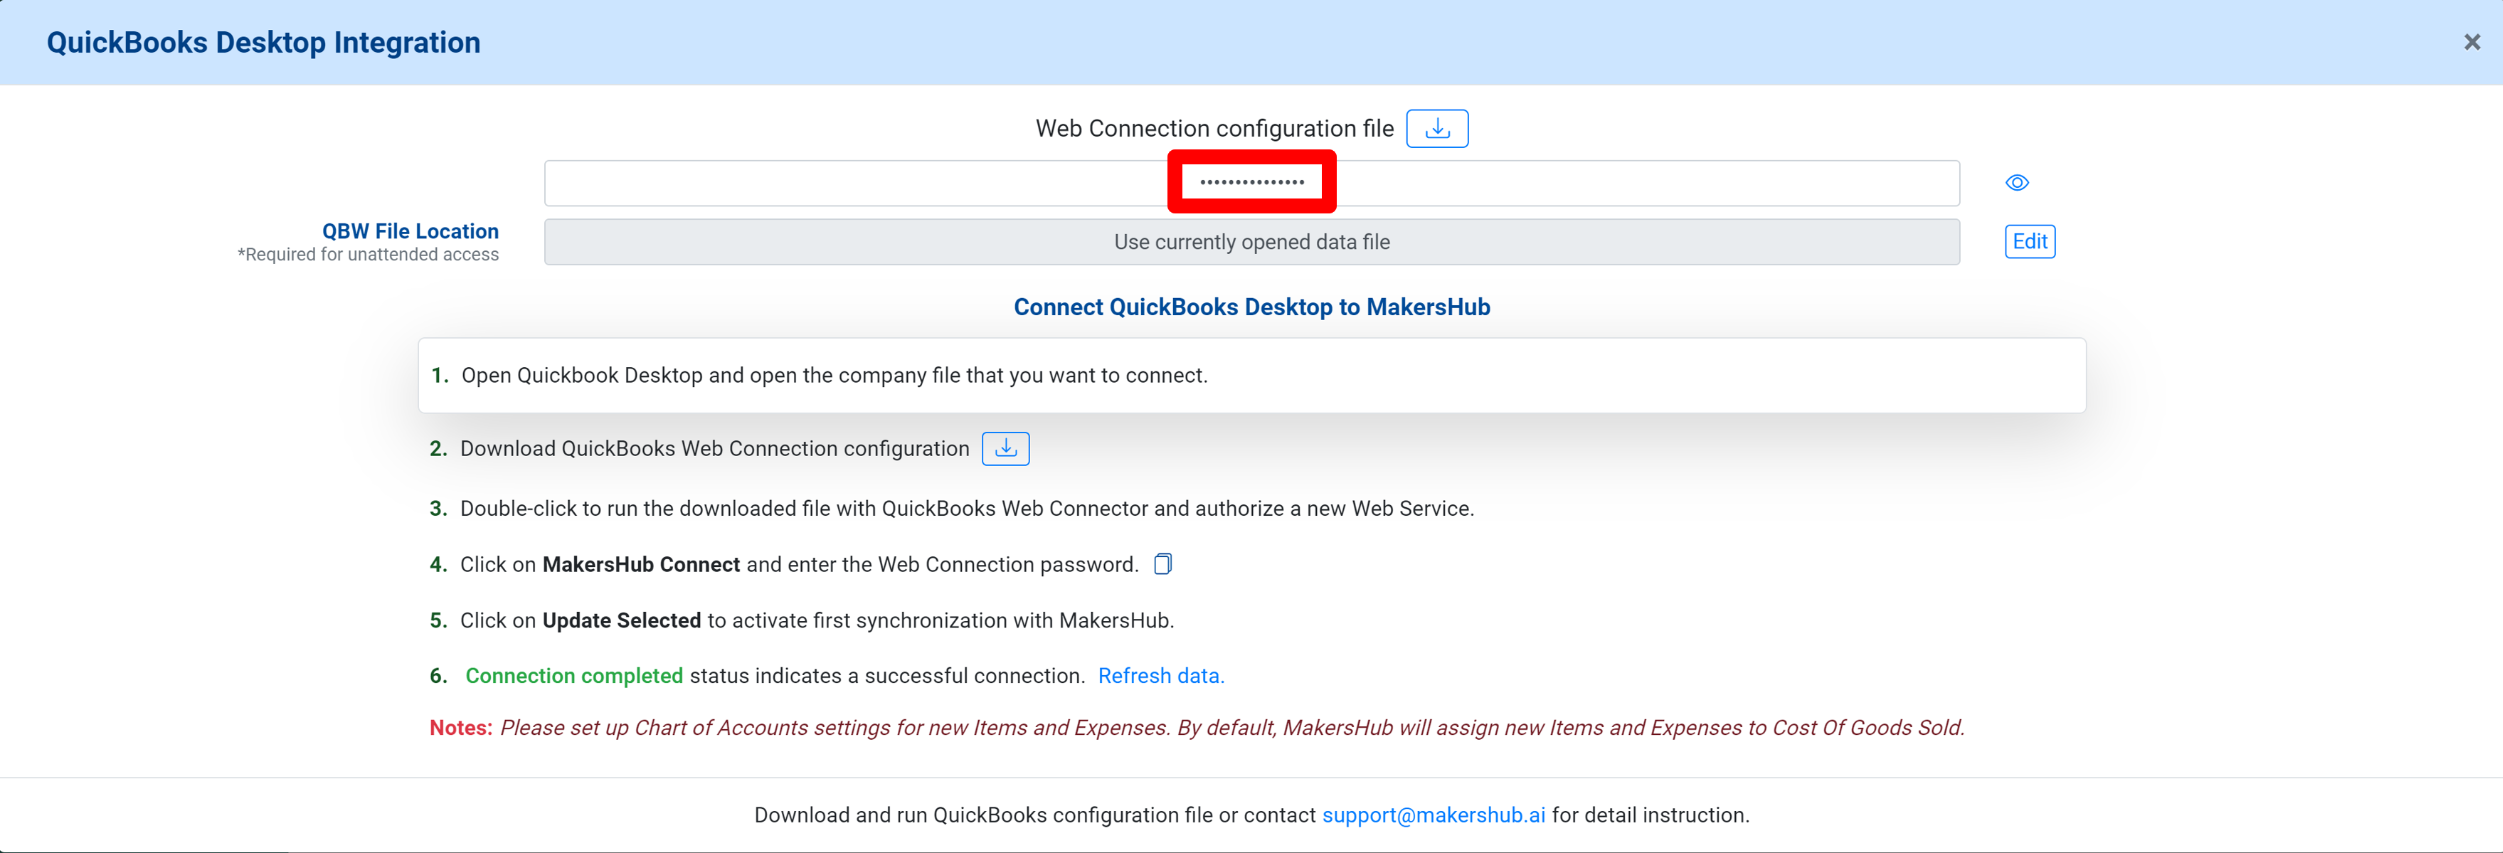
Leave the QuickBooks Web Connector open. Go back to MakersHub. Under the QuickBooks Desktop Integration, copy the password.
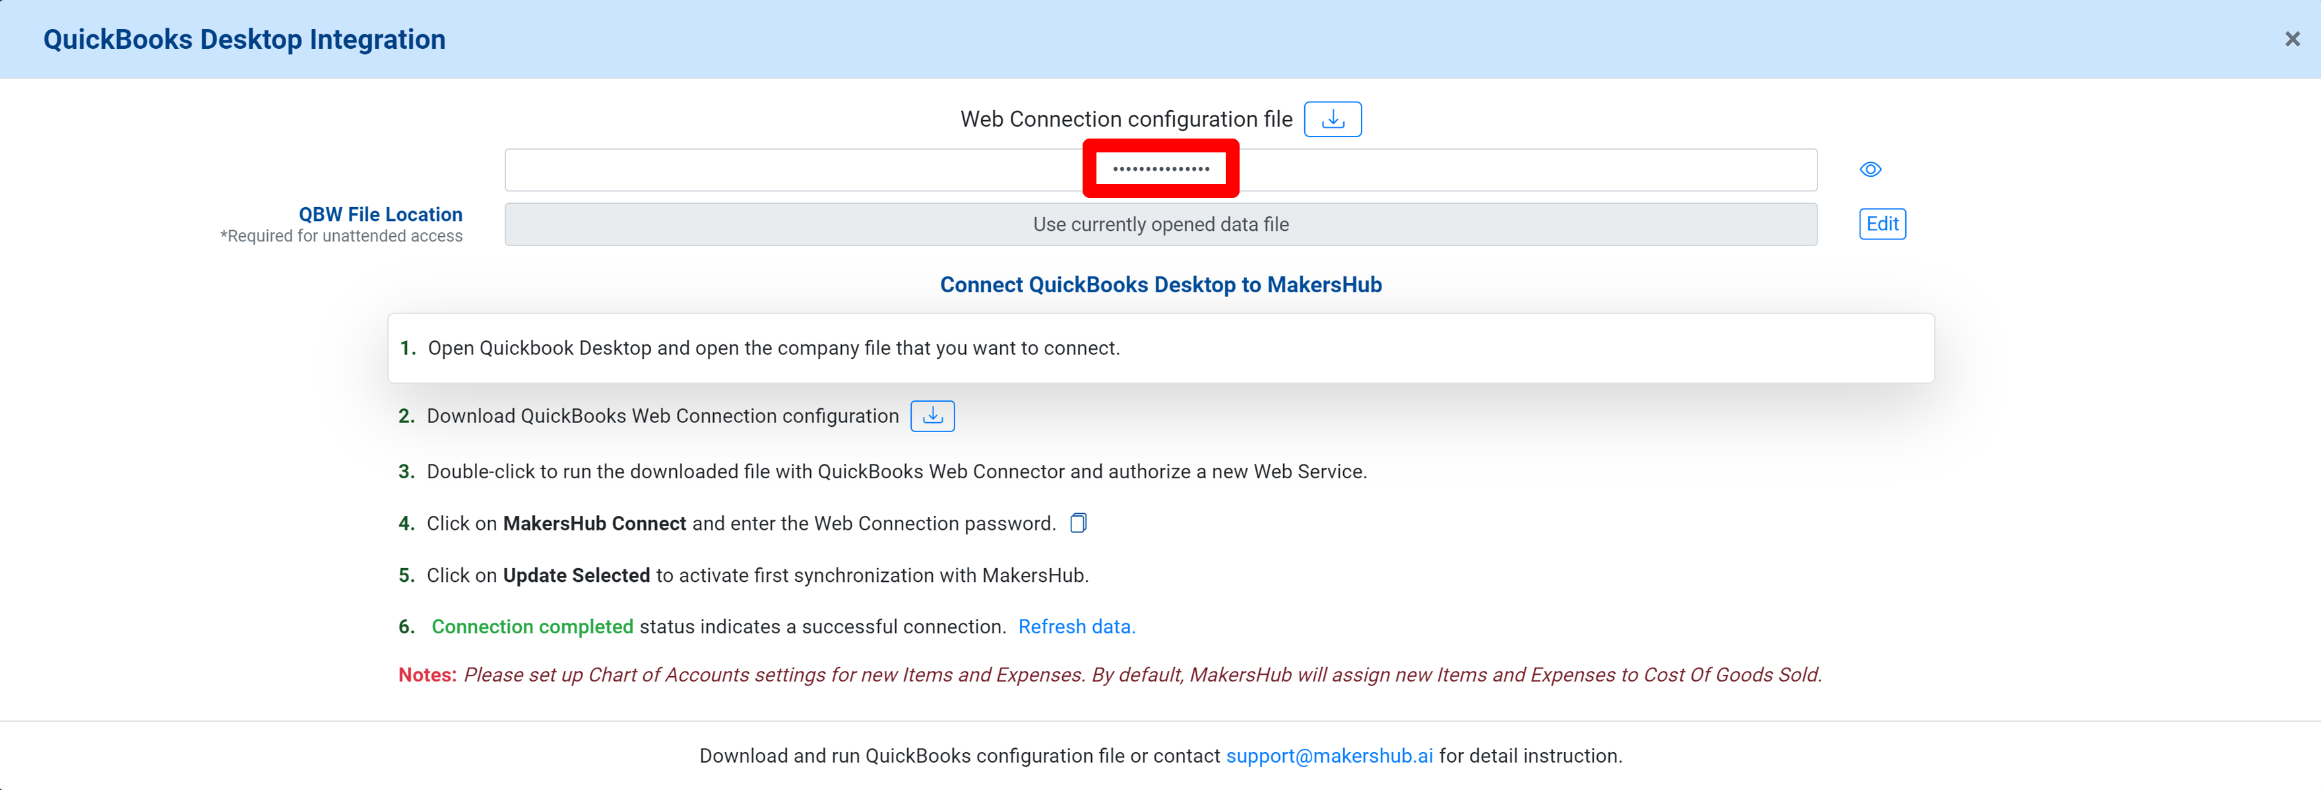
Navigate back to the QuickBooks Web Connector. Click the check box next to MakersHub Connect. A popup will appear asking for the password for the Web Connector. Paste the password we copied and click OK.
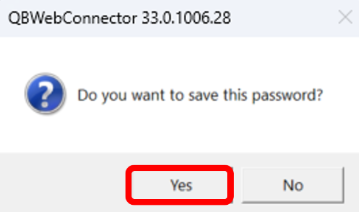
You will be asked if you want to save the password. Select Yes.
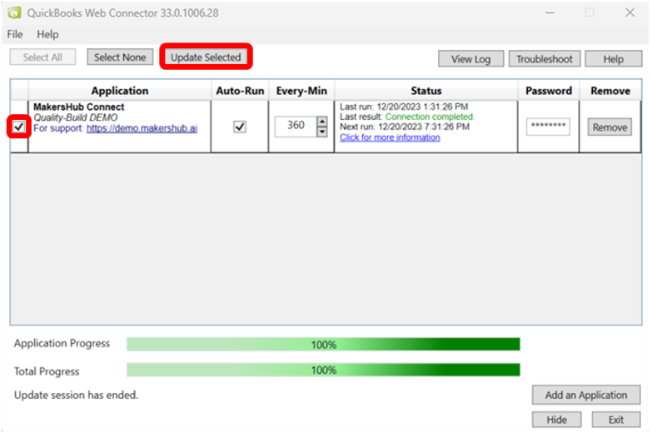
Check the box next to the MakersHub Connect application. Then click Update Selected. This will begin the process of syncing your files to MakersHub.
Running Web Connector for Multiple Files
When running the web Connector for Multiple QuickBooks files you must either:
Have the Web Connector open and all QuickBooks files closed.
Have only the specific QuickBooks file open that you want to run the Web Connector for.
Once the Application Progress and Total Progress are at 100%, you may exit out of the Web Connector.
Step 4: Verify Your Connection
To verify all of your records were synced, go to MakersHub, select the drop down next to your name in the top right corner, and click Integrations. From there click the View Connection button next to QuickBooks Desktop.

Select the Integration Data tab. Here you can see the number of records that were imported and the records themselves by clicking the dropdown.
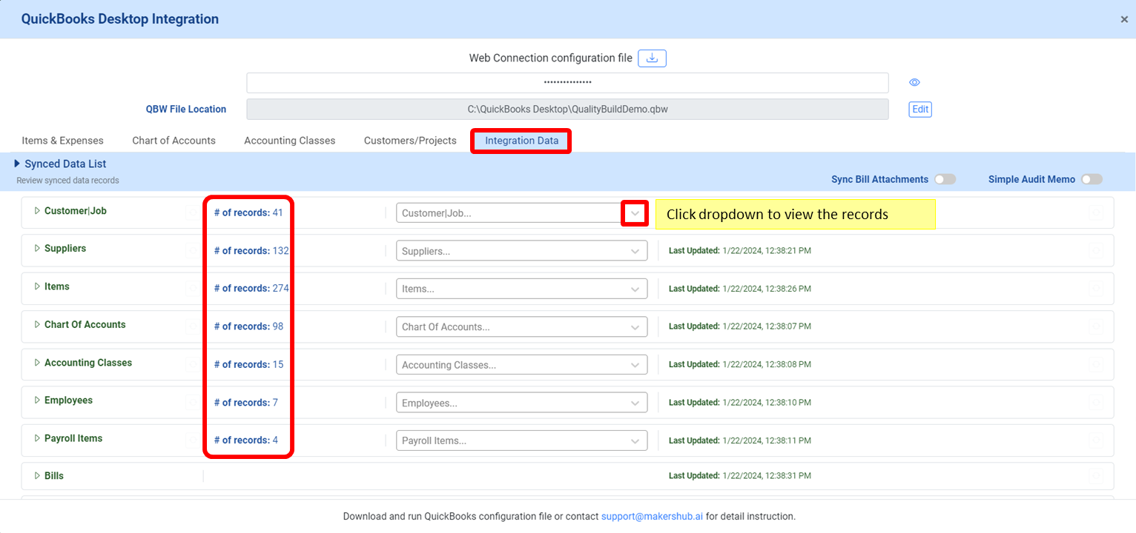
Once you verify your records are connected, you are ready to process your first bill!
Additional Steps: Multiple AP Accounts
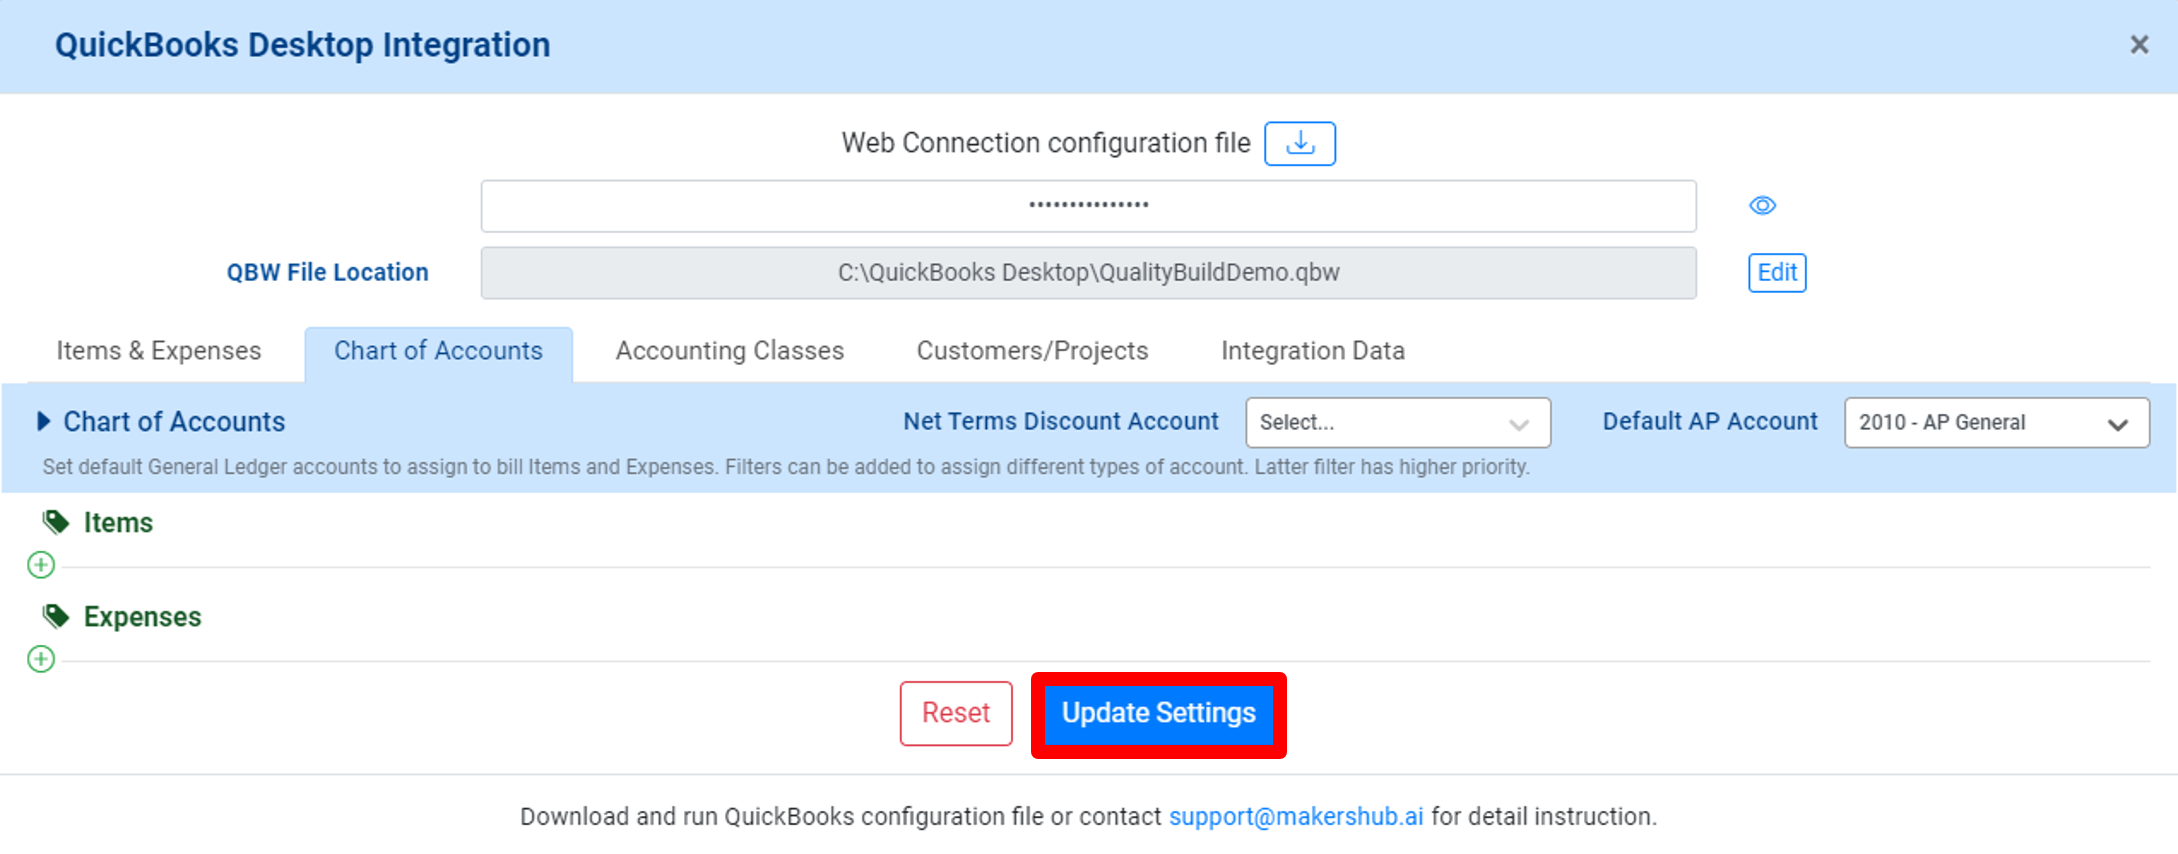
If you have multiple AP Accounts, follow these additional steps below to select the default AP account.
Navigate to the Chart of Accounts.
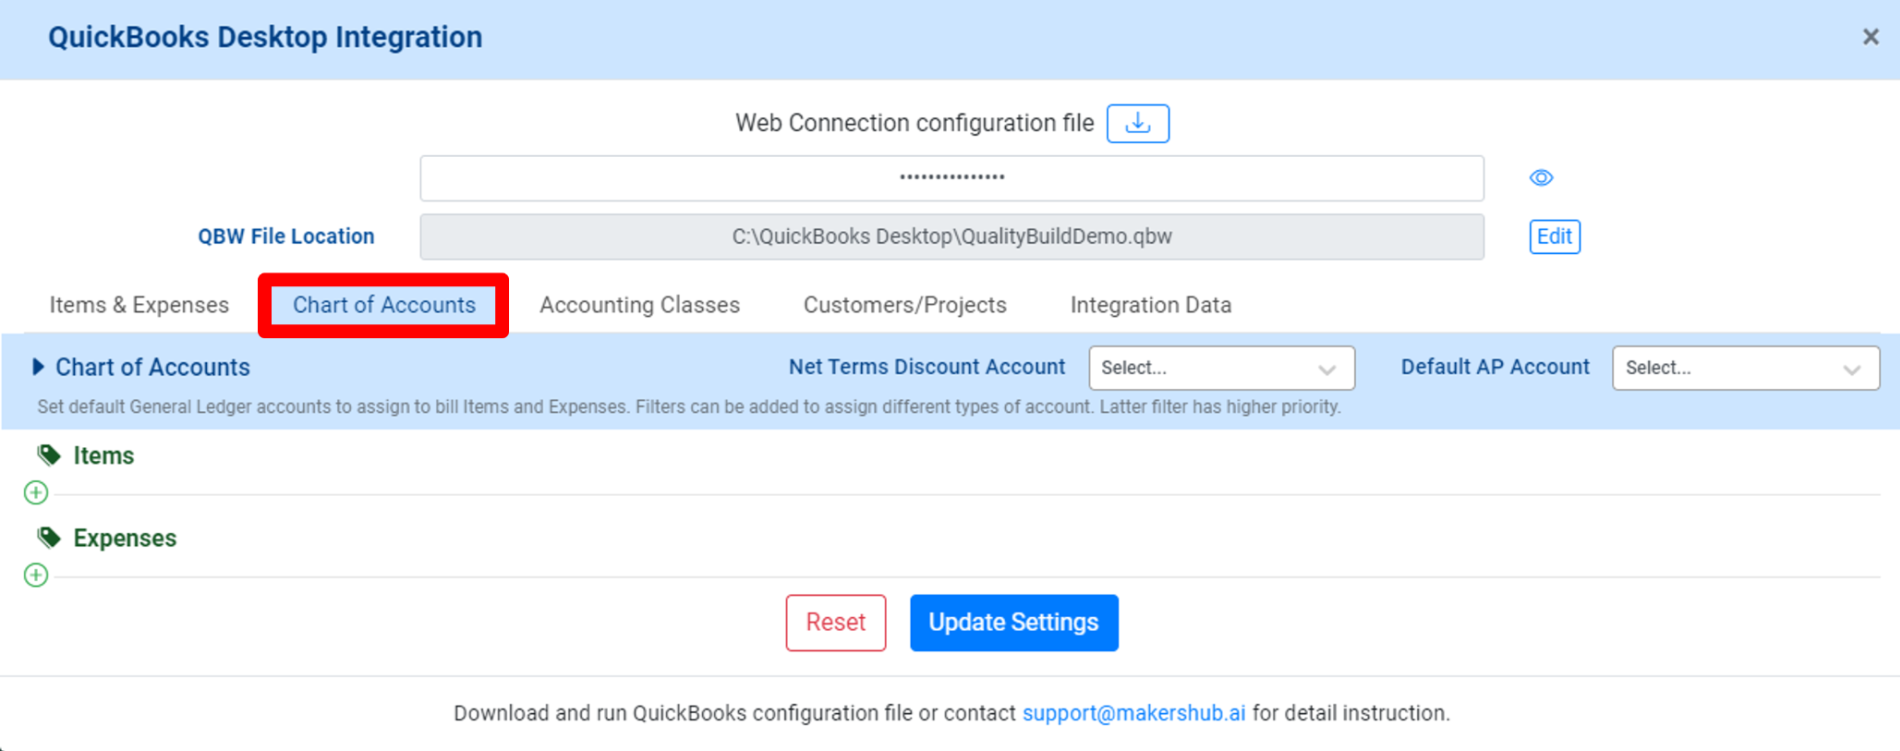
Select your Default AP Account from the dropdown.
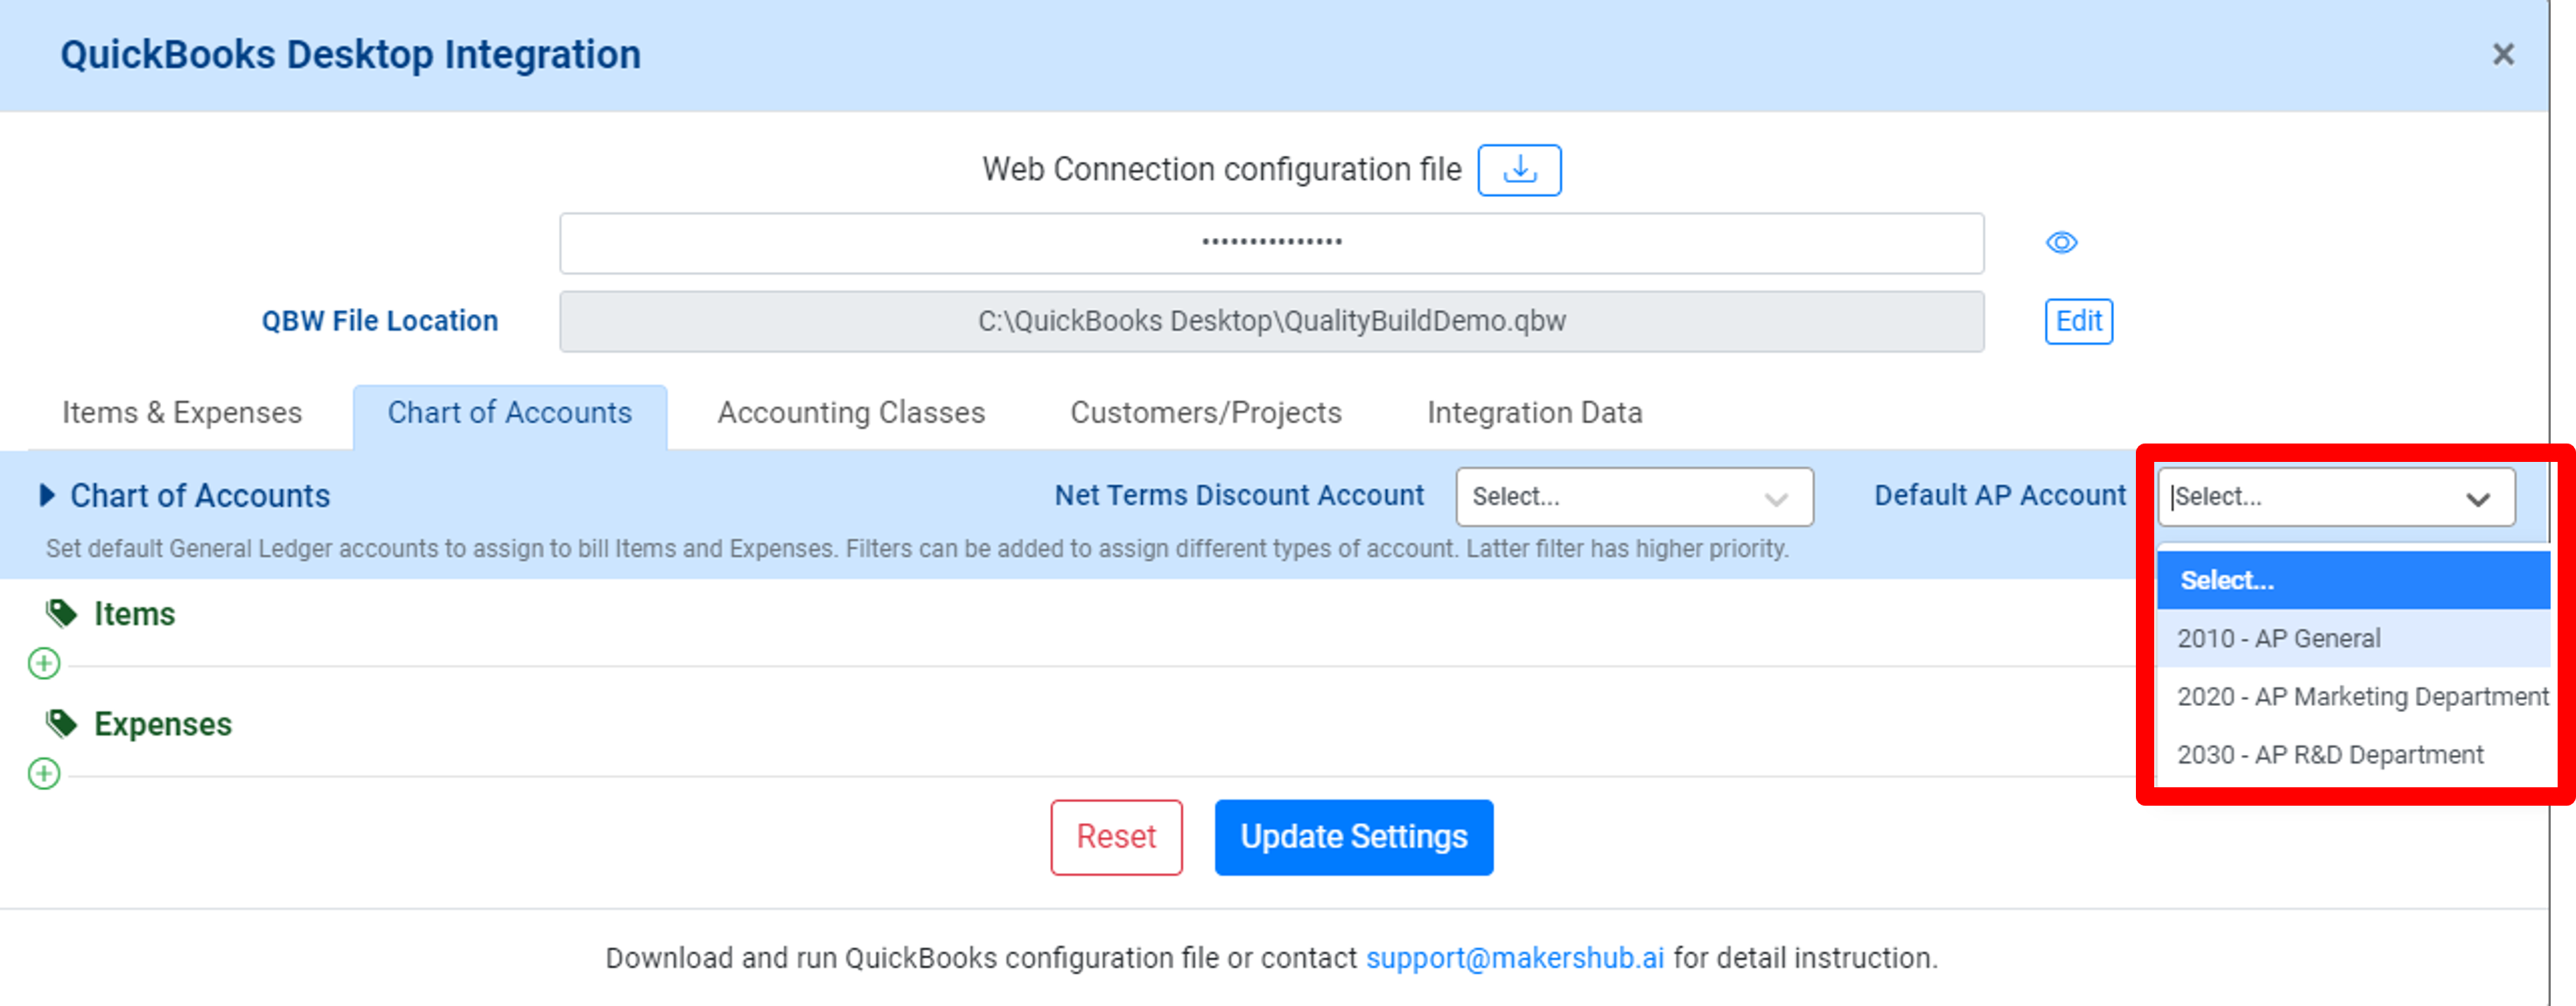
Click Update Settings to save the changes.
