This document will walk through how to locate and configure auto-forwarding for Outlook on both the new and old layout.
Locate Your AP Inbox
Navigate to your name in the upper right corner, click Admin. Under the Bill Settings you can find your unique AP Inbox.
MakersHub Only Processes Valid Attachments
When processing emails, we look for attachments (pdf, jpeg, png, xls, doc, heic) or images within the email to process. At this time, we are not able to process bills included as text within the body of the email. In these situations, you may use the snipping tool and paste the bill into MakersHub.
.jpg)
Outlook (New) Auto Forwarding Setup
Click the Gear Icon in the upper right corner, Select Mail, select Rules, and click Add New Rule.
.jpg)
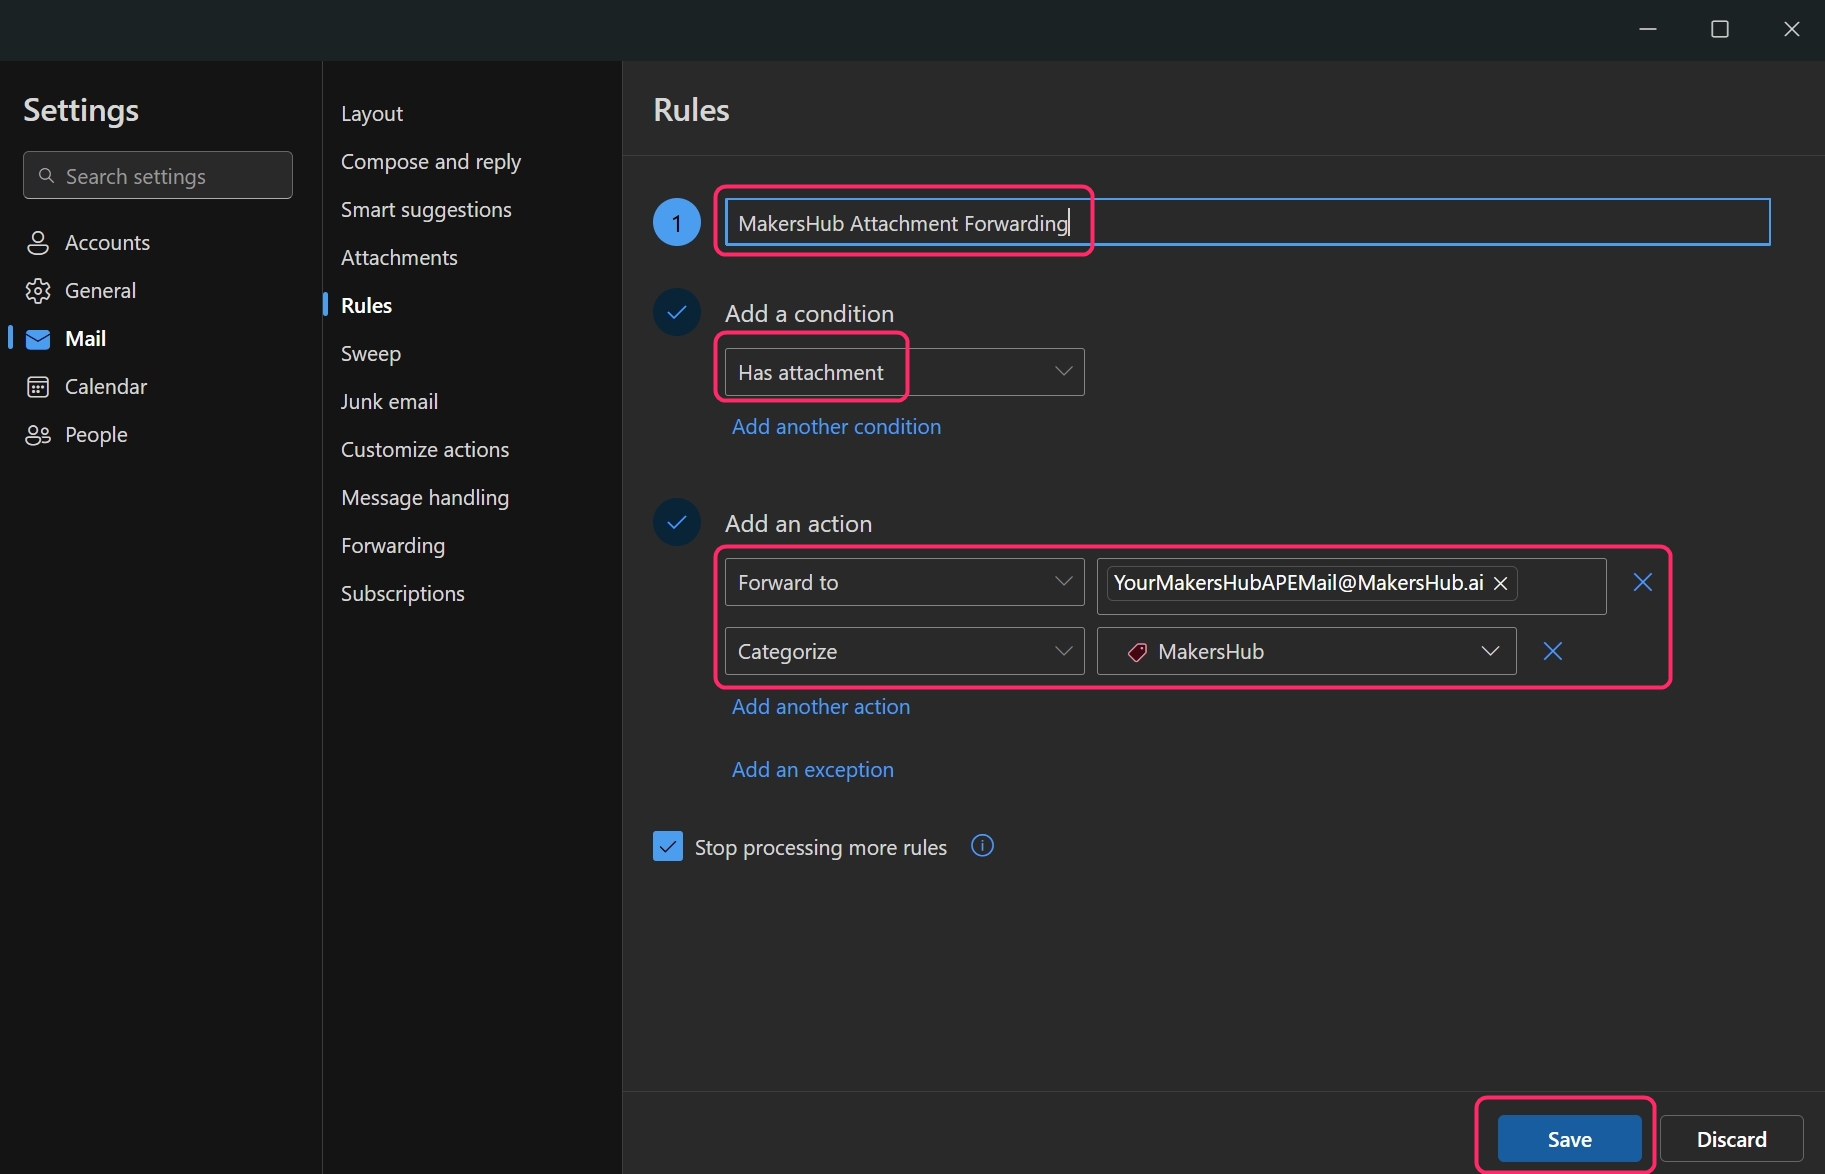
Name your rule: Enter a name for your rule. In the example below, it is named, MakersHub Attachment Forwarding.
Add a Condition: Has Attachment
Add an Action
Select Forward to: YourMakersHubAPEMail@MakersHub.ai
Select Categorize: Add a new tag for MakersHub under the drop down. This will allow you to know if an email has been forwarded.
Save
Outlook (Classic) Auto Forwarding Setup
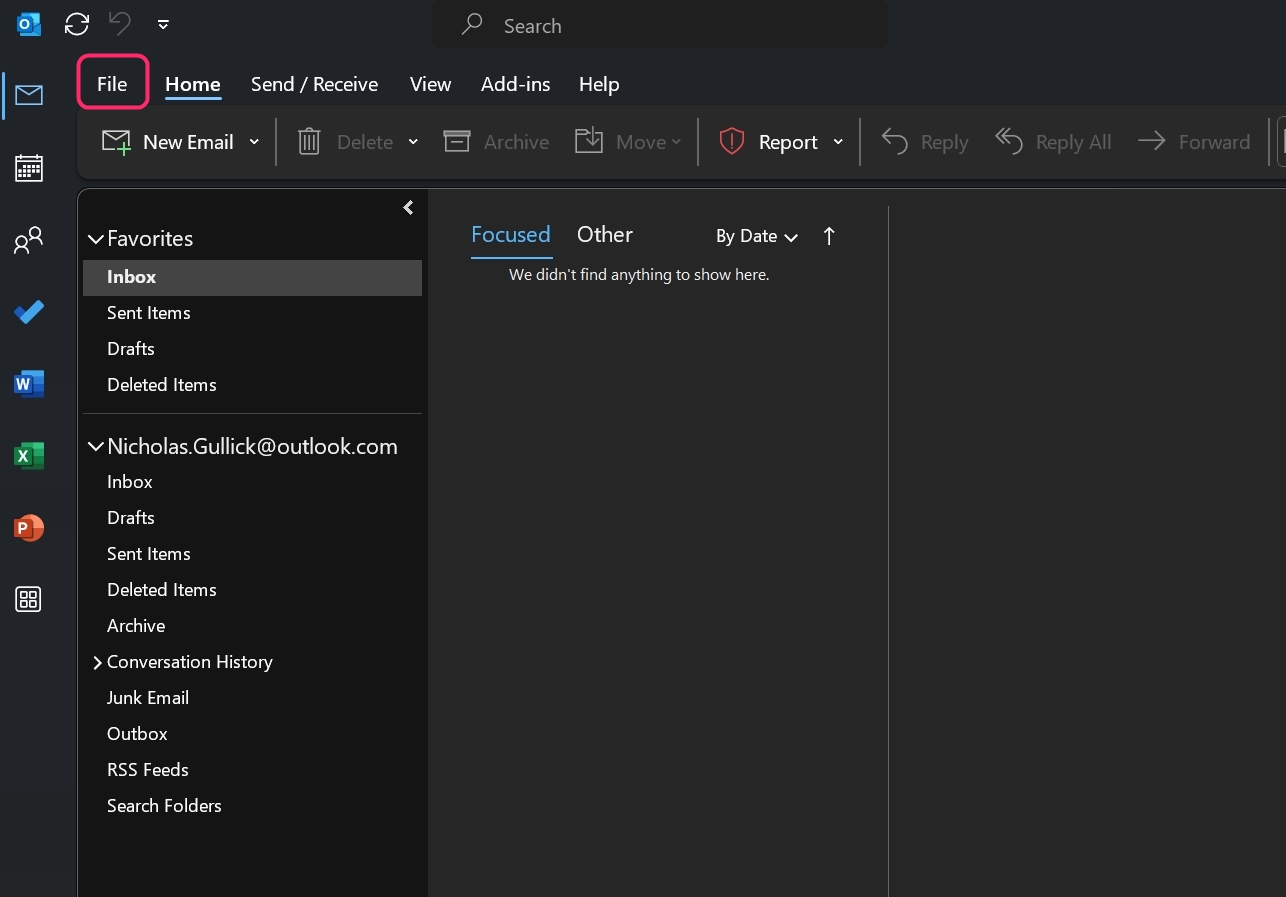
Click on the File tab (or the Tools menu in older versions).
Select Manage Rules & Alerts.
.jpg)
Click on New Rule.
.jpg)
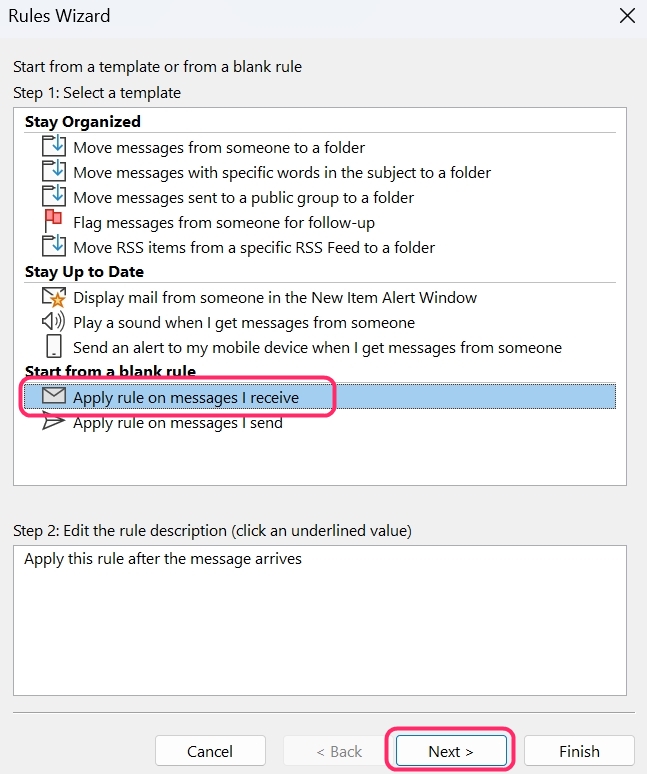
Select Apply rule on messages I receive under the Start from a blank rule section, then click Next.
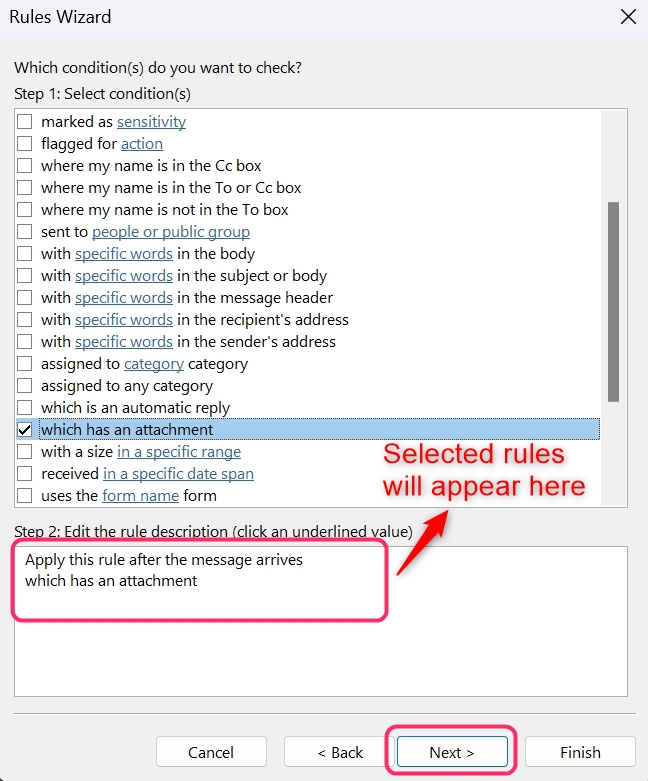
Choose the condition which has an attachment to forward all emails that contain an attachment and click Next.
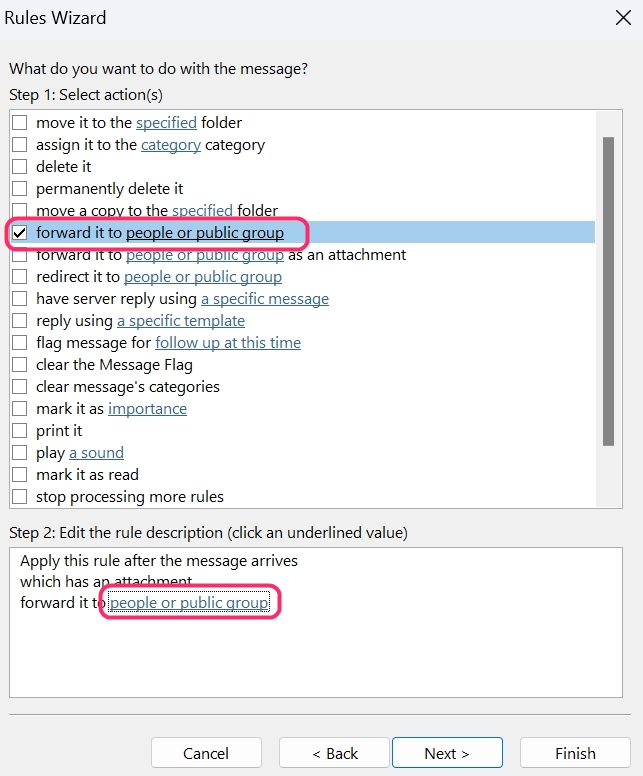
Check the box next to forward it to people or public group and in the bottom panel, click on the underlined people or public group link.
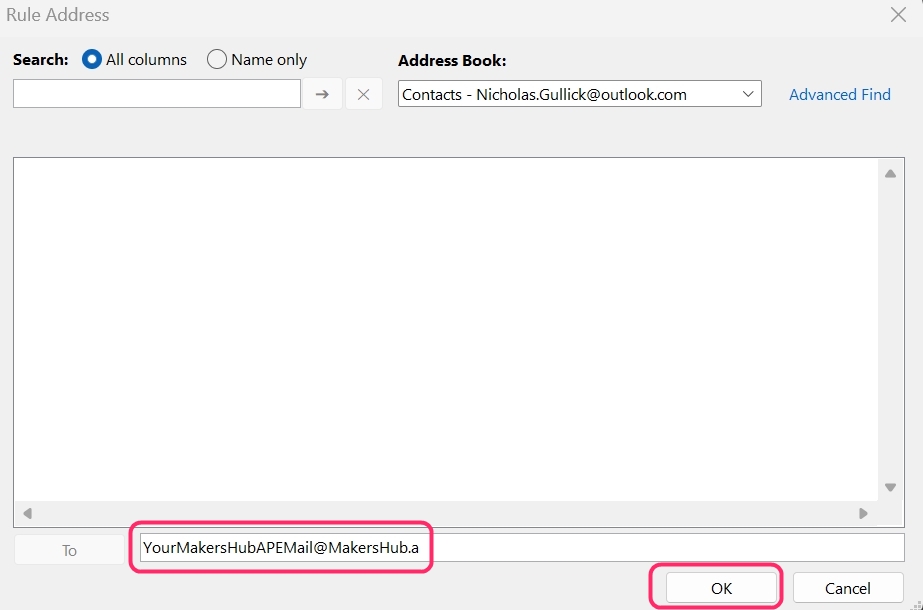
In the Rule Address dialog, enter your MakersHub AP email address in the To field and click OK.
Click Next to continue and set any exceptions if necessary (this step is optional). Click Next again.
Give your rule a name (e.g., "MakersHub AP Inbox Forwarding"). Make sure the Turn on this rule checkbox is selected. Click Finish, then click OK to close the Rules and Alerts dialog.
