In this document, we will review the basic steps to configure your account and process your first bill. This article assumes you have already integrated MakersHub with QuickBooks. If you have not, click here.
Dashboard
When you login, the first page you will see is your dashboard (this can be changed later under User Settings). The dashboard is split into two sections:
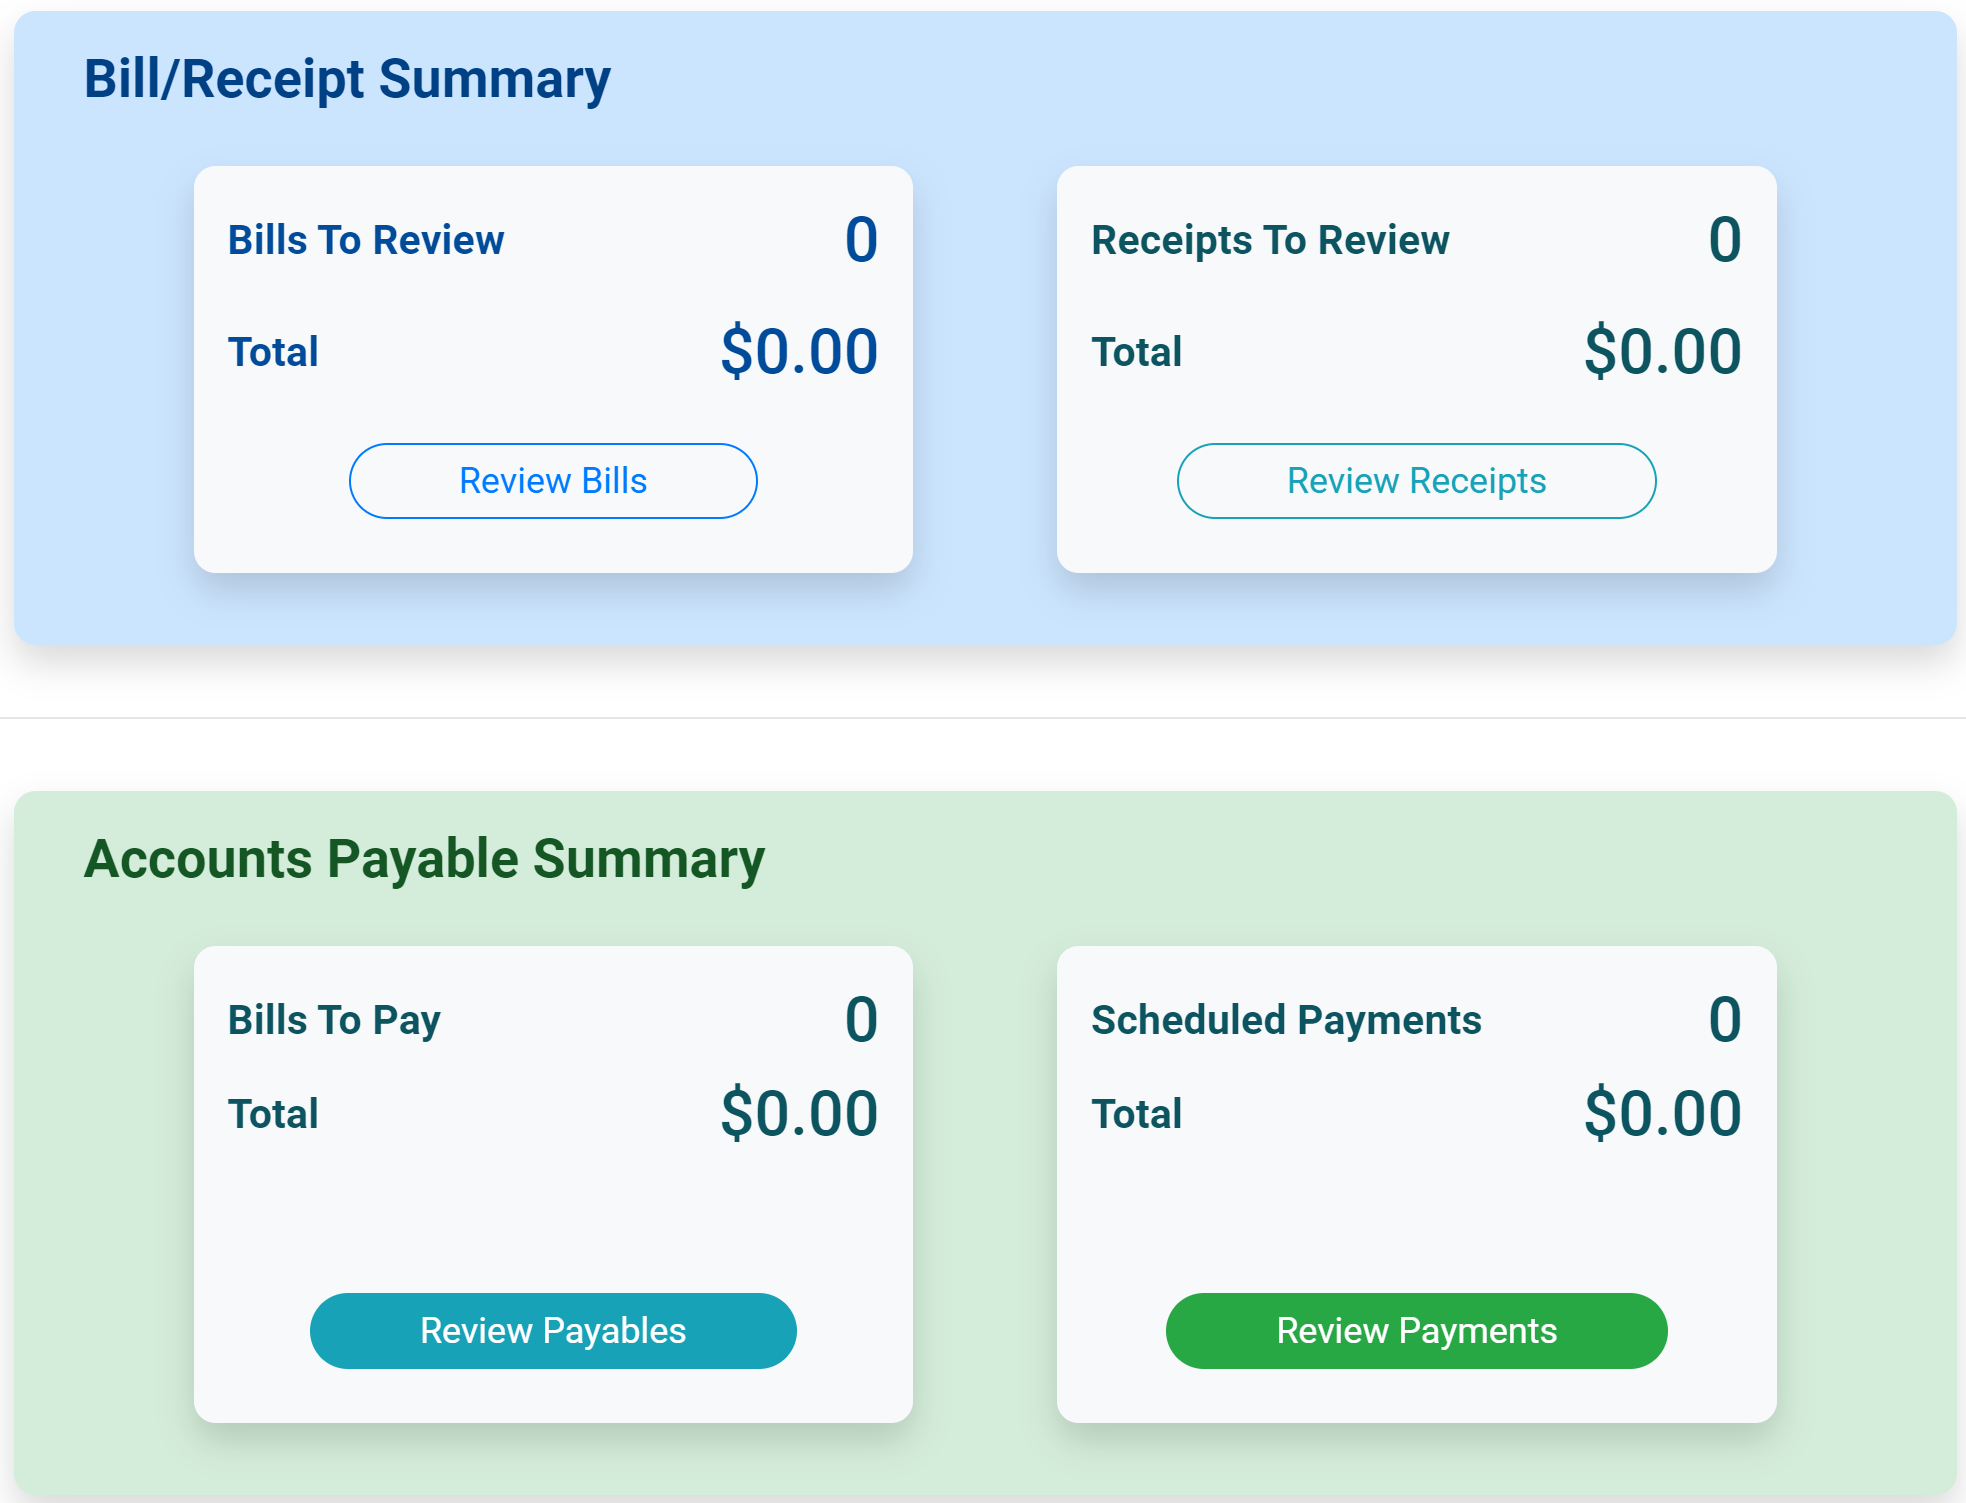
Bill/Receipt Summary
Bills - Any transaction that requires payment
Receipts - Bills that have already been paid but need a payment record in QuickBooks
Accounts Payable Summary
Payables - An approved bill
Payments - An approved bill that has been scheduled for payment
Click Review Bills or Financial on the left navigation pane to begin uploading bills.

Uploading Your First Bill
Bills can be uploaded in three ways:
Drag and drop a bill from your computer
Upload the bill from your computer
Forward the bill as an attachment to your AP Inbox
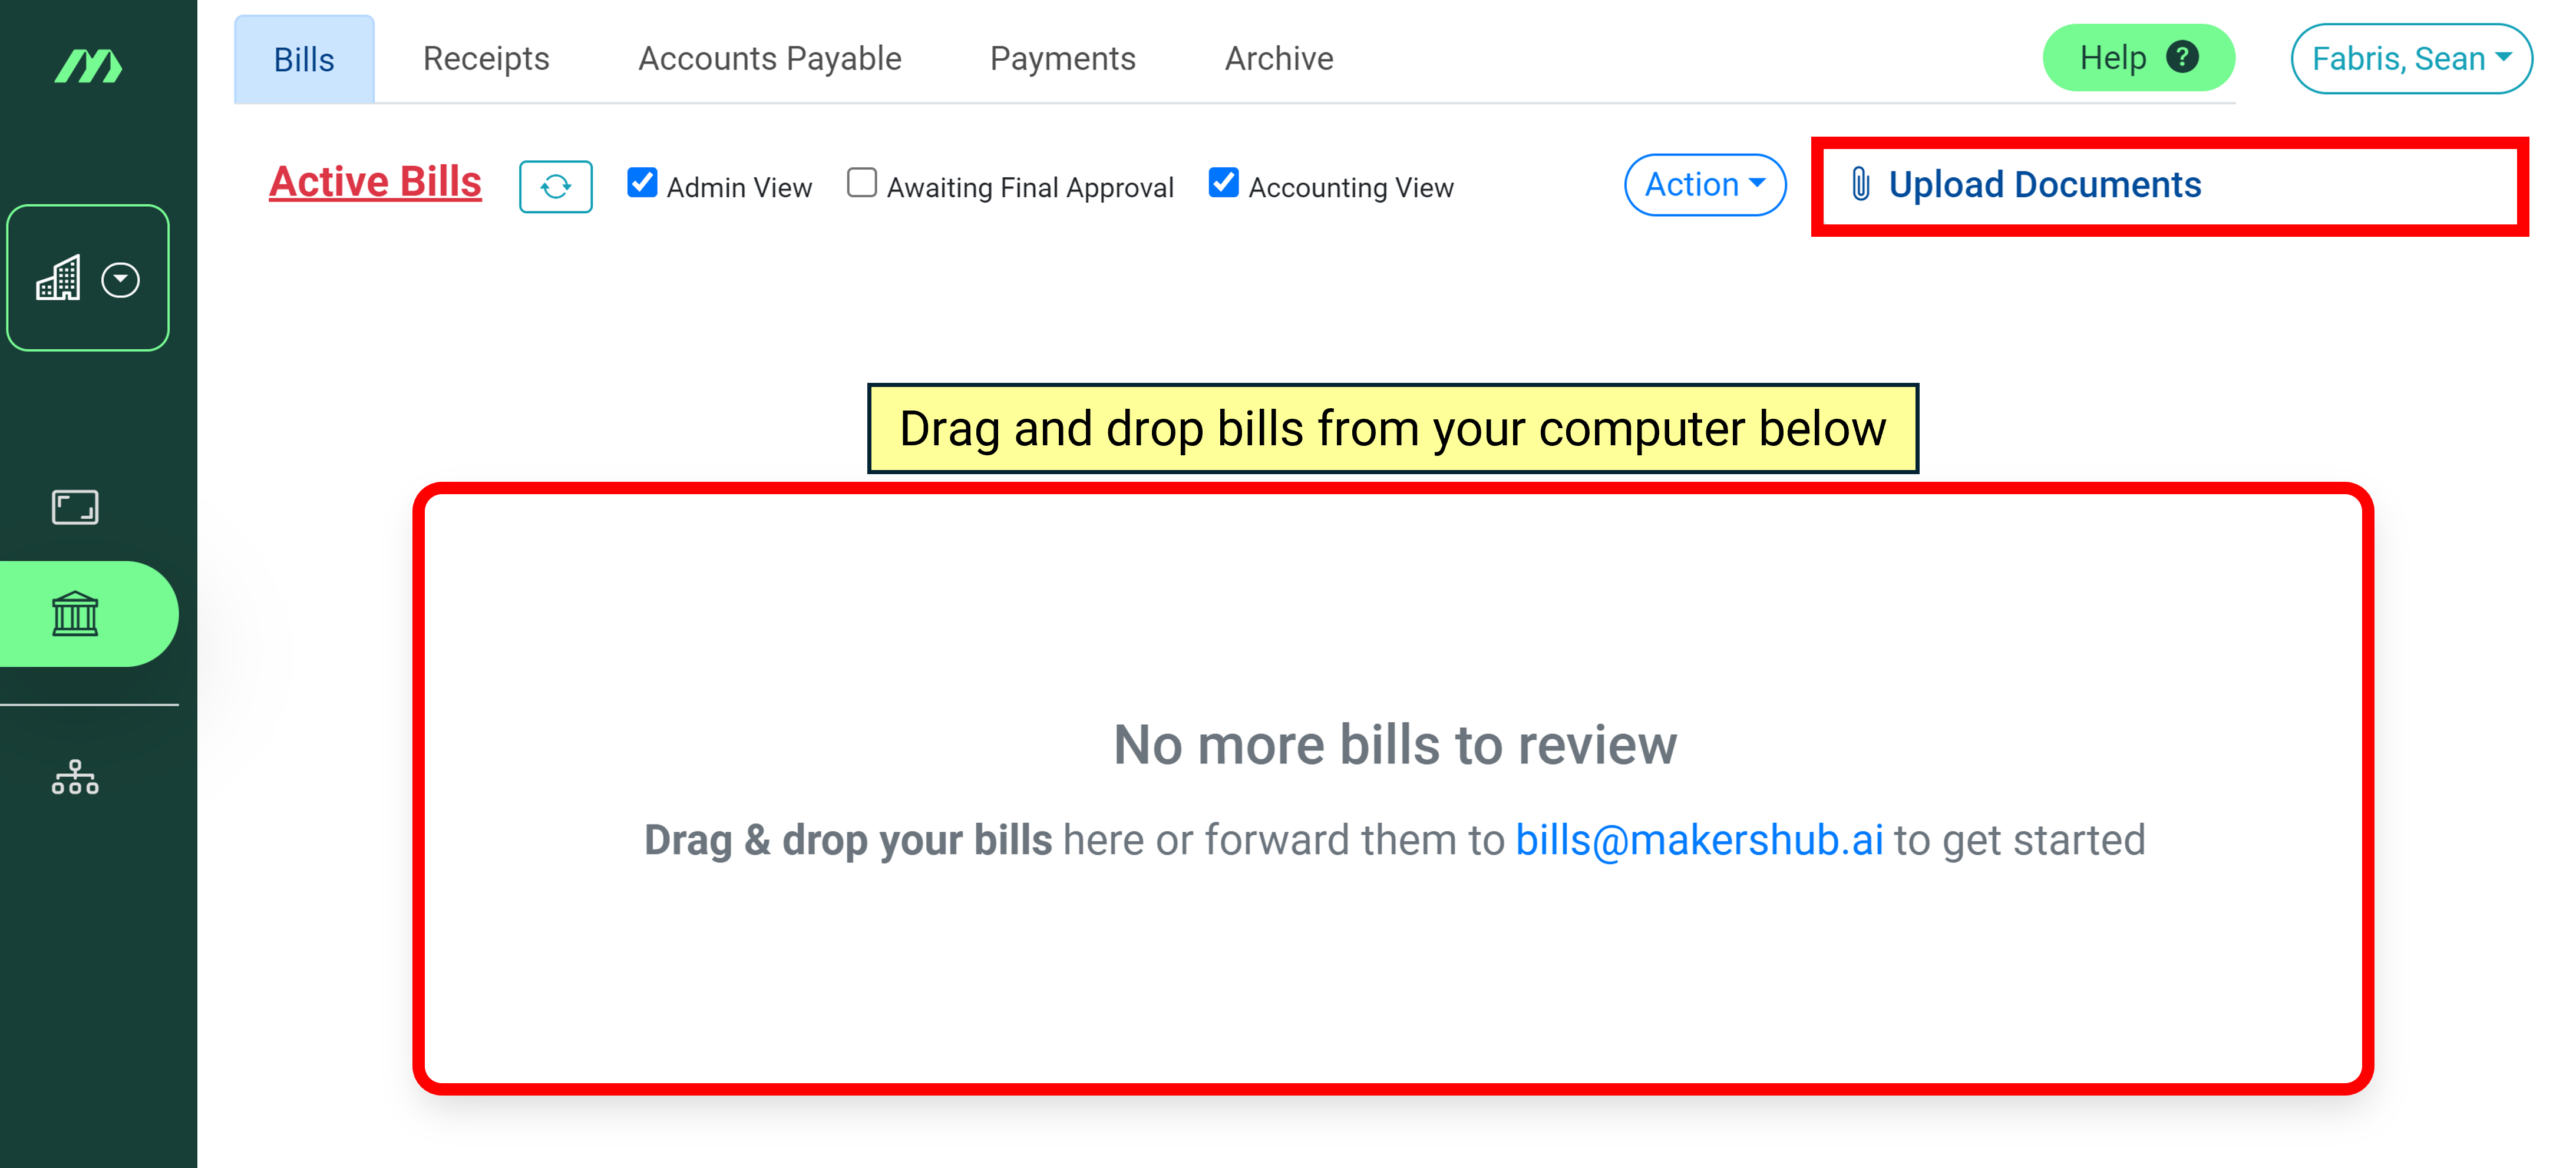
Once a bill is uploaded and processed, it will appear in yellow as an active bill ready for review.
Bill Dashboard
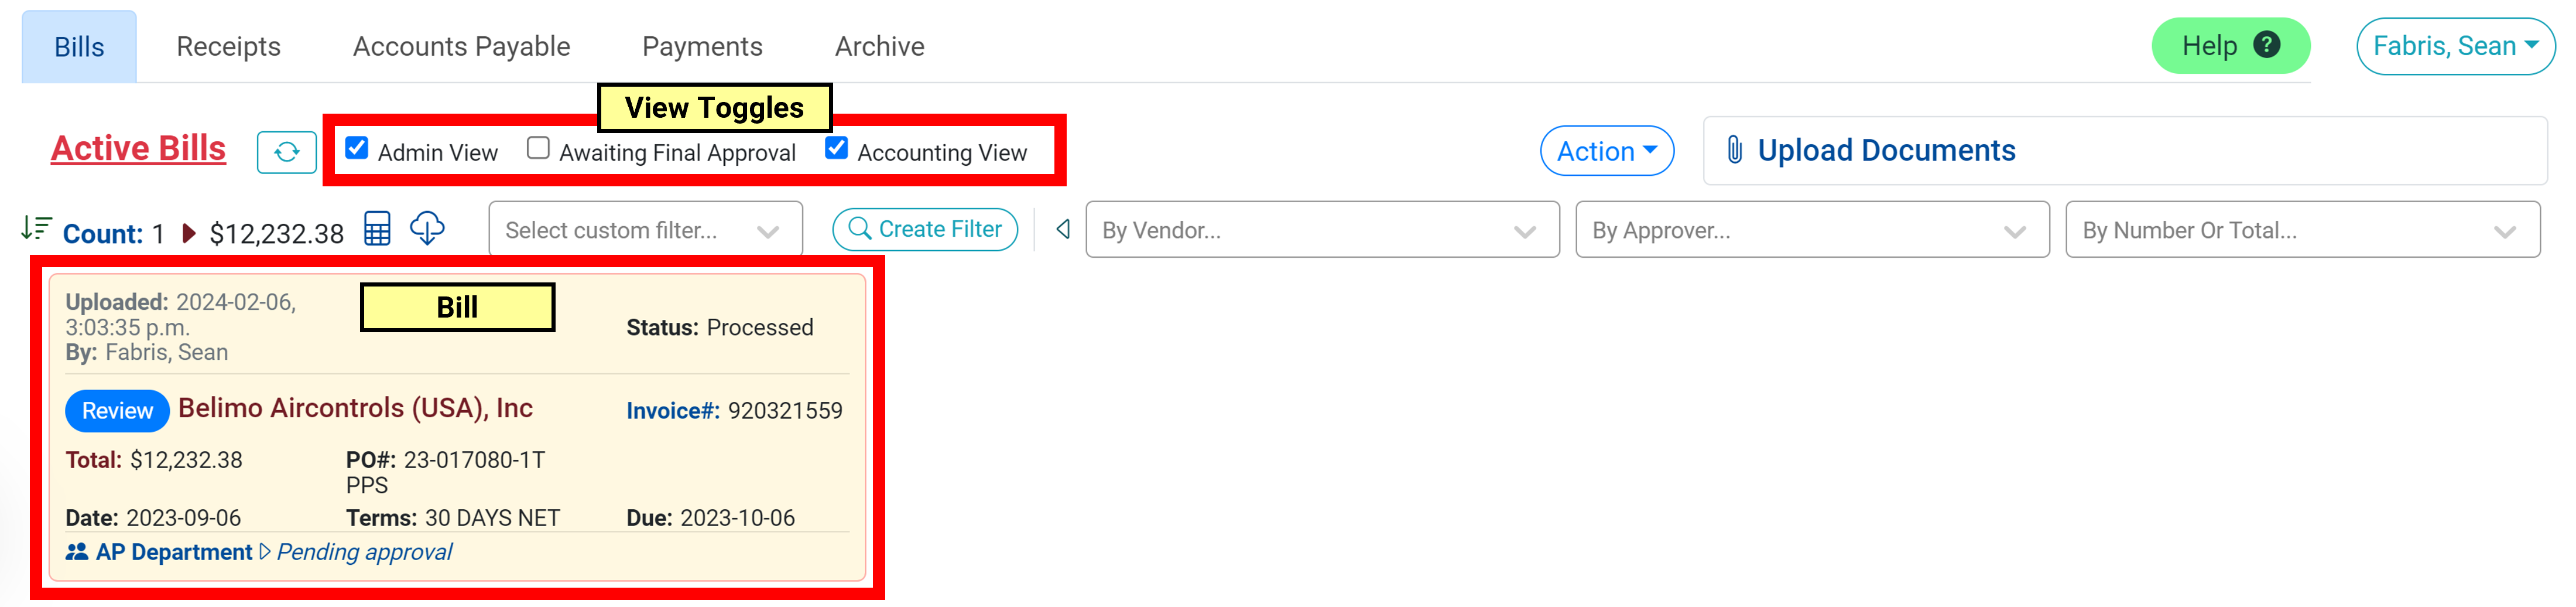
View Toggles:
Admin View - When enabled, the admin view allows you to see ALL bills that are pending approval. When disabled, you will only see bills pending your approval.
Awaiting Final Approval - Shows you all invoices that are on one last approval before they become an active payable.
When Admin View is toggled off, you will only see bills awaiting YOUR final approval.
Accounting View - Allows you to see the Account, Class, and Billable fields for all invoices you review. We generally see this toggled on for accountants and toggled off for project managers. Access to Accounting View can be configured under User Settings.
To start the process of validating and coding the bill, click Review.
Bill Review
The bill review page is the interface you use to verify and code a bill to the correct place in QuickBooks.
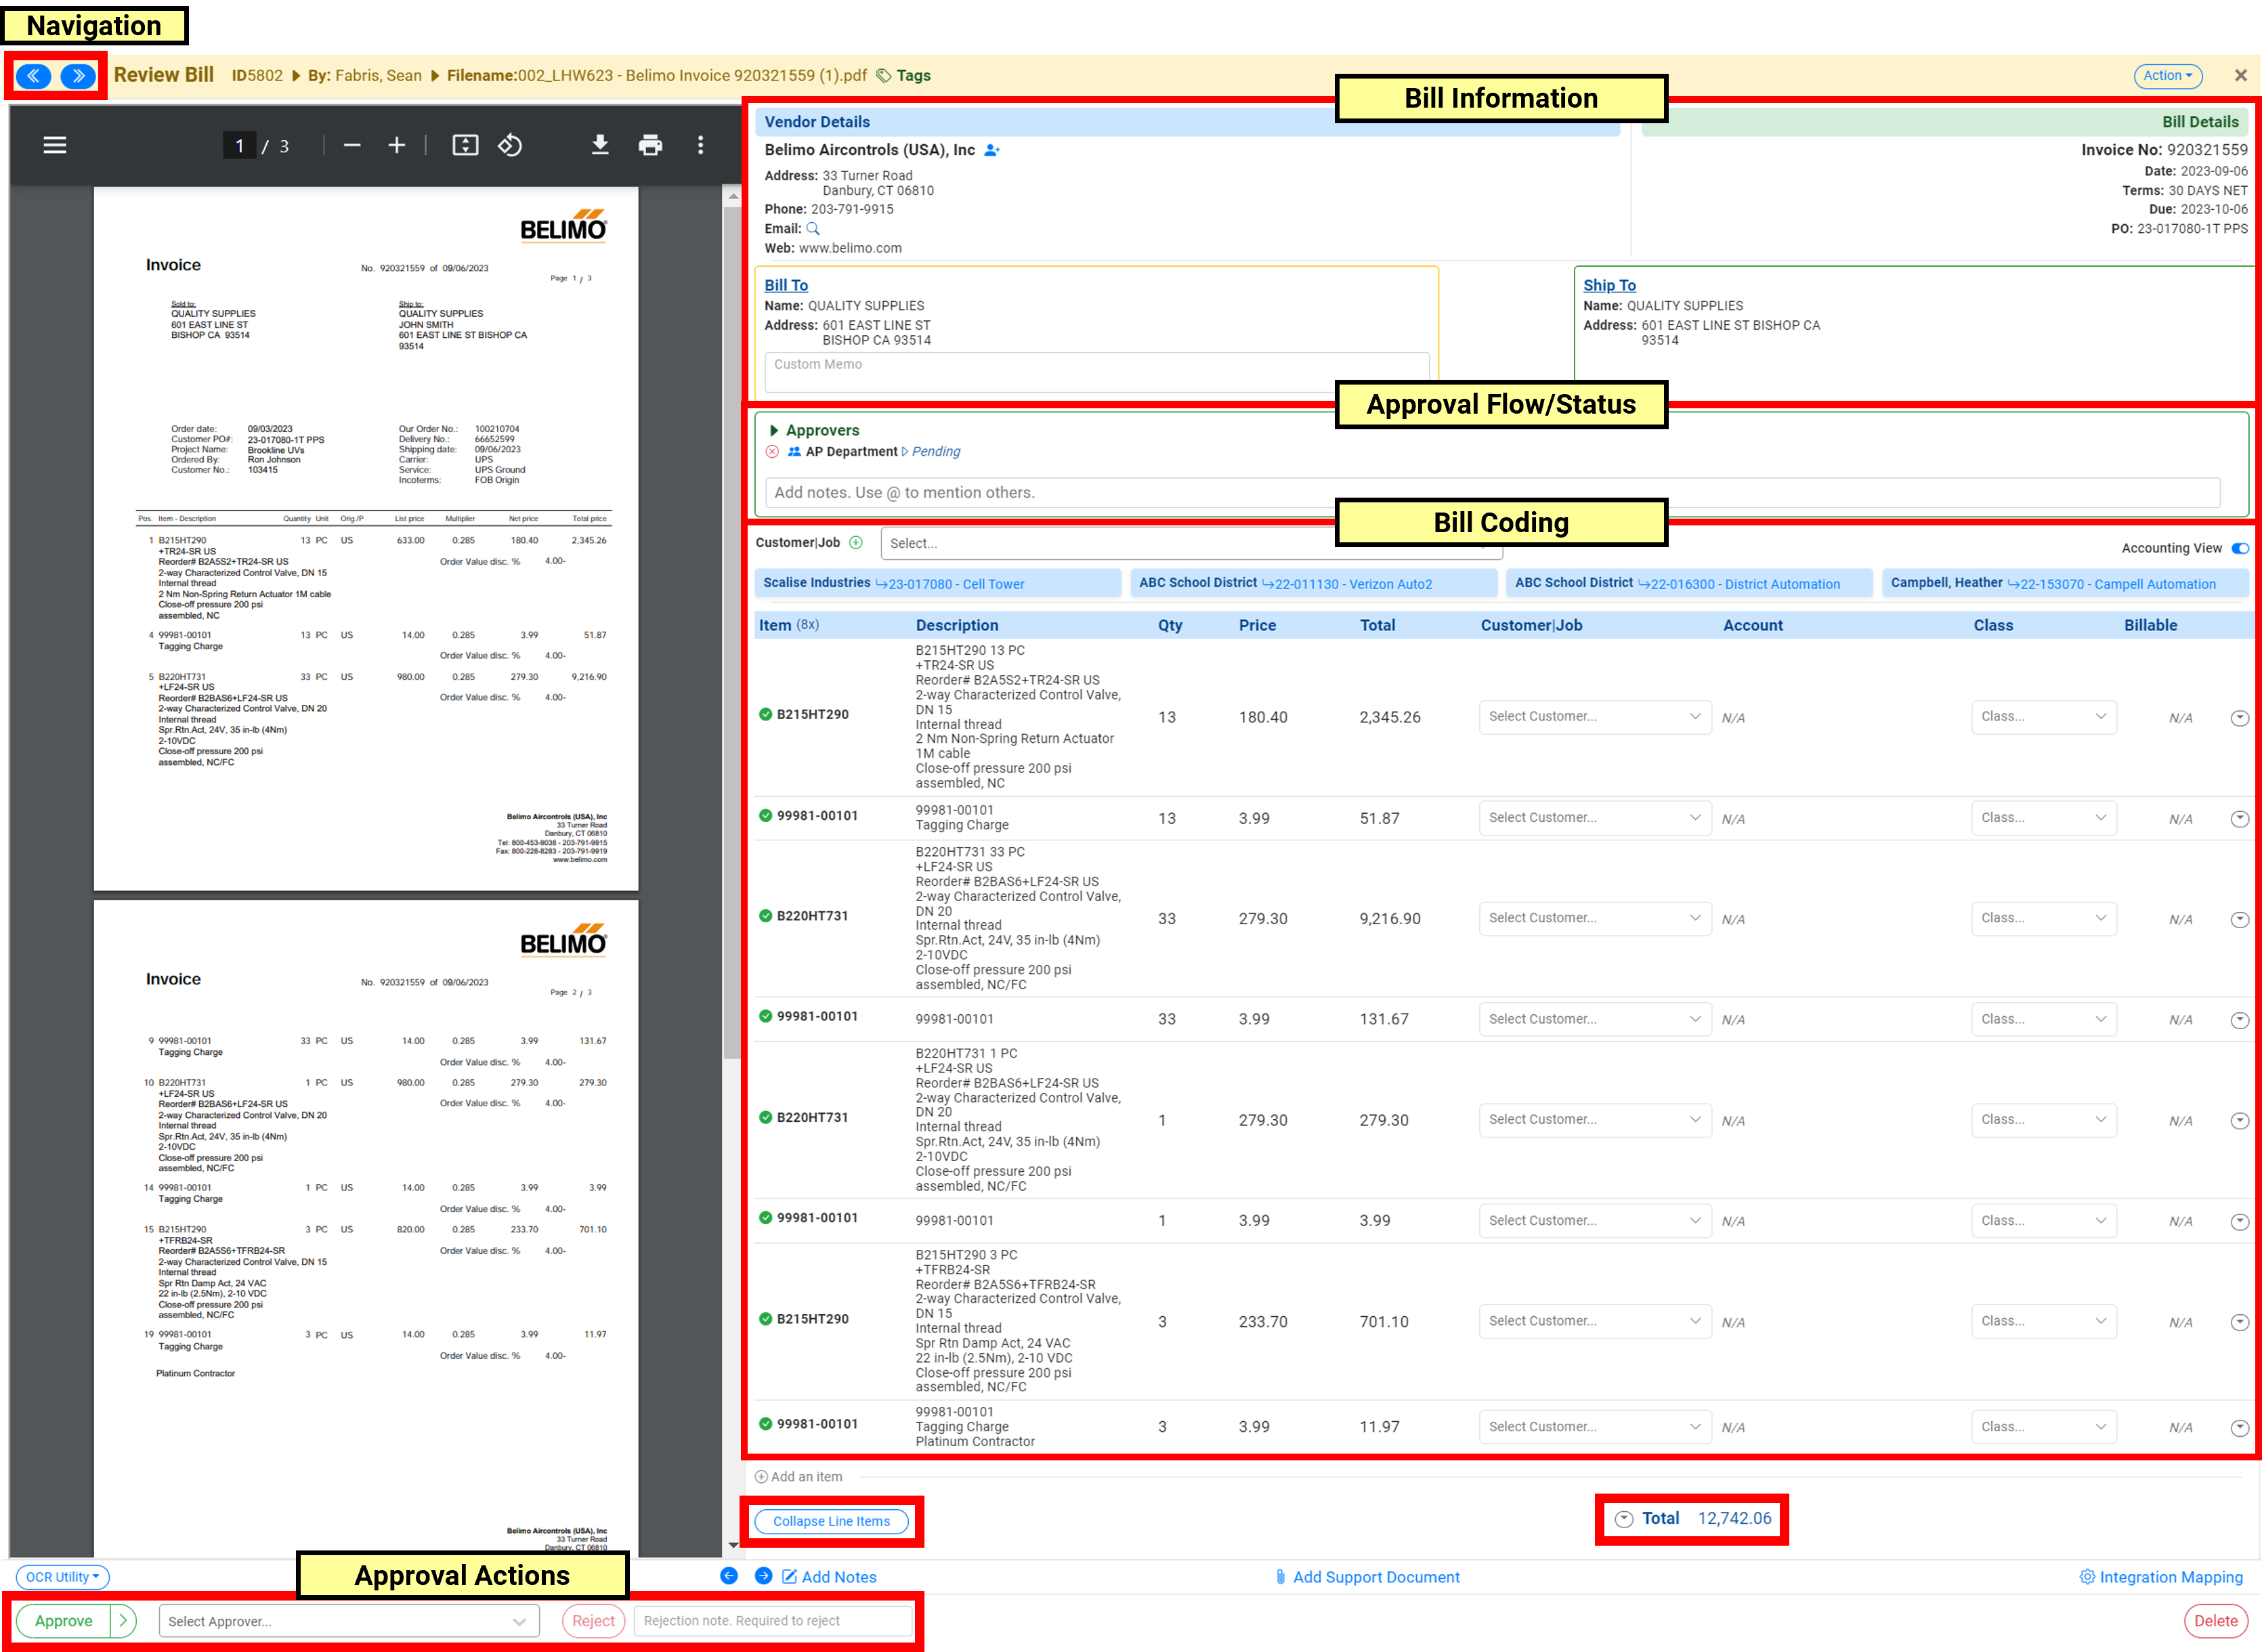
Bill Information
Vendor Details - The vendor name is read from the bill and cross referenced against known vendors in QuickBooks.
When a vendor name on the bill matches a known vendor, a green check mark will appear next to their name (shown below).
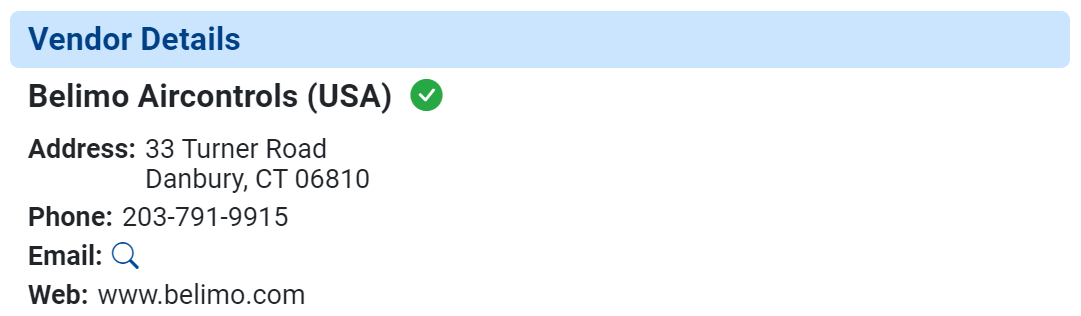
When a bill does not directly match to a vendor in QuickBooks, MakersHub will provide vendor name suggestions based on similarities in text. Upon selection of the correct vendor, MakersHub will learn to recognize that vendor going forward.
Should a new vendor need to be created, click Create a new vendor at the bottom of the list and MakersHub will create the vendor for you in QuickBooks once the bill is approved.
.png)
Address, phone number, email, and web are read from the invoice. When you approve a bill, we do not overwrite your vendor information in QuickBooks.
Bill Details - Specific information pertinent to the bill
You can train the OCR on all of these fields where to look.
If no payment terms are found, MakersHub automatically assumes they are 30 days net due.
Approval Flow/Status
The Approval Flow section shows all approvers assigned to a bill and the approval status. By default approvals are run in parallel, meaning that approvals do not have to occur in any particular order, unless the Approve Sequentially button is toggled on. To create rules to assign bills to approvers when specific conditions are met, see creating and structuring approval workflows.
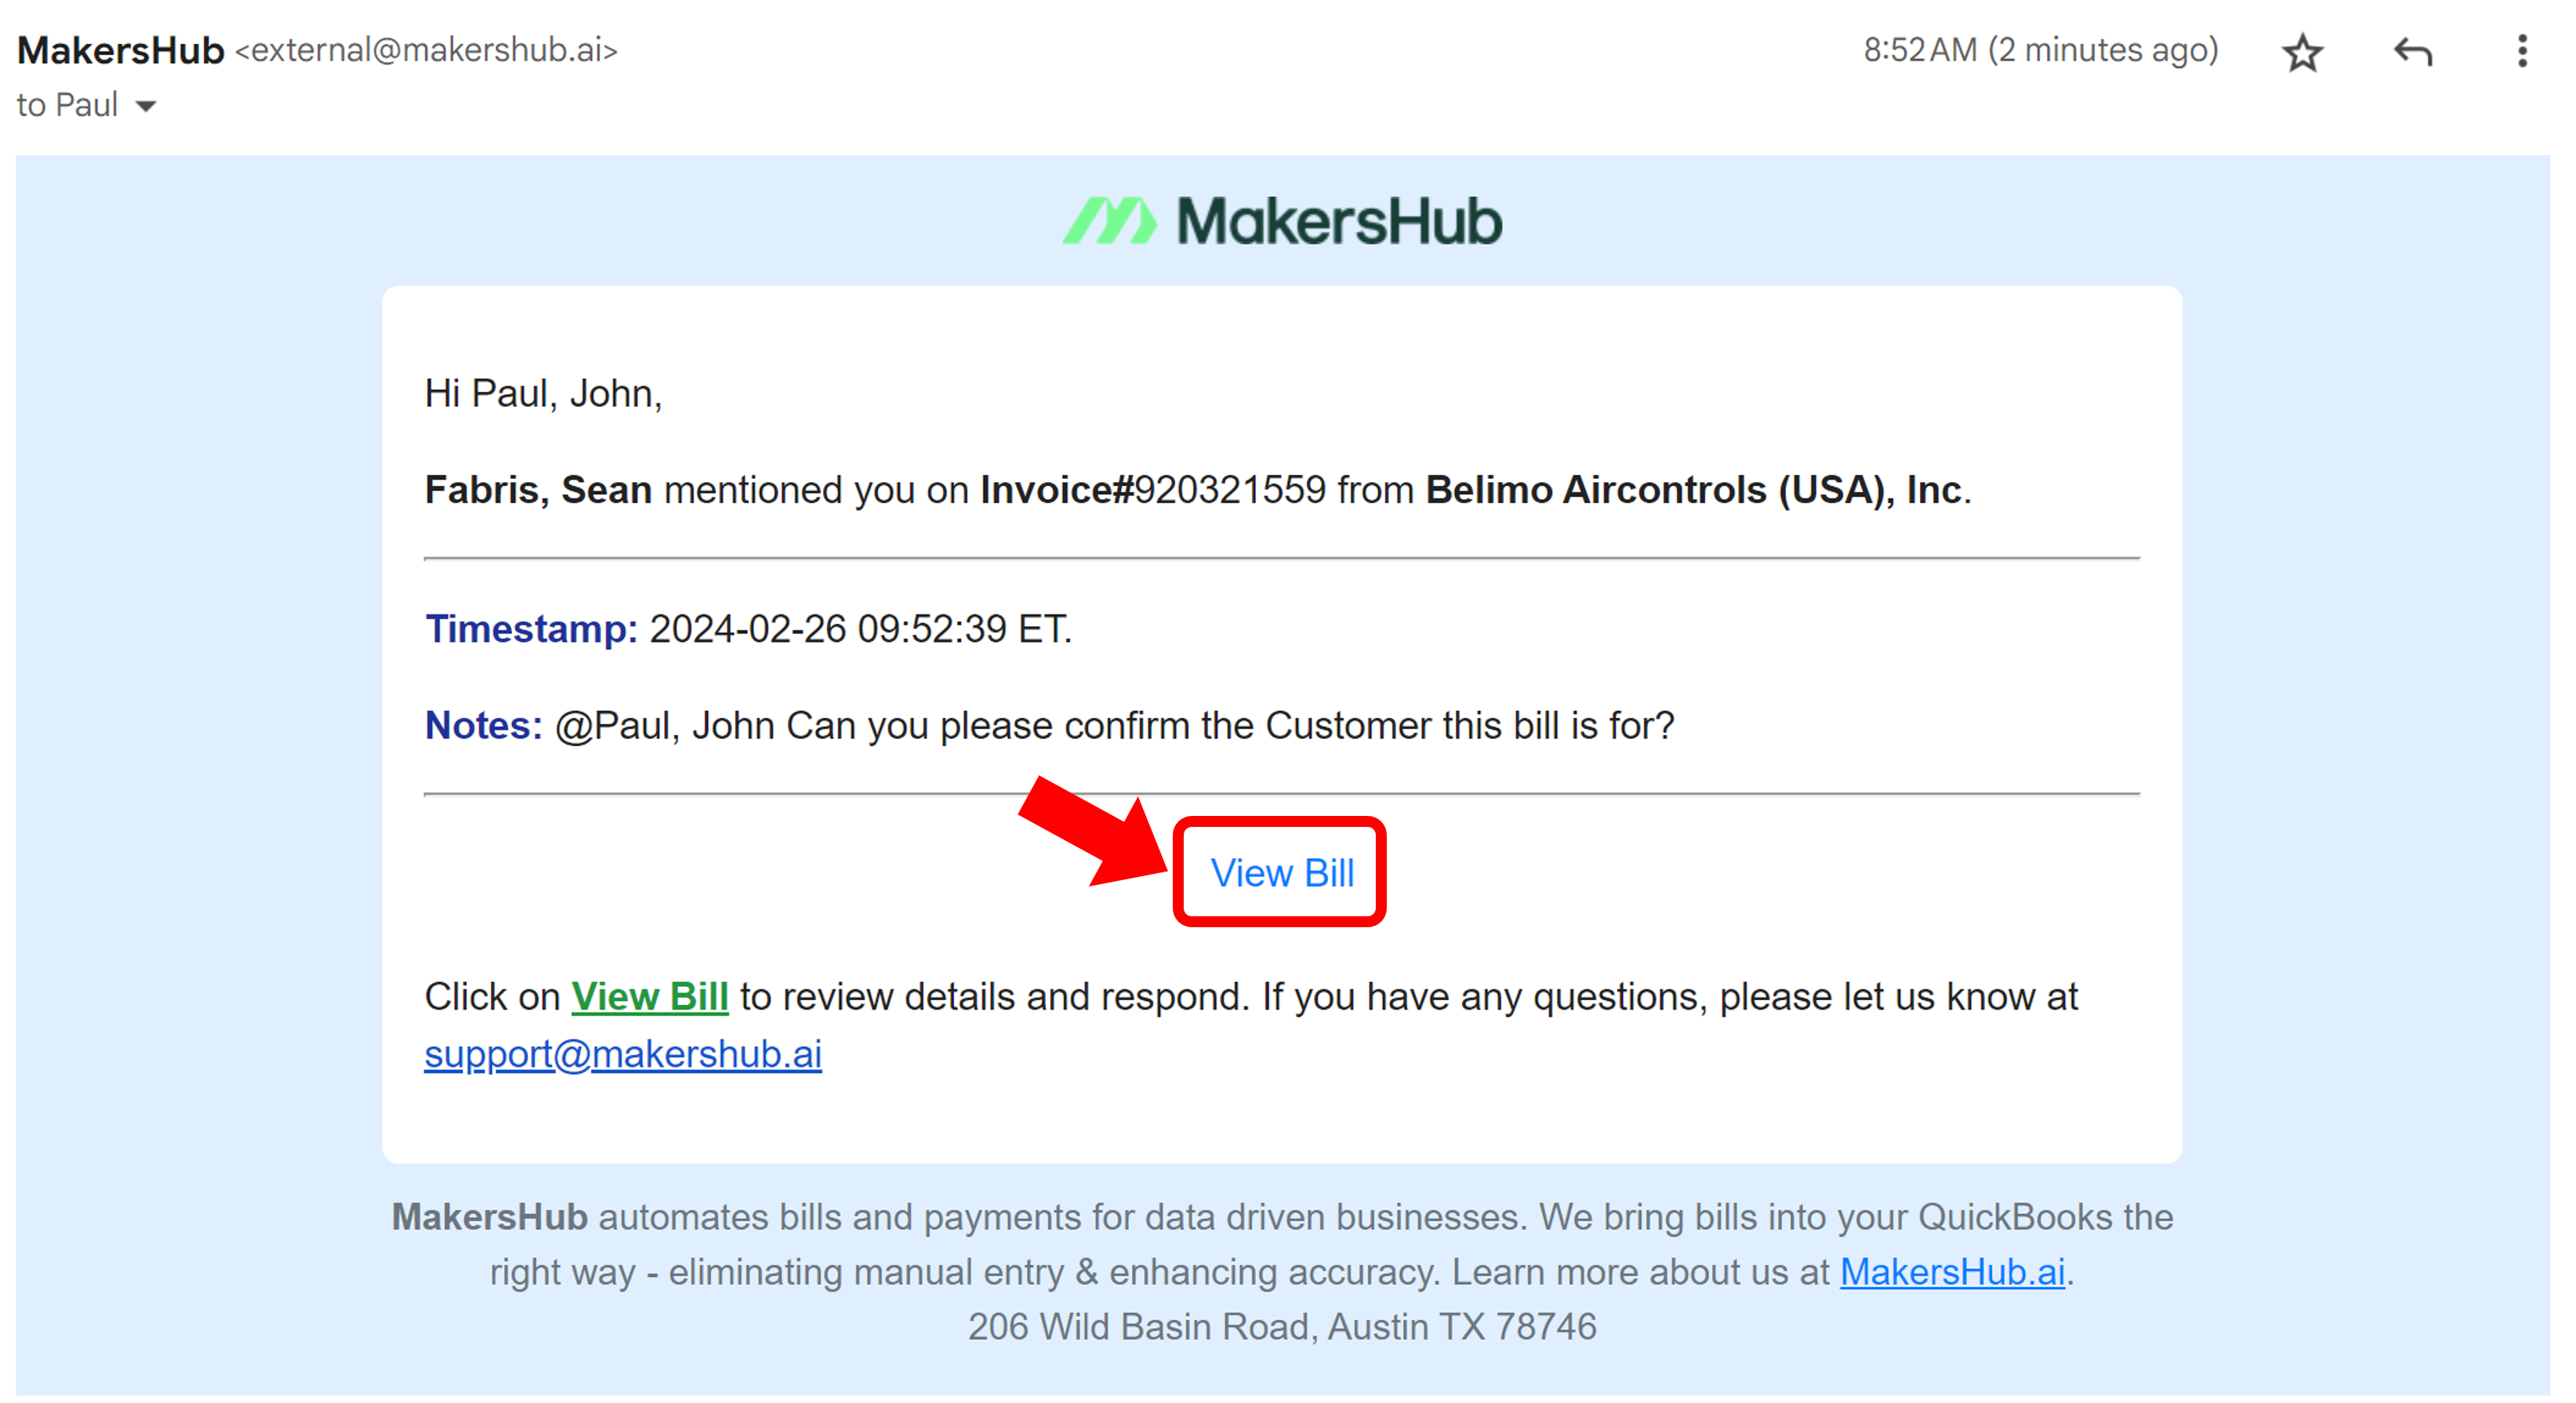
You can also see any conversations that relate to the bill. To add a note, click on the text box underneath the list of approvers and type your message. To tag specific users, type “@” followed by their name.
.png)
When a user is tagged to a note, they will receive a notification to their email and can view the bill and comment back.
Bill Coding
The Bill Coding section contains the content MakersHub was able to extract from the bill.
Differences in QuickBooks Terminology
For QuickBooks Online users, please note that Expenses in MakersHub is synonymous with Categories in QuickBooks Online
To add a new item to a bill, click Add an Item. To make changes to an existing line, click on the field you would like edit. This will open up the text dialogue box where you can change the text or values.
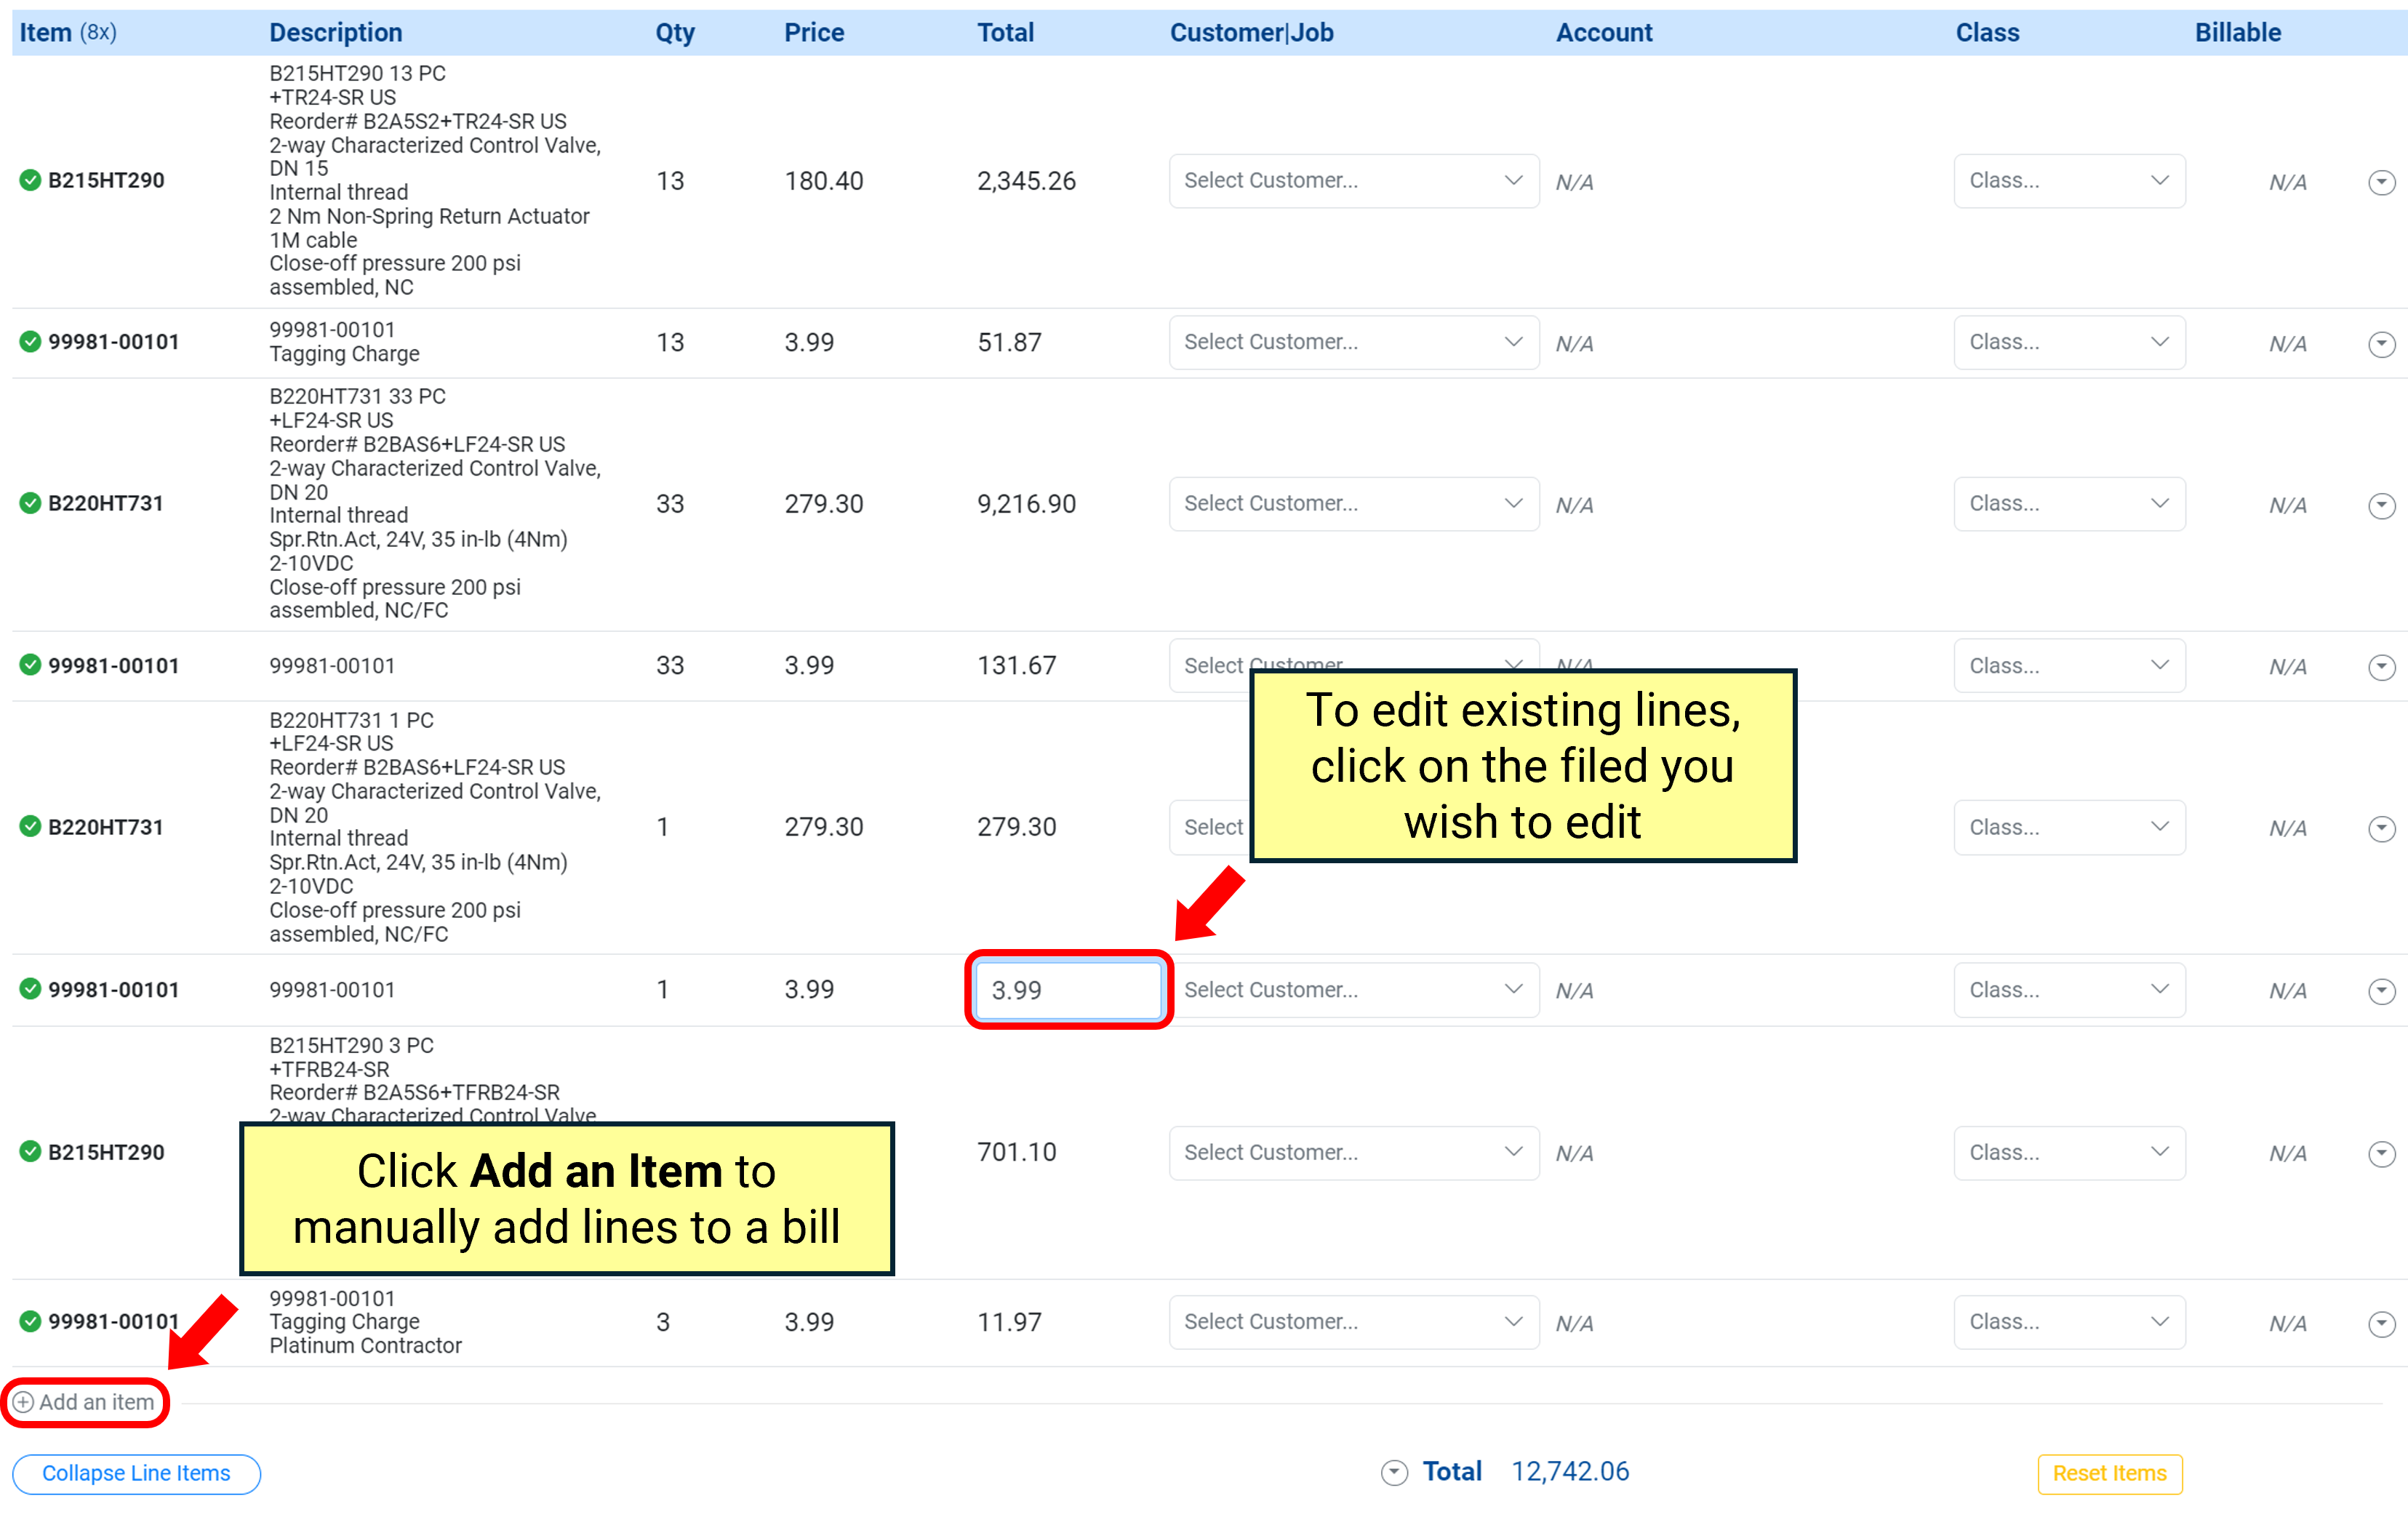
Code the Customer and Class, if applicable.
.png)
To apply changes to all bills below, select the drop down arrow at the top of the Bill Coding section.
.png)
In the example bill, MakersHub read the line items, extracted the SKU, and recognized the SKU as a known item in QuickBooks, reflected by the green check mark.

If the line is not an item, and you want to be able to code the Account, click on the Item and select Expense Item from the dropdown.
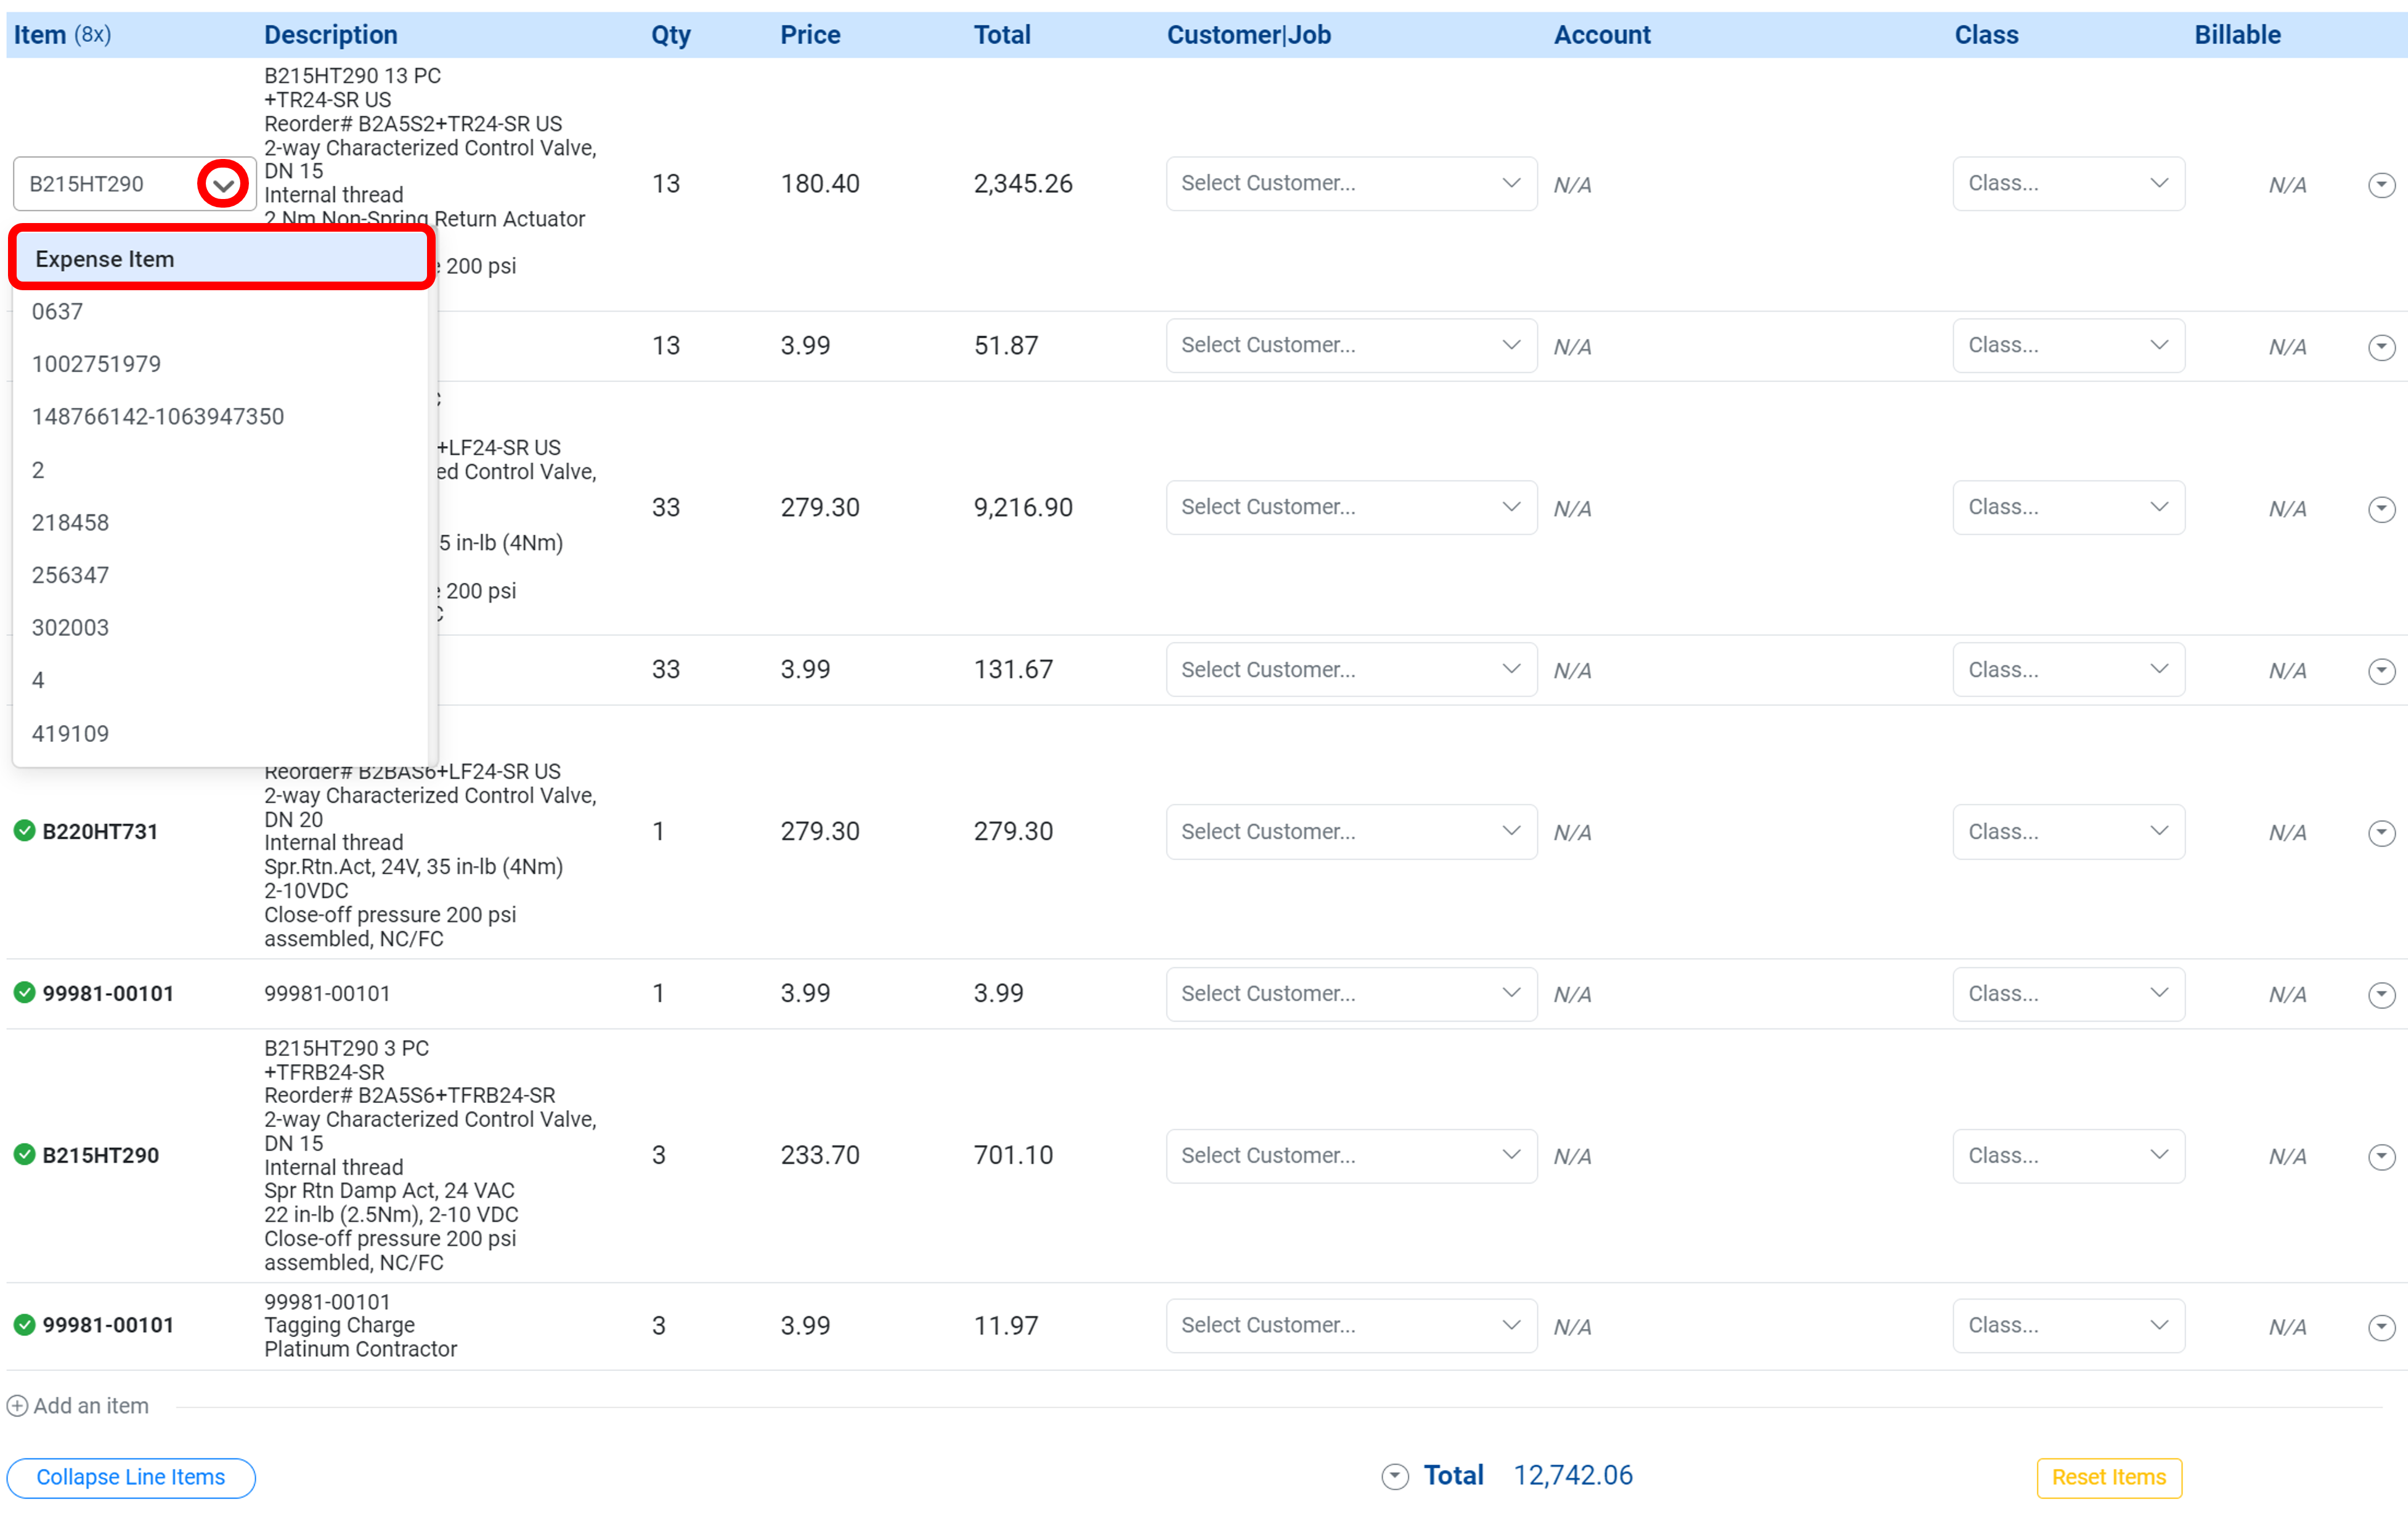
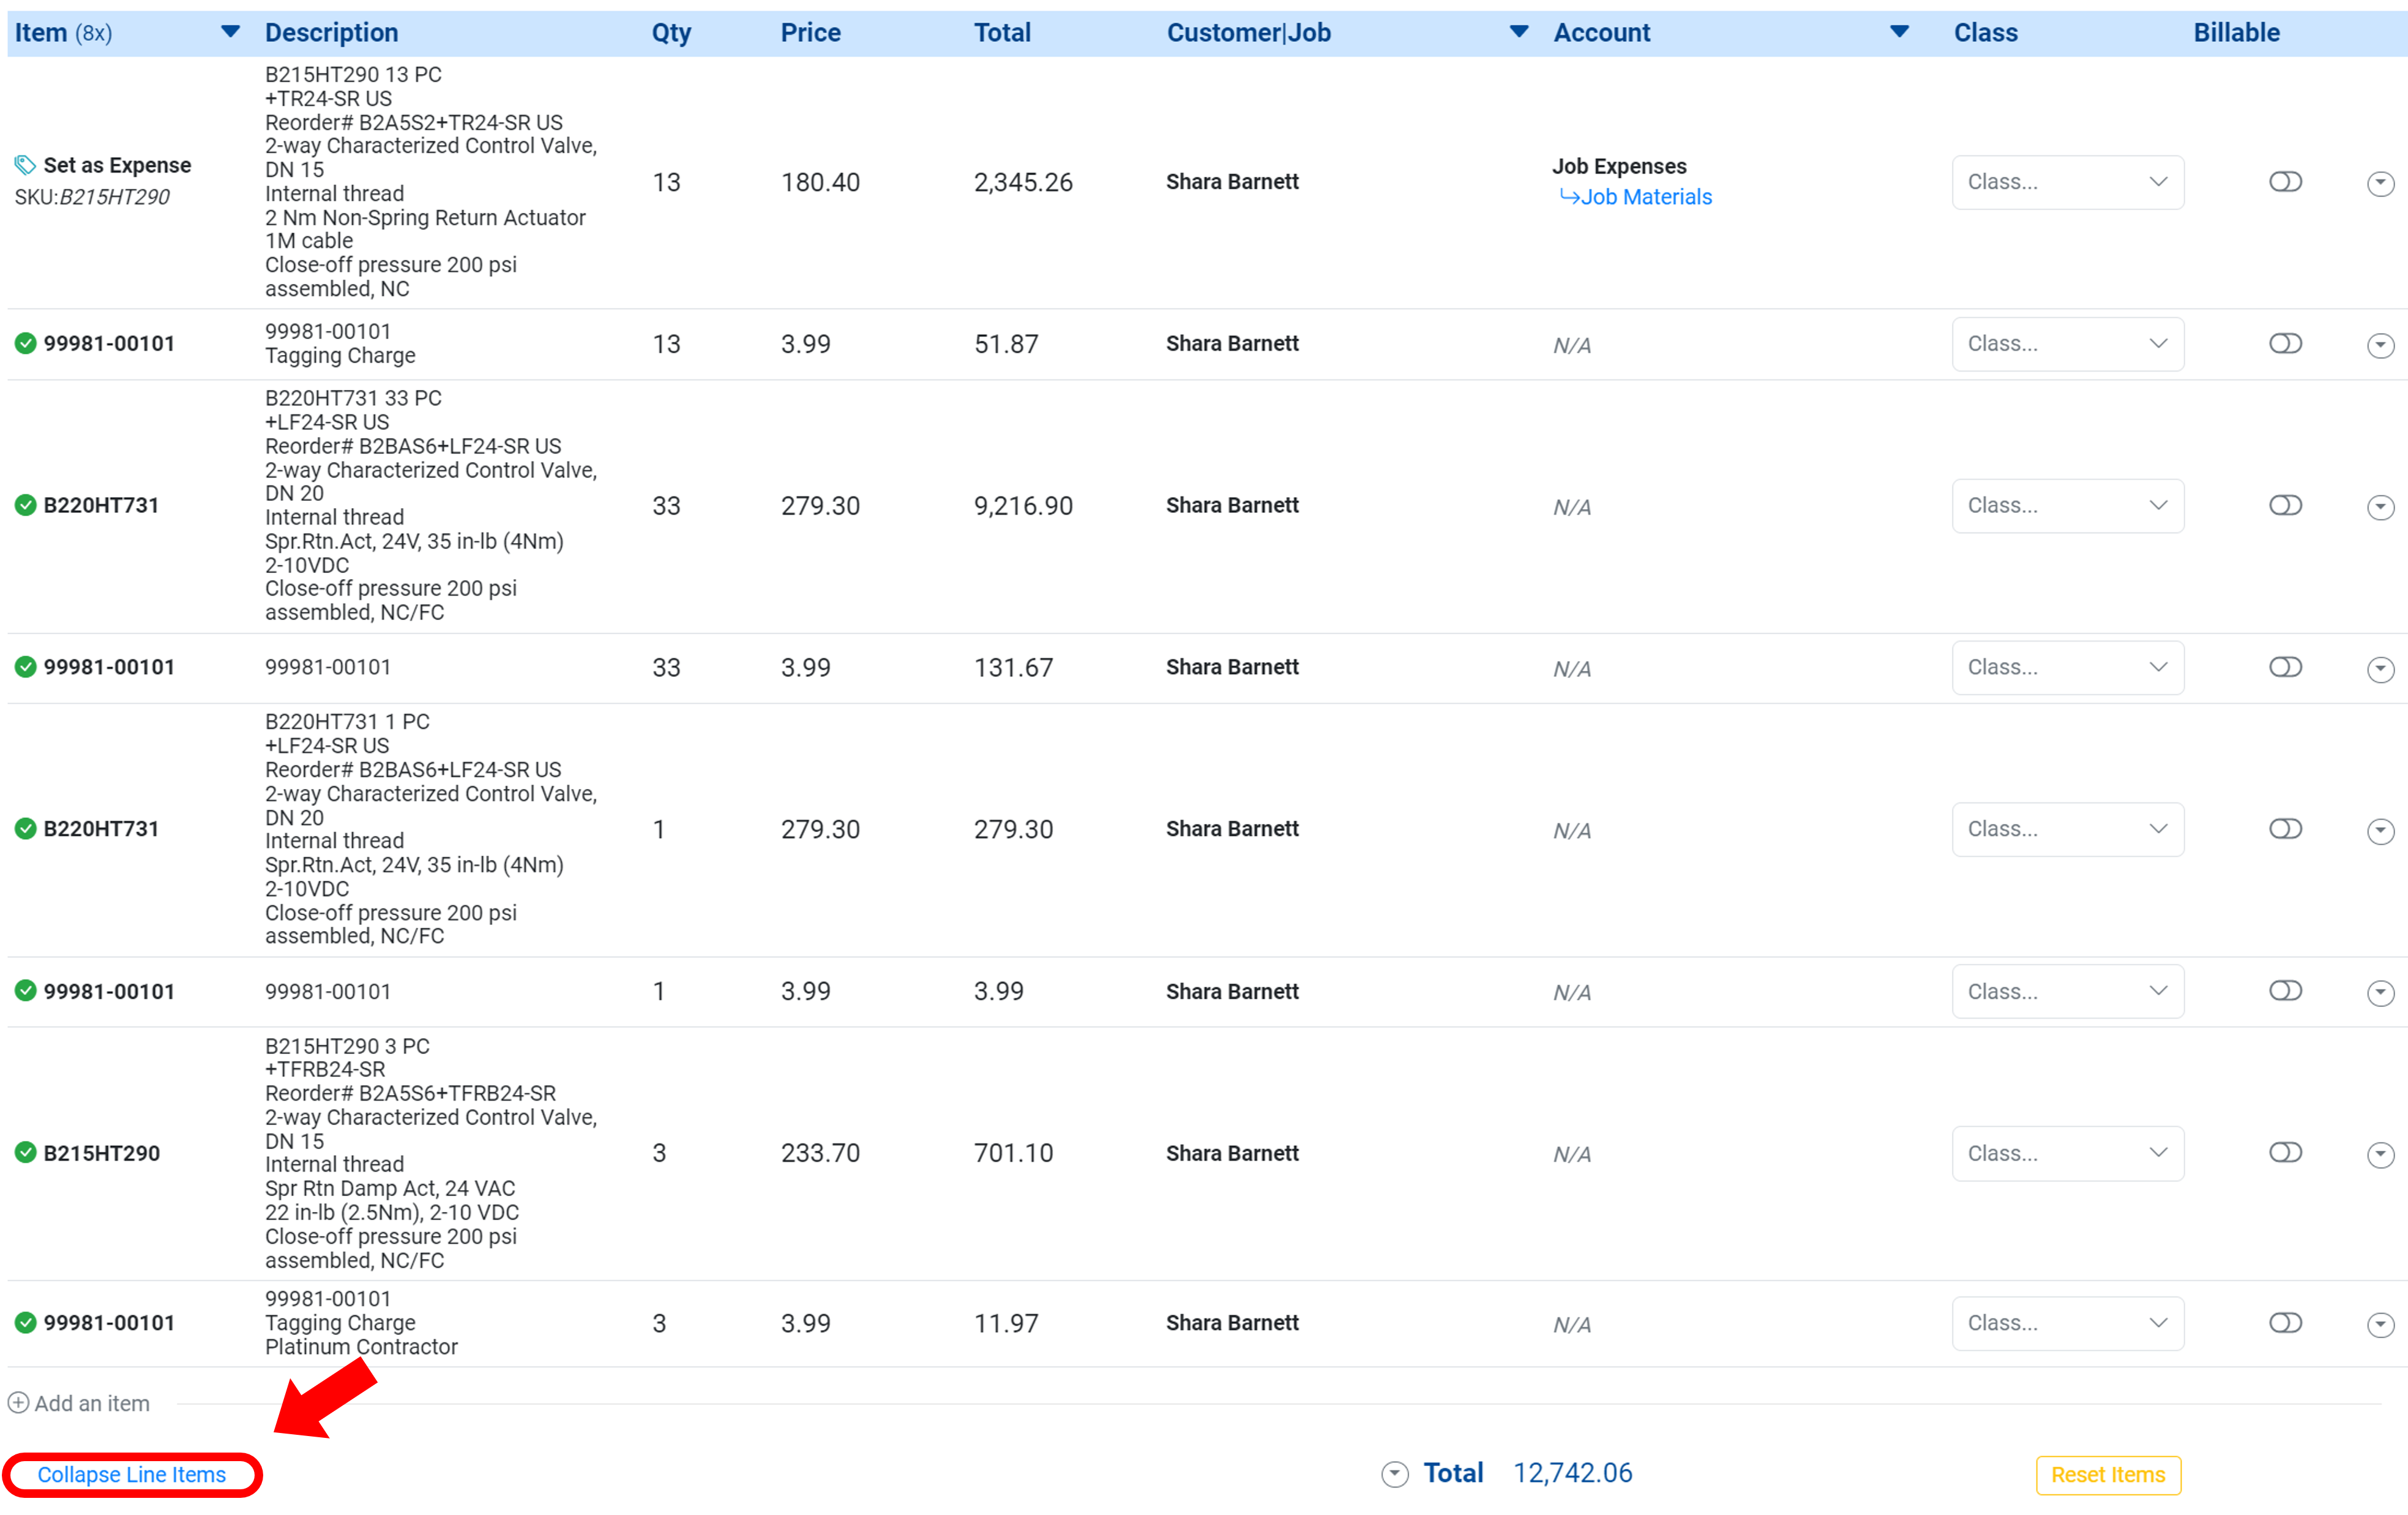
Should you not want the line item detail, you can select Collapse Line Items which will show the bill as one expense line.
Enter a description for the expense item.
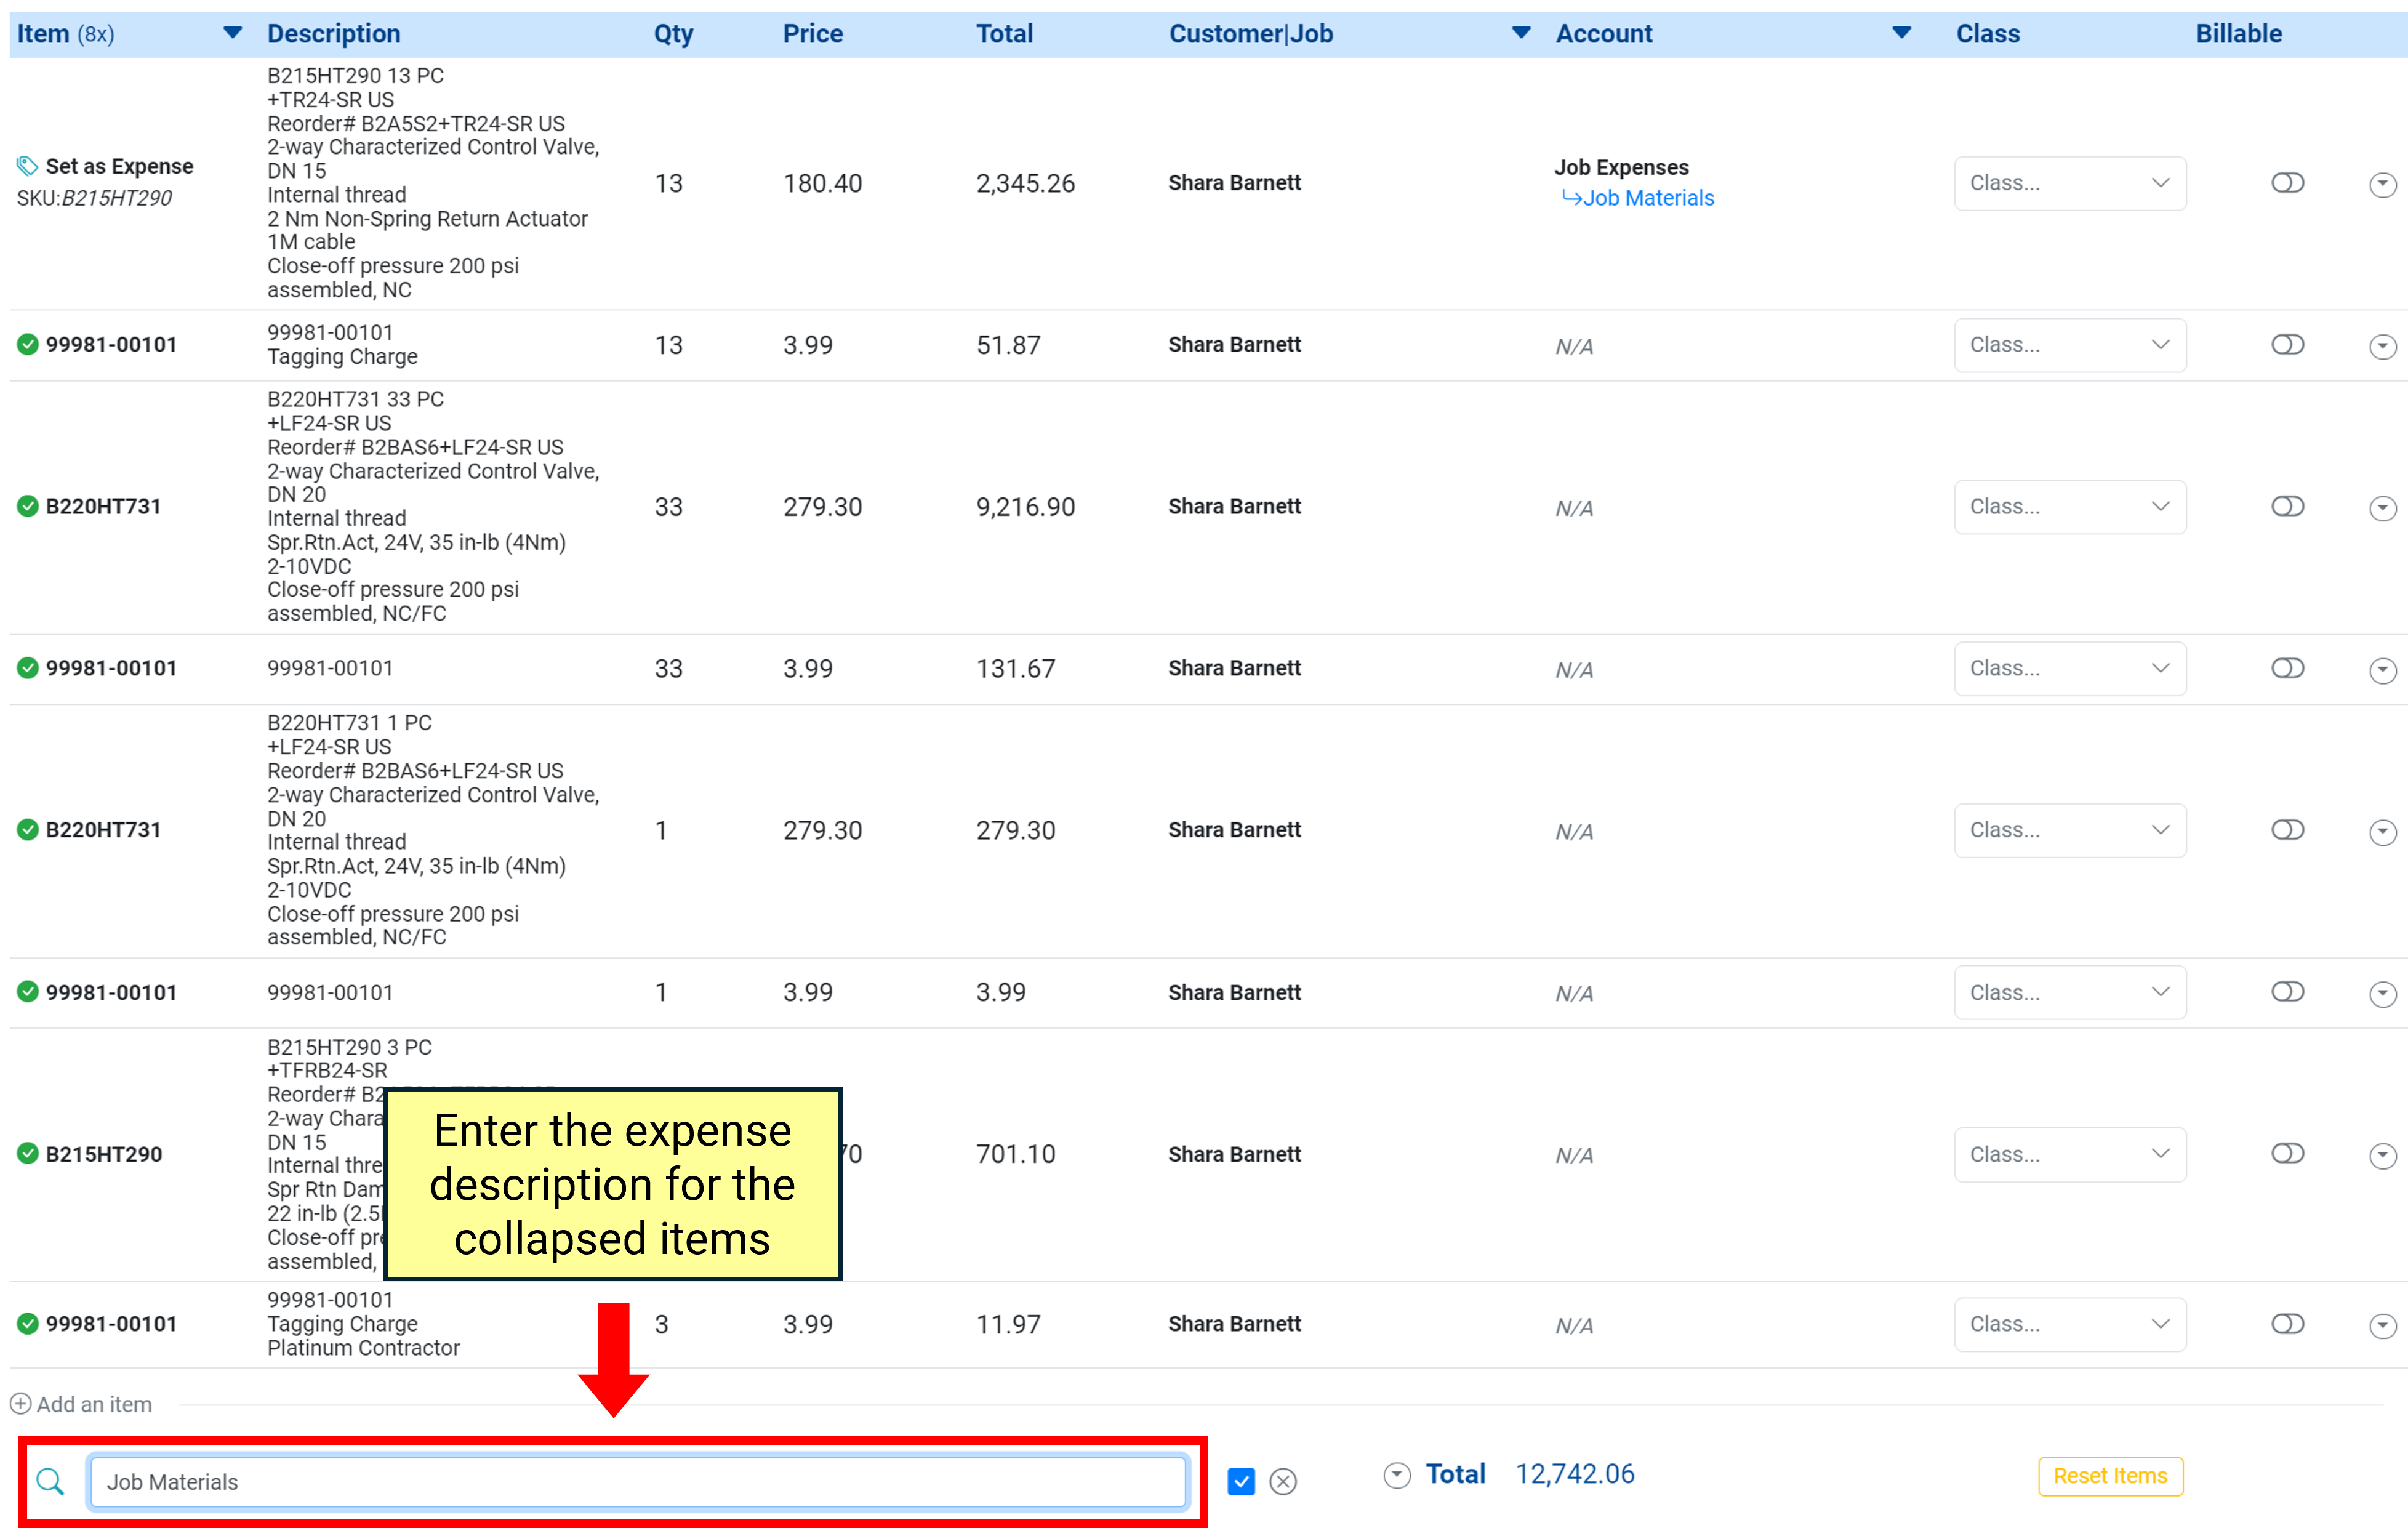
Going forward, MakersHub will collapse all line items from this vendor.

Single Expense Line for ALL Bills
Should you want all bills to be collapsed into a single line item. Navigate to Bill Settings by clicking your name in the top right corner and selecting Admin.
Navigate to the Bill Processing section. Toggle OFF the Extract Bill Items. Click Update Settings to save.
.png)
.png)
Approval Actions
If an additional approver is needed, click on Select an Approver… and choose a user from the dropdown.
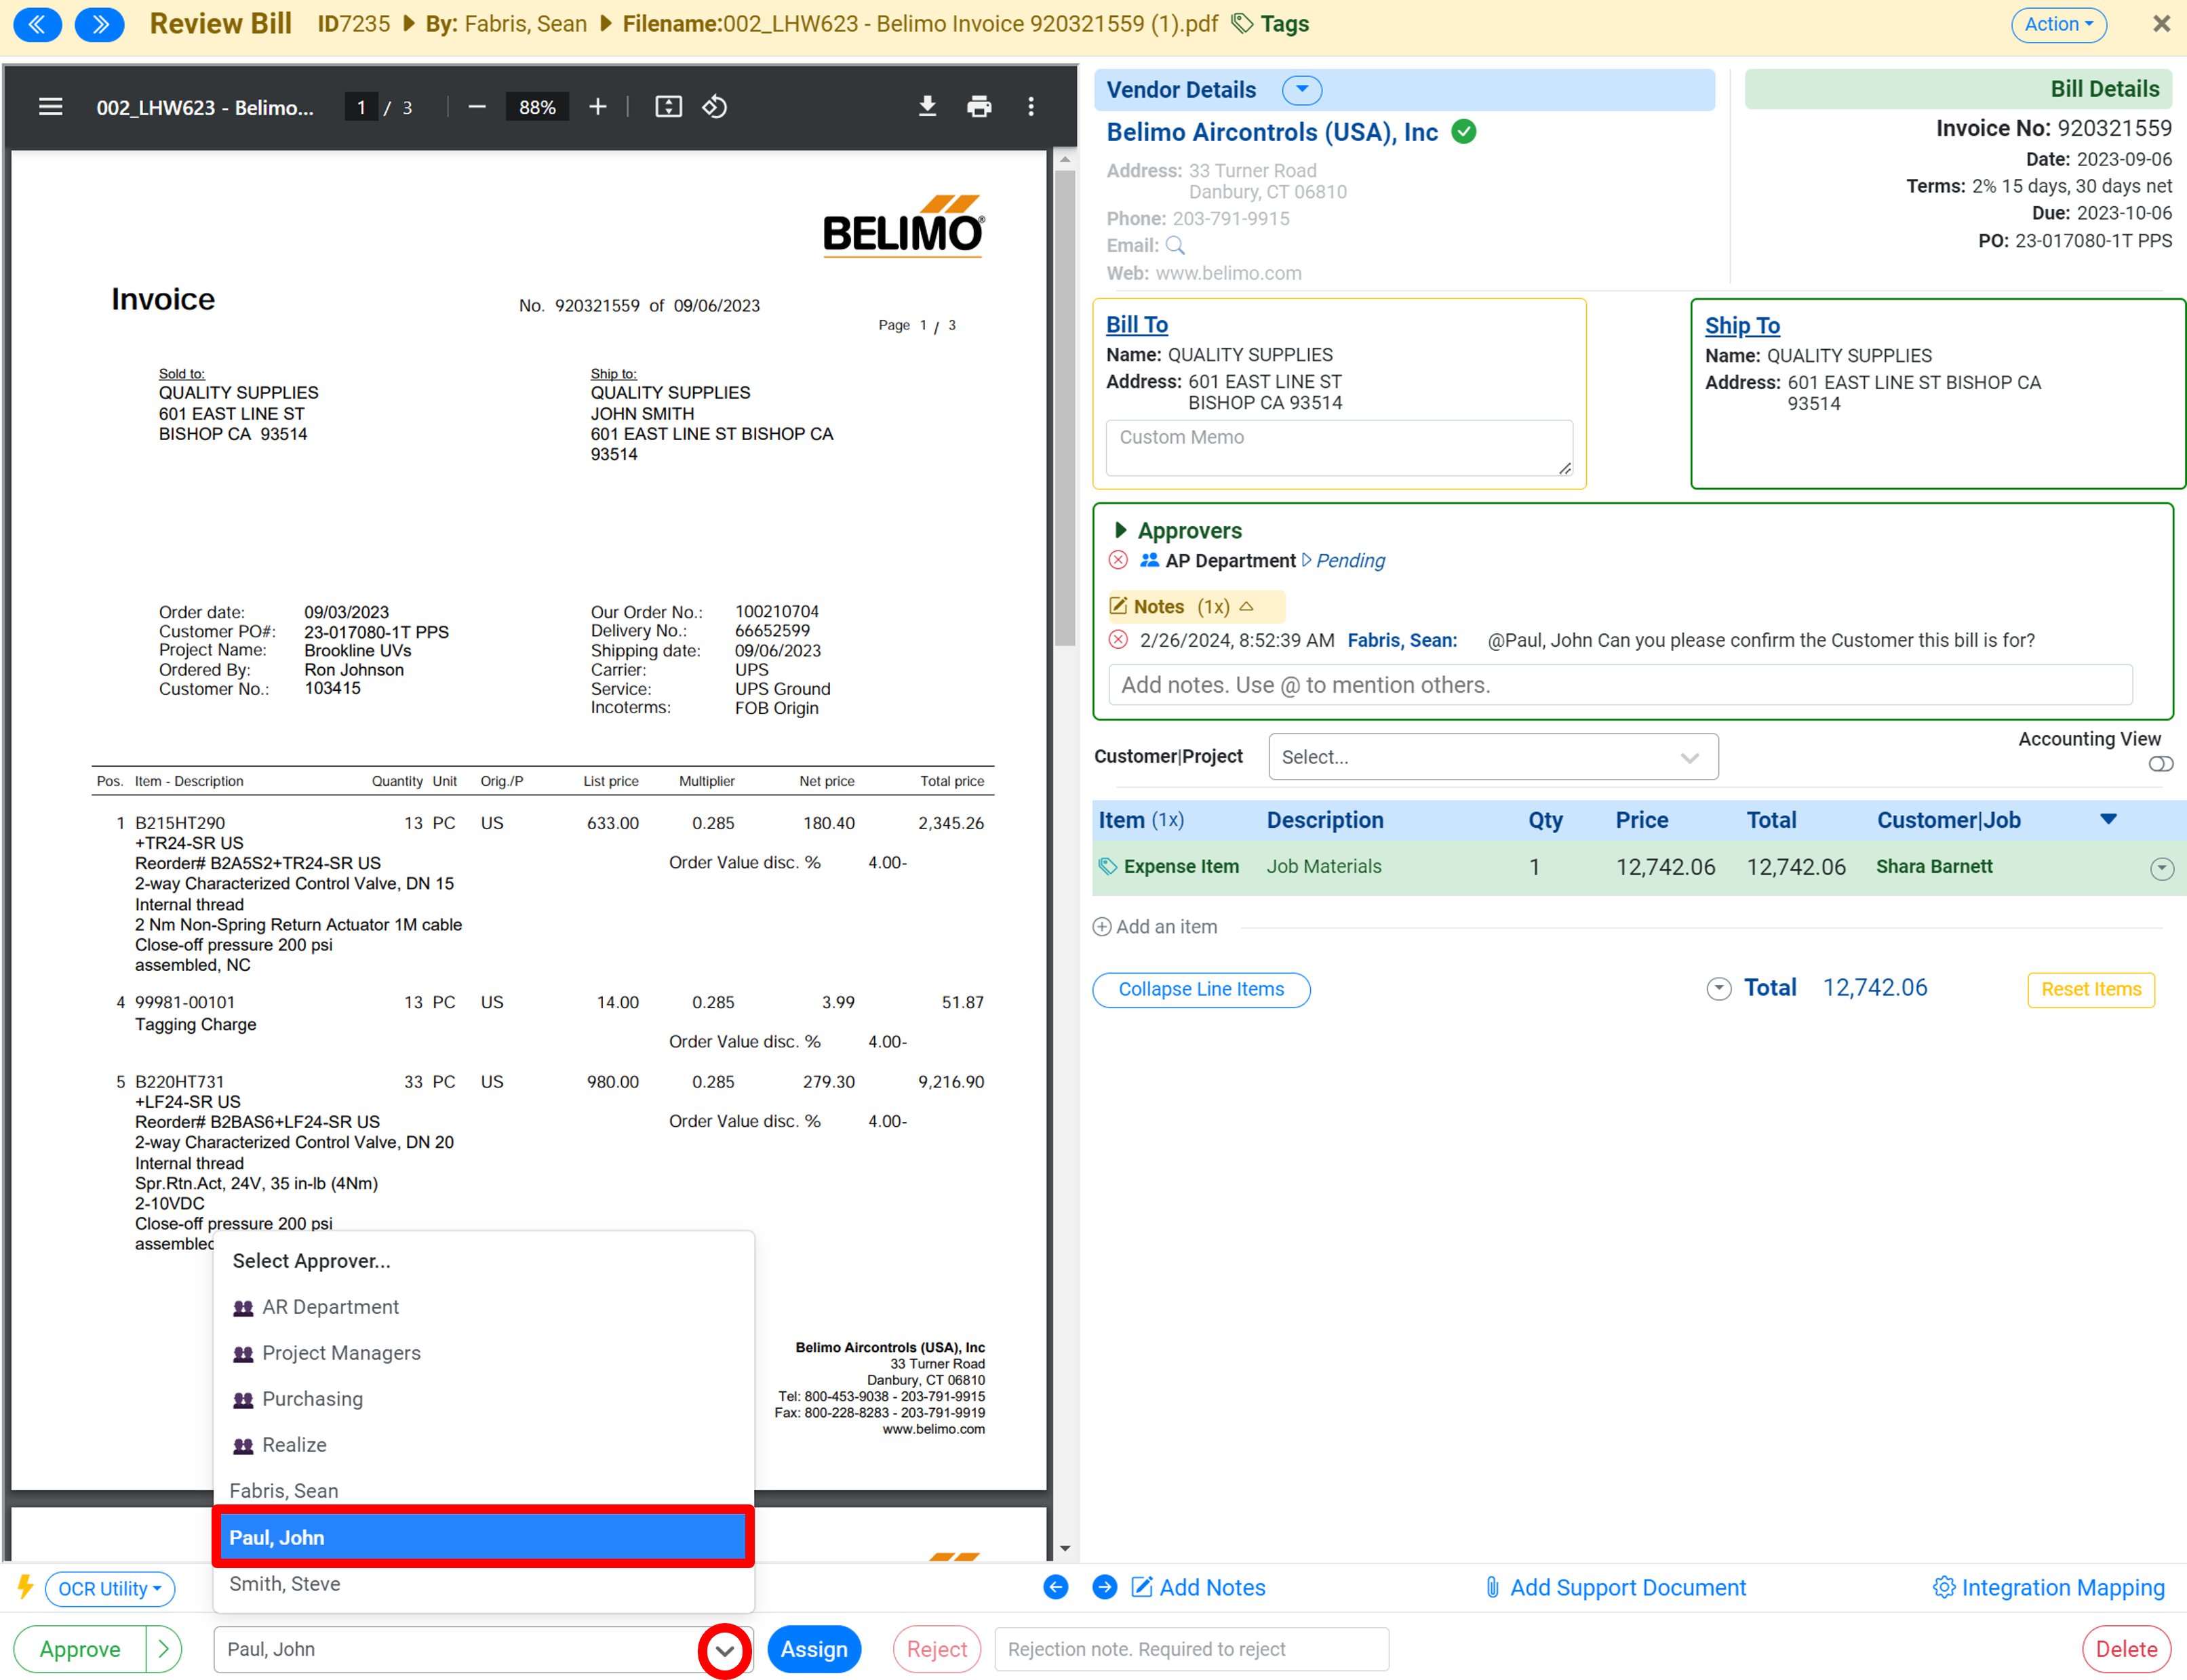
Click Assign. This will then route the bill to the selected user for approval before the bill becomes an active payable. John will then receive an email in his inbox informing him that he has been added as an approver to the bill.
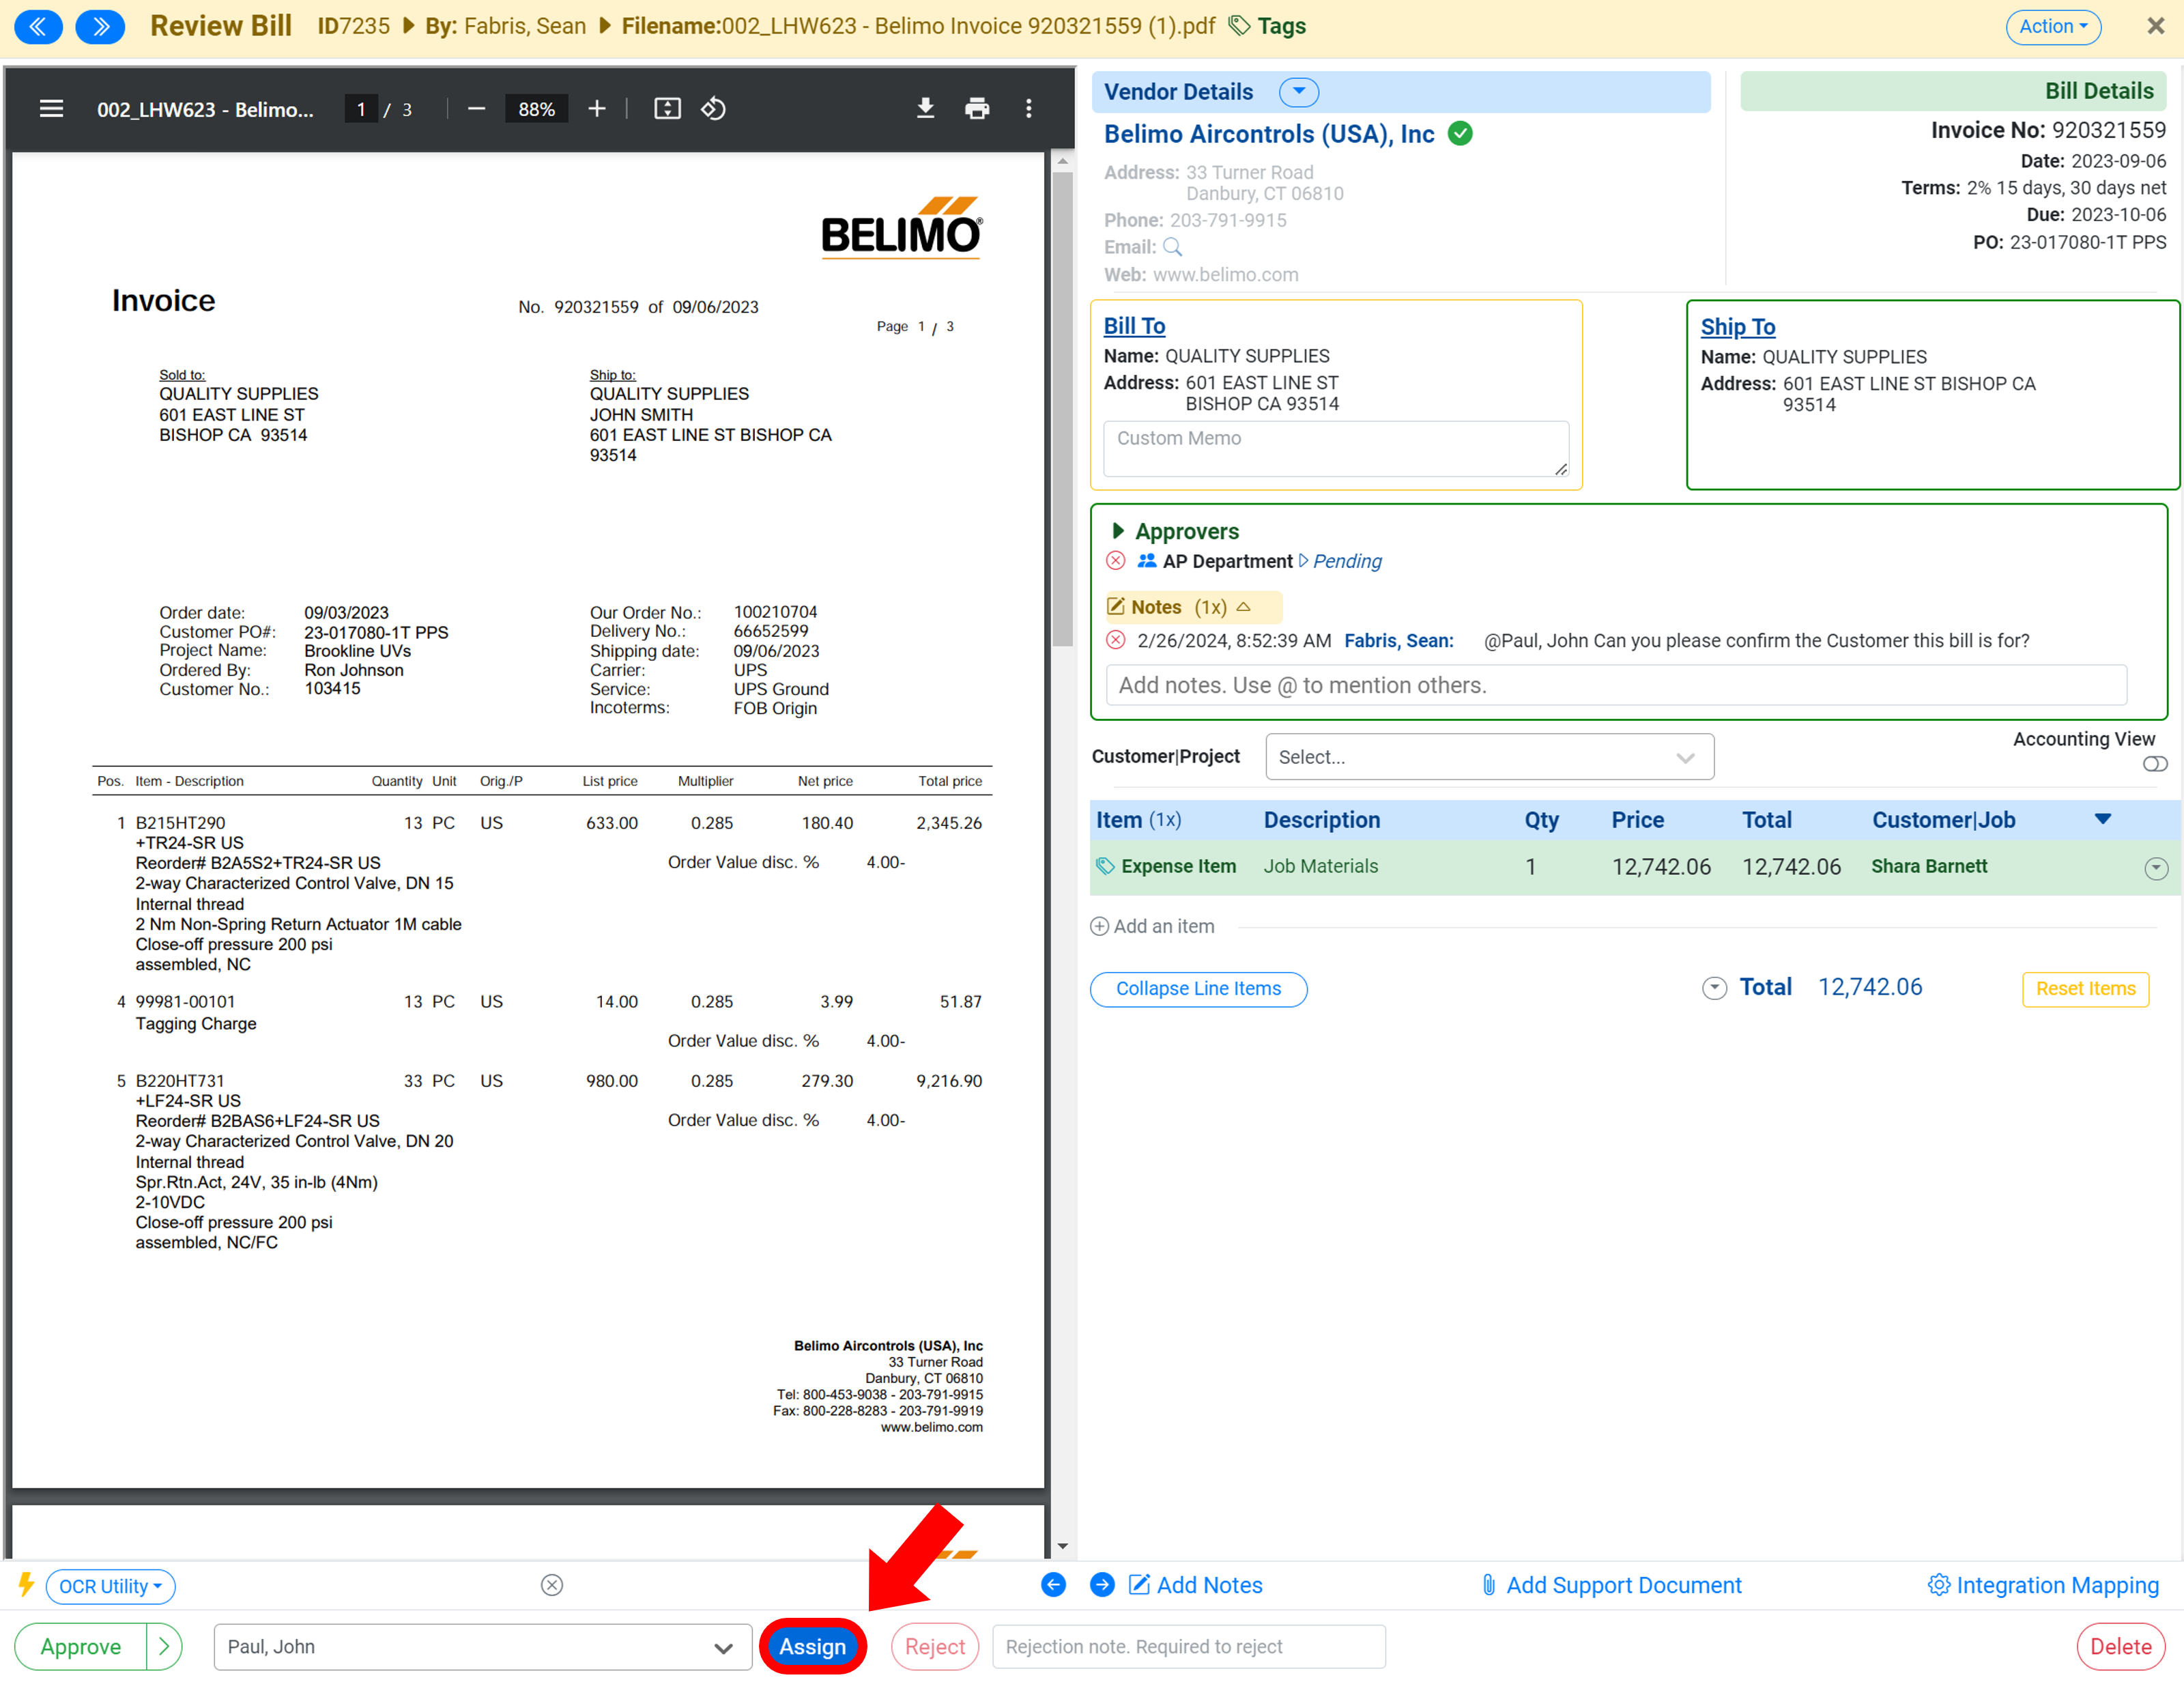
Once the bill is coded and ready to approve, click the Approve button in the bottom left-hand corner which will move the bill to become an active payable.

Admin Approval Status
By default, when admin approves a bill, it will override the approval workflow and become an active payable. This can be changed at any time. To disable admin override, click on your name in the top right corner and select Admin.
Under Bill Settings, navigate to Approval Workflow and toggle on Disable Admin Override.
.png)
.png)
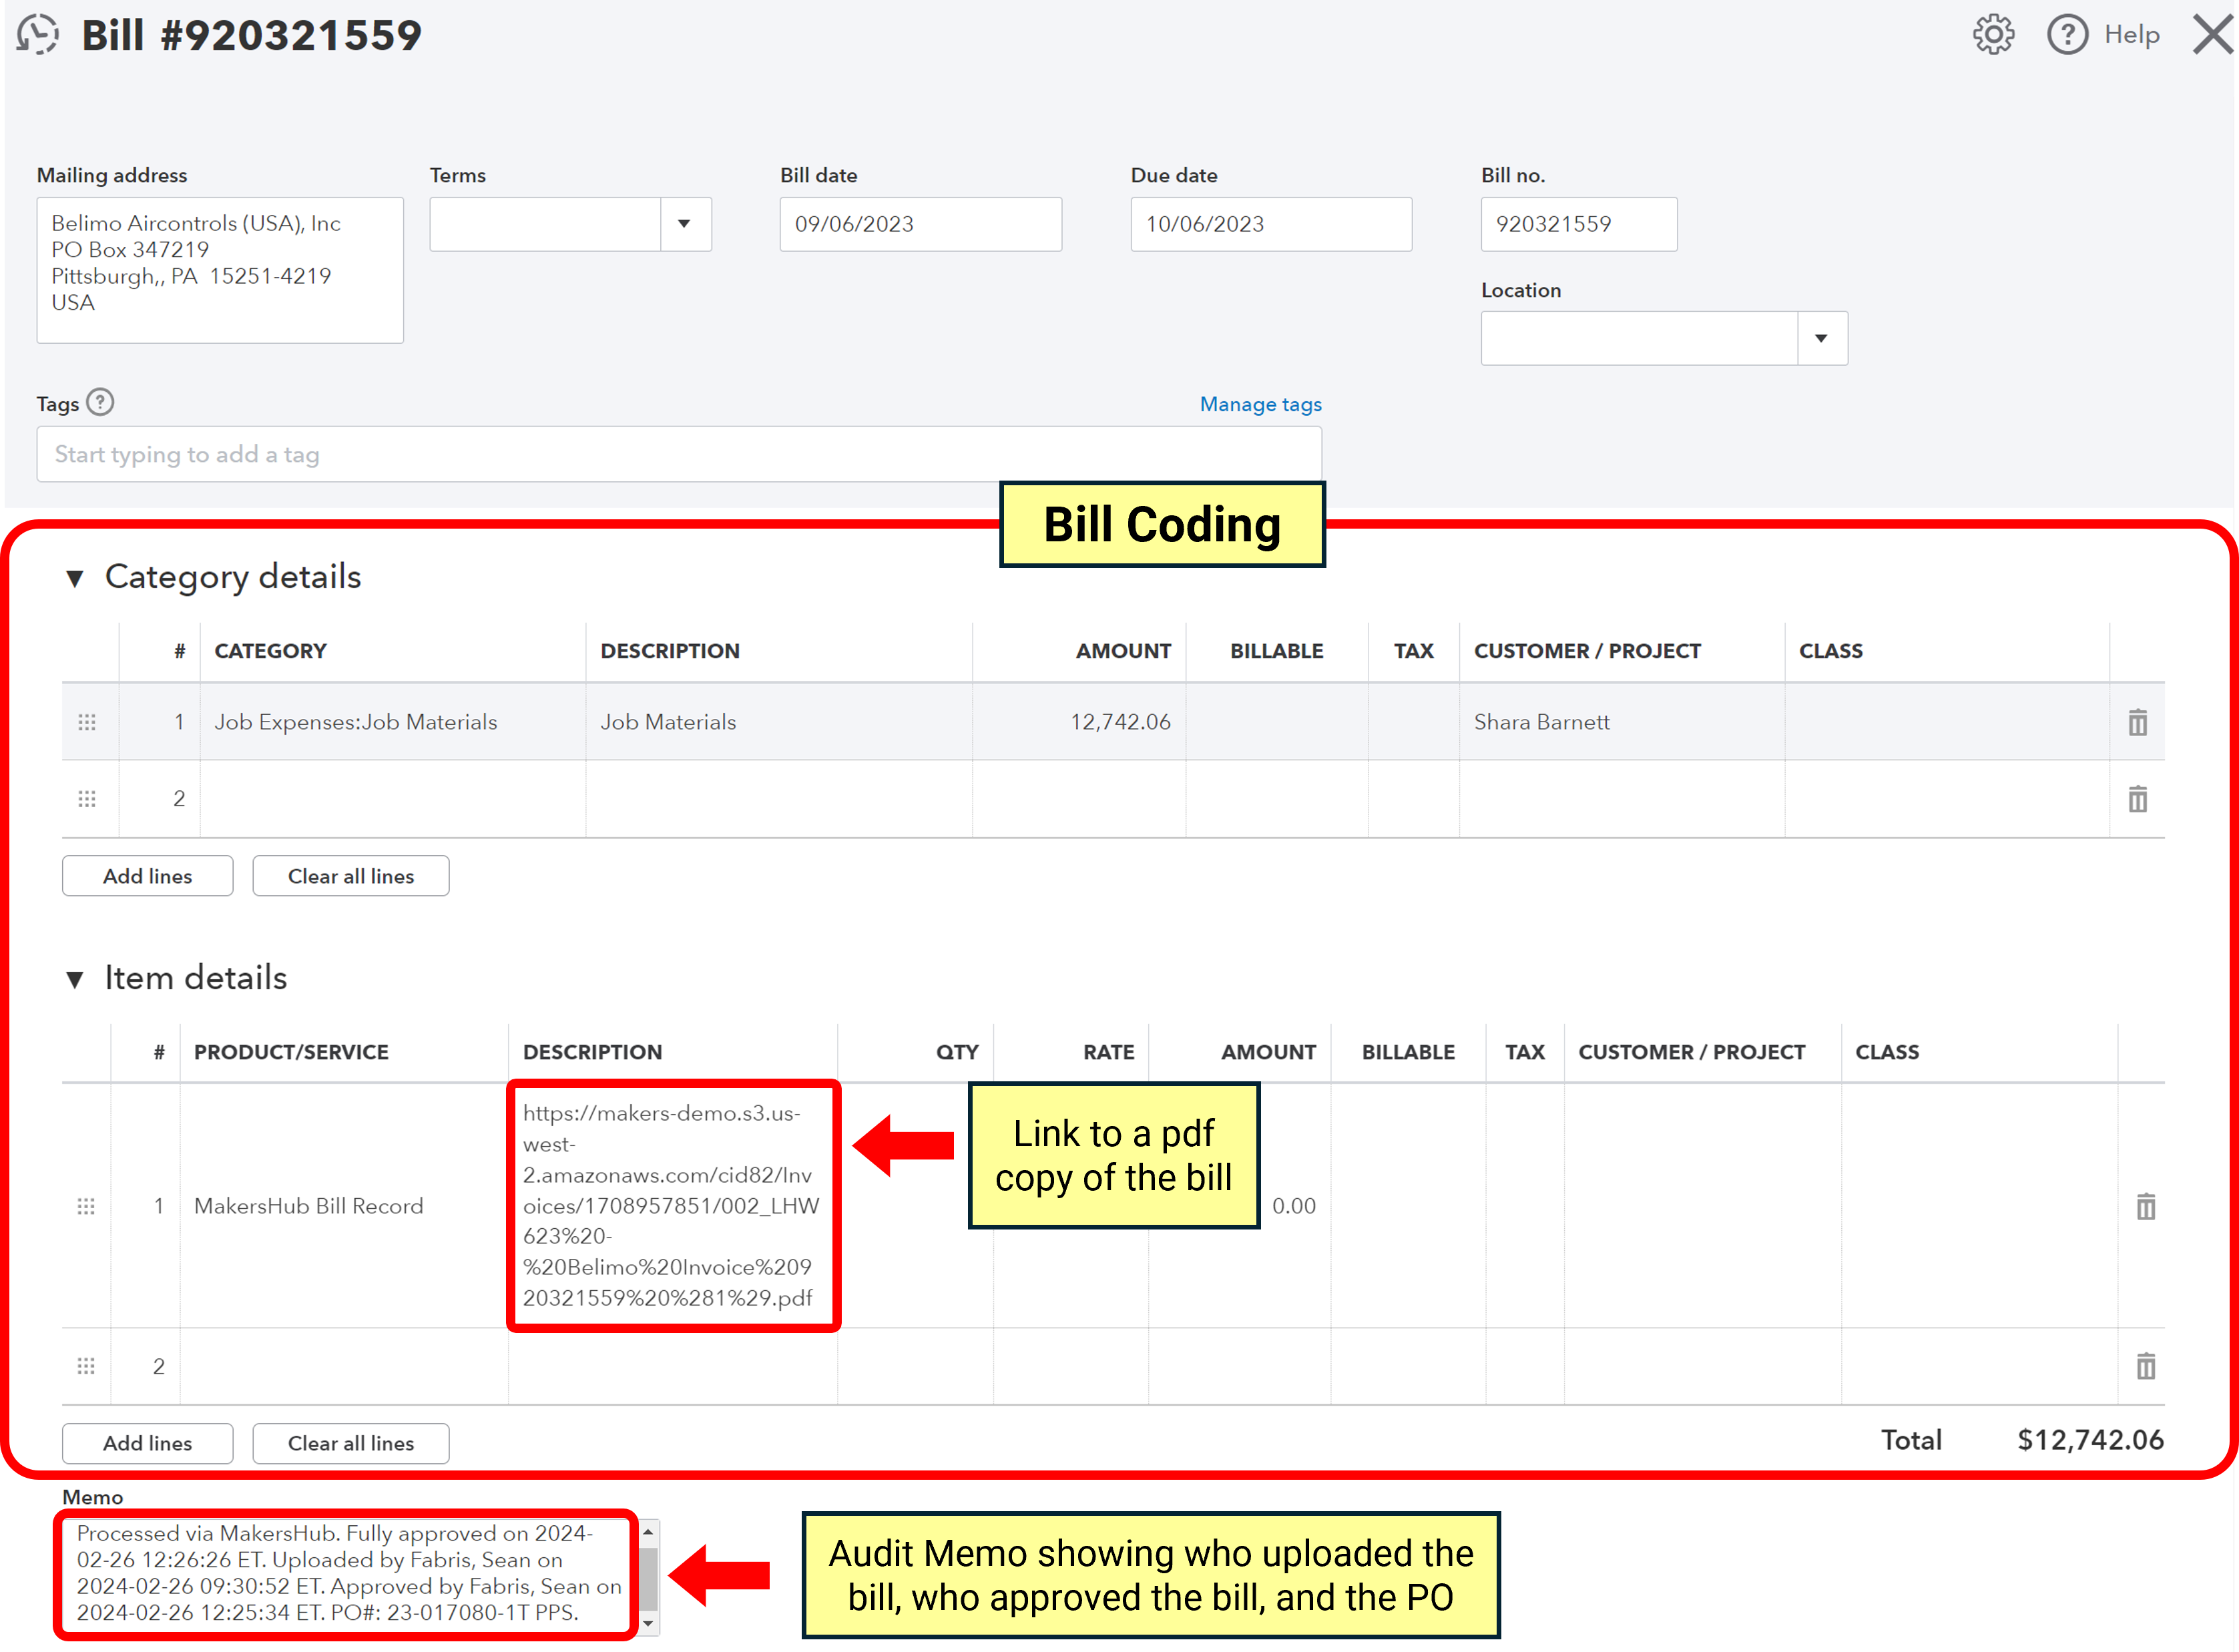
Syncing to QuickBooks Online
Once a bill has been approved by all parties, it will be moved to the Accounts Payable tab and synced with QuickBooks Online.
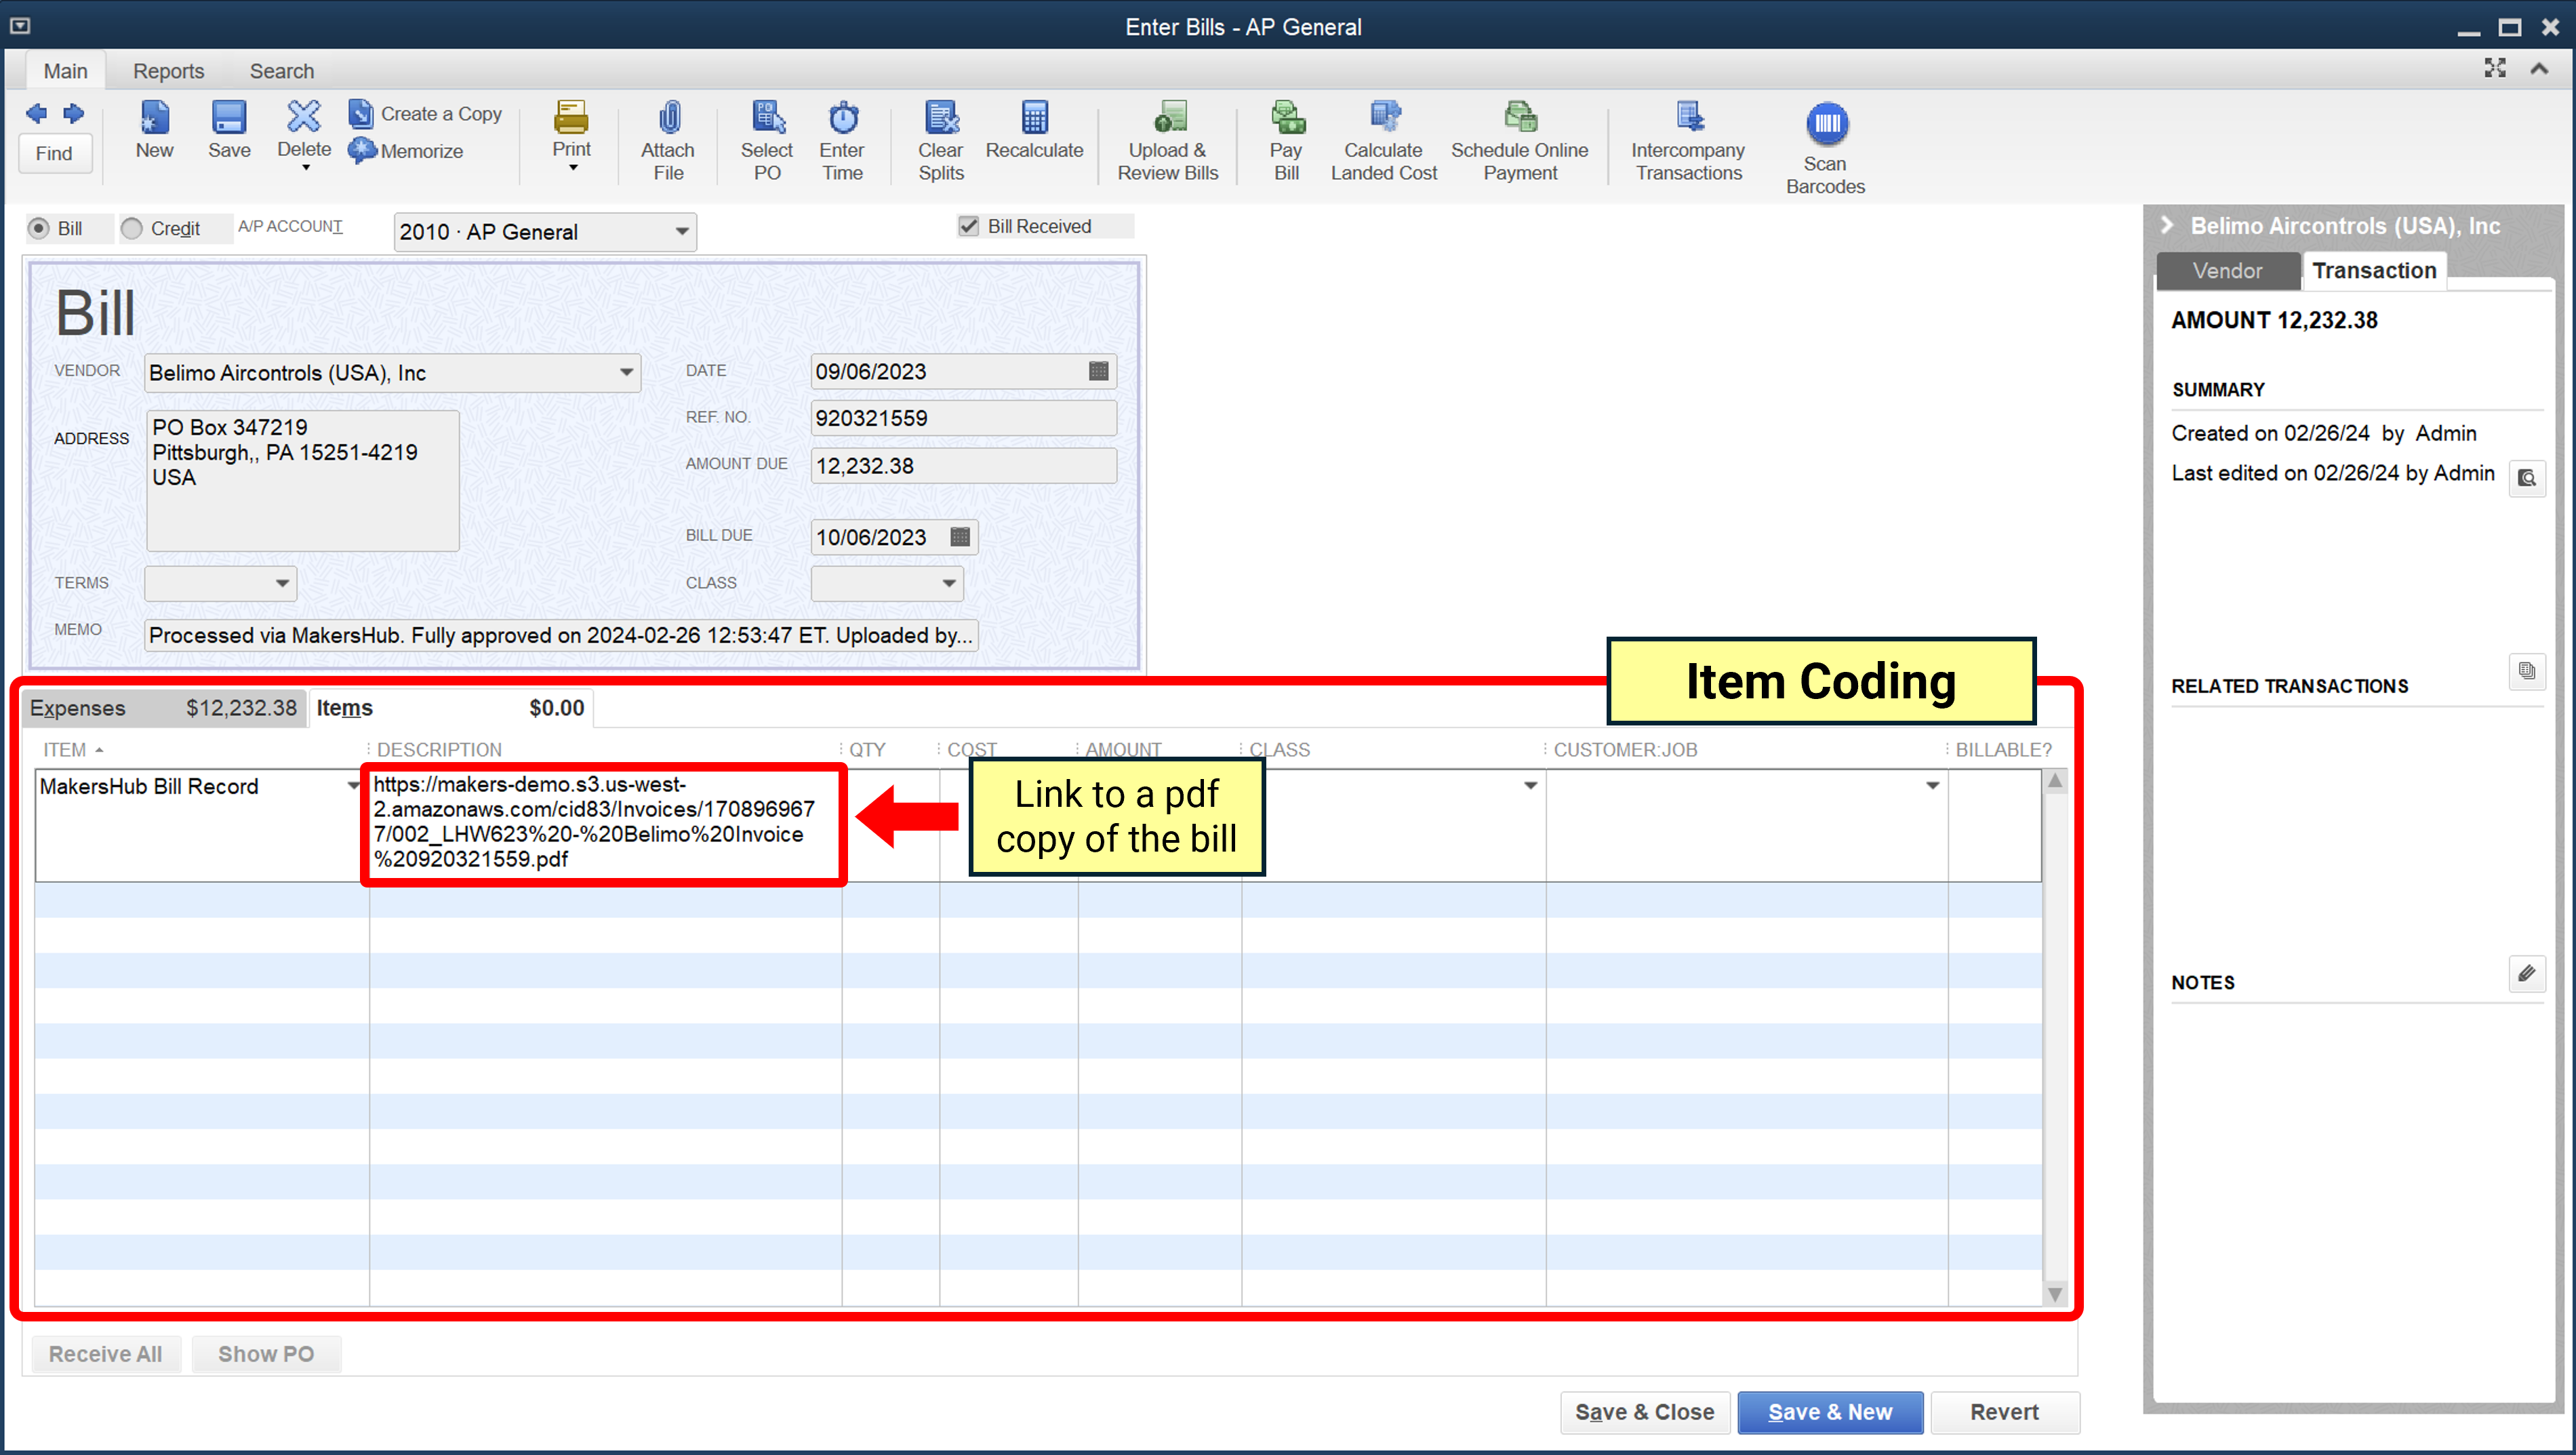
In the Memo field, you will see the bill was processed via MakersHub with the time stamp and an audit trail showing all of the approvers.
On every bill, you will see a zero dollar item titled MakersHub Bill Record. This holds a unique URL to each bill and can be accessed at any time.
Additionally if you uploaded a supporting document, an additional item will appear with a MakersHub Document Record.
Syncing to QuickBooks Desktop
The same detail is provided to QuickBooks Desktop after you run the QuickBooks Web Connector. To update the Web Connector, Navigate to QuickBooks. Go to File>App Management>Update Web Services.
.png)
Check the box next to the MakersHub Connect application. Then click Update Selected. This will begin the process of syncing your files to MakersHub.
.png)
In the Memo field, you will see the bill was processed via MakersHub with the time stamp and an audit trail of everyone who approved the bill.
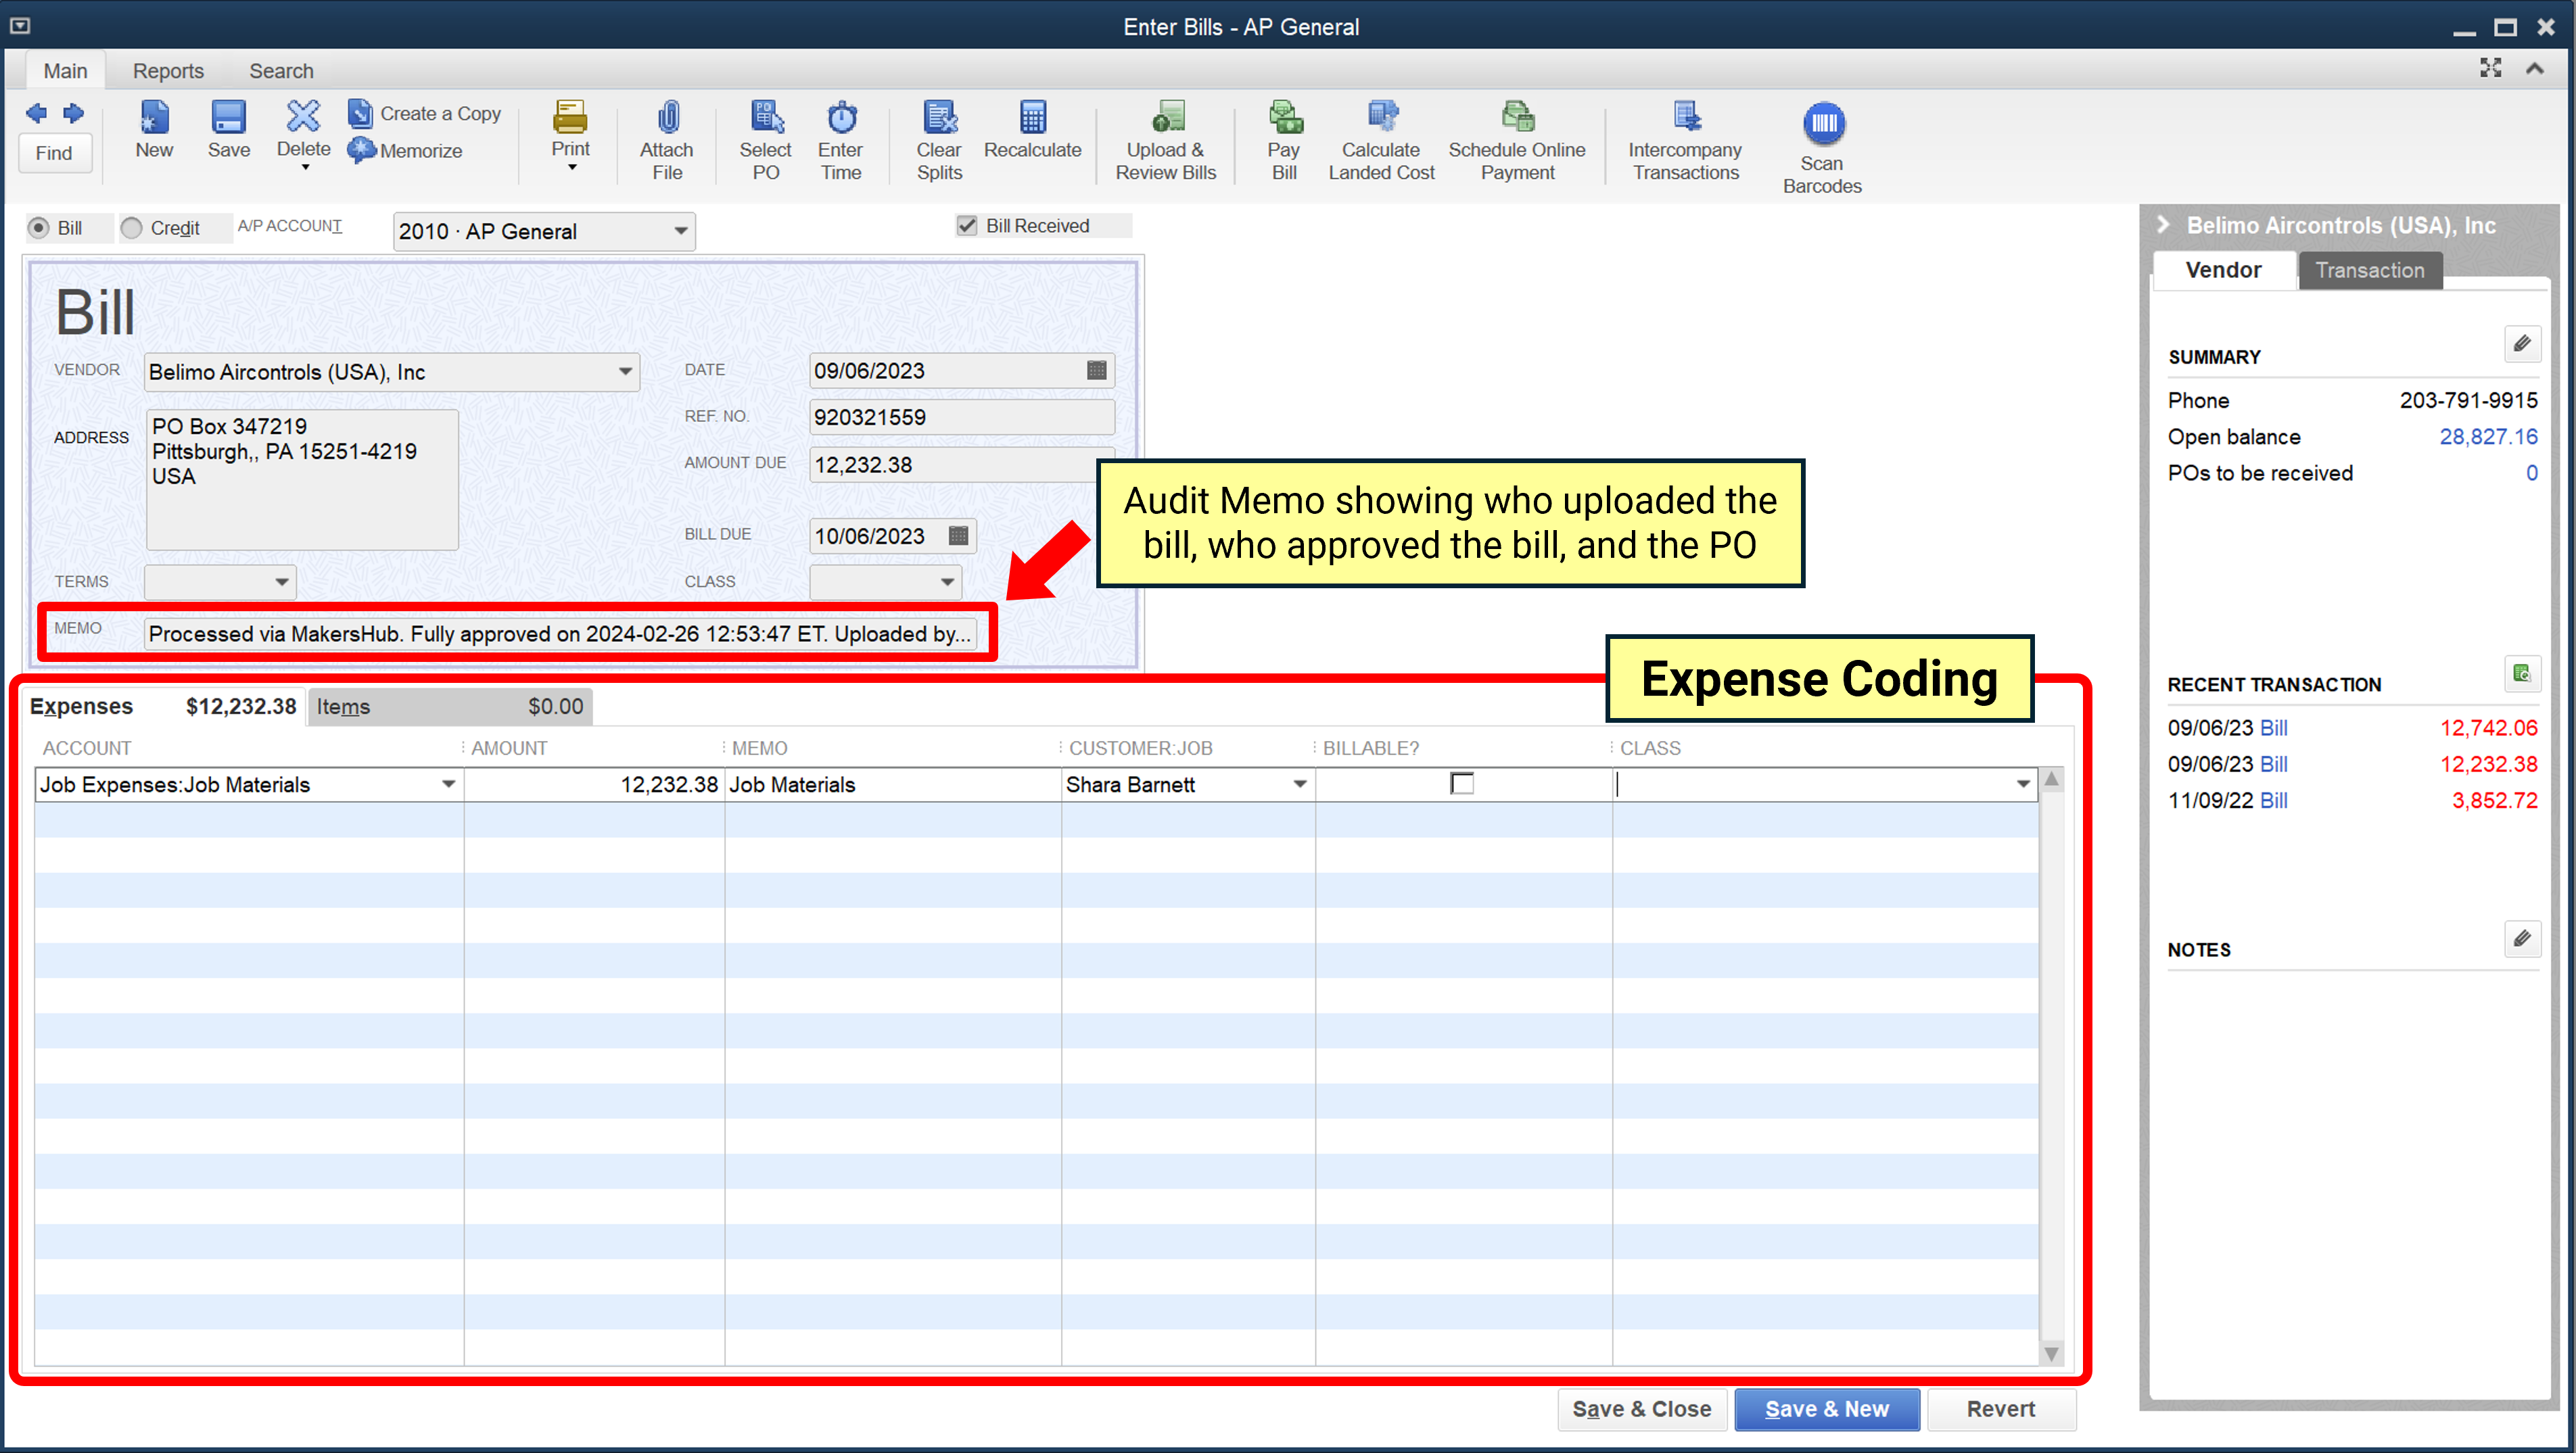
In the Items tab, you will see a zero dollar item titled MakersHub Bill Record. This holds a unique URL to each bill and can be accessed at any time.
Additionally if you uploaded a supporting document, an additional item will appear with a MakersHub Document Record.