Sometimes, you may have supporting documentation that is uploaded to MakersHub and you want to live alongside the bill. The steps below outline the process of marking these as Supporting Documents that you can attach and sync over to QuickBooks alongside the bill.
Creating Supporting Document
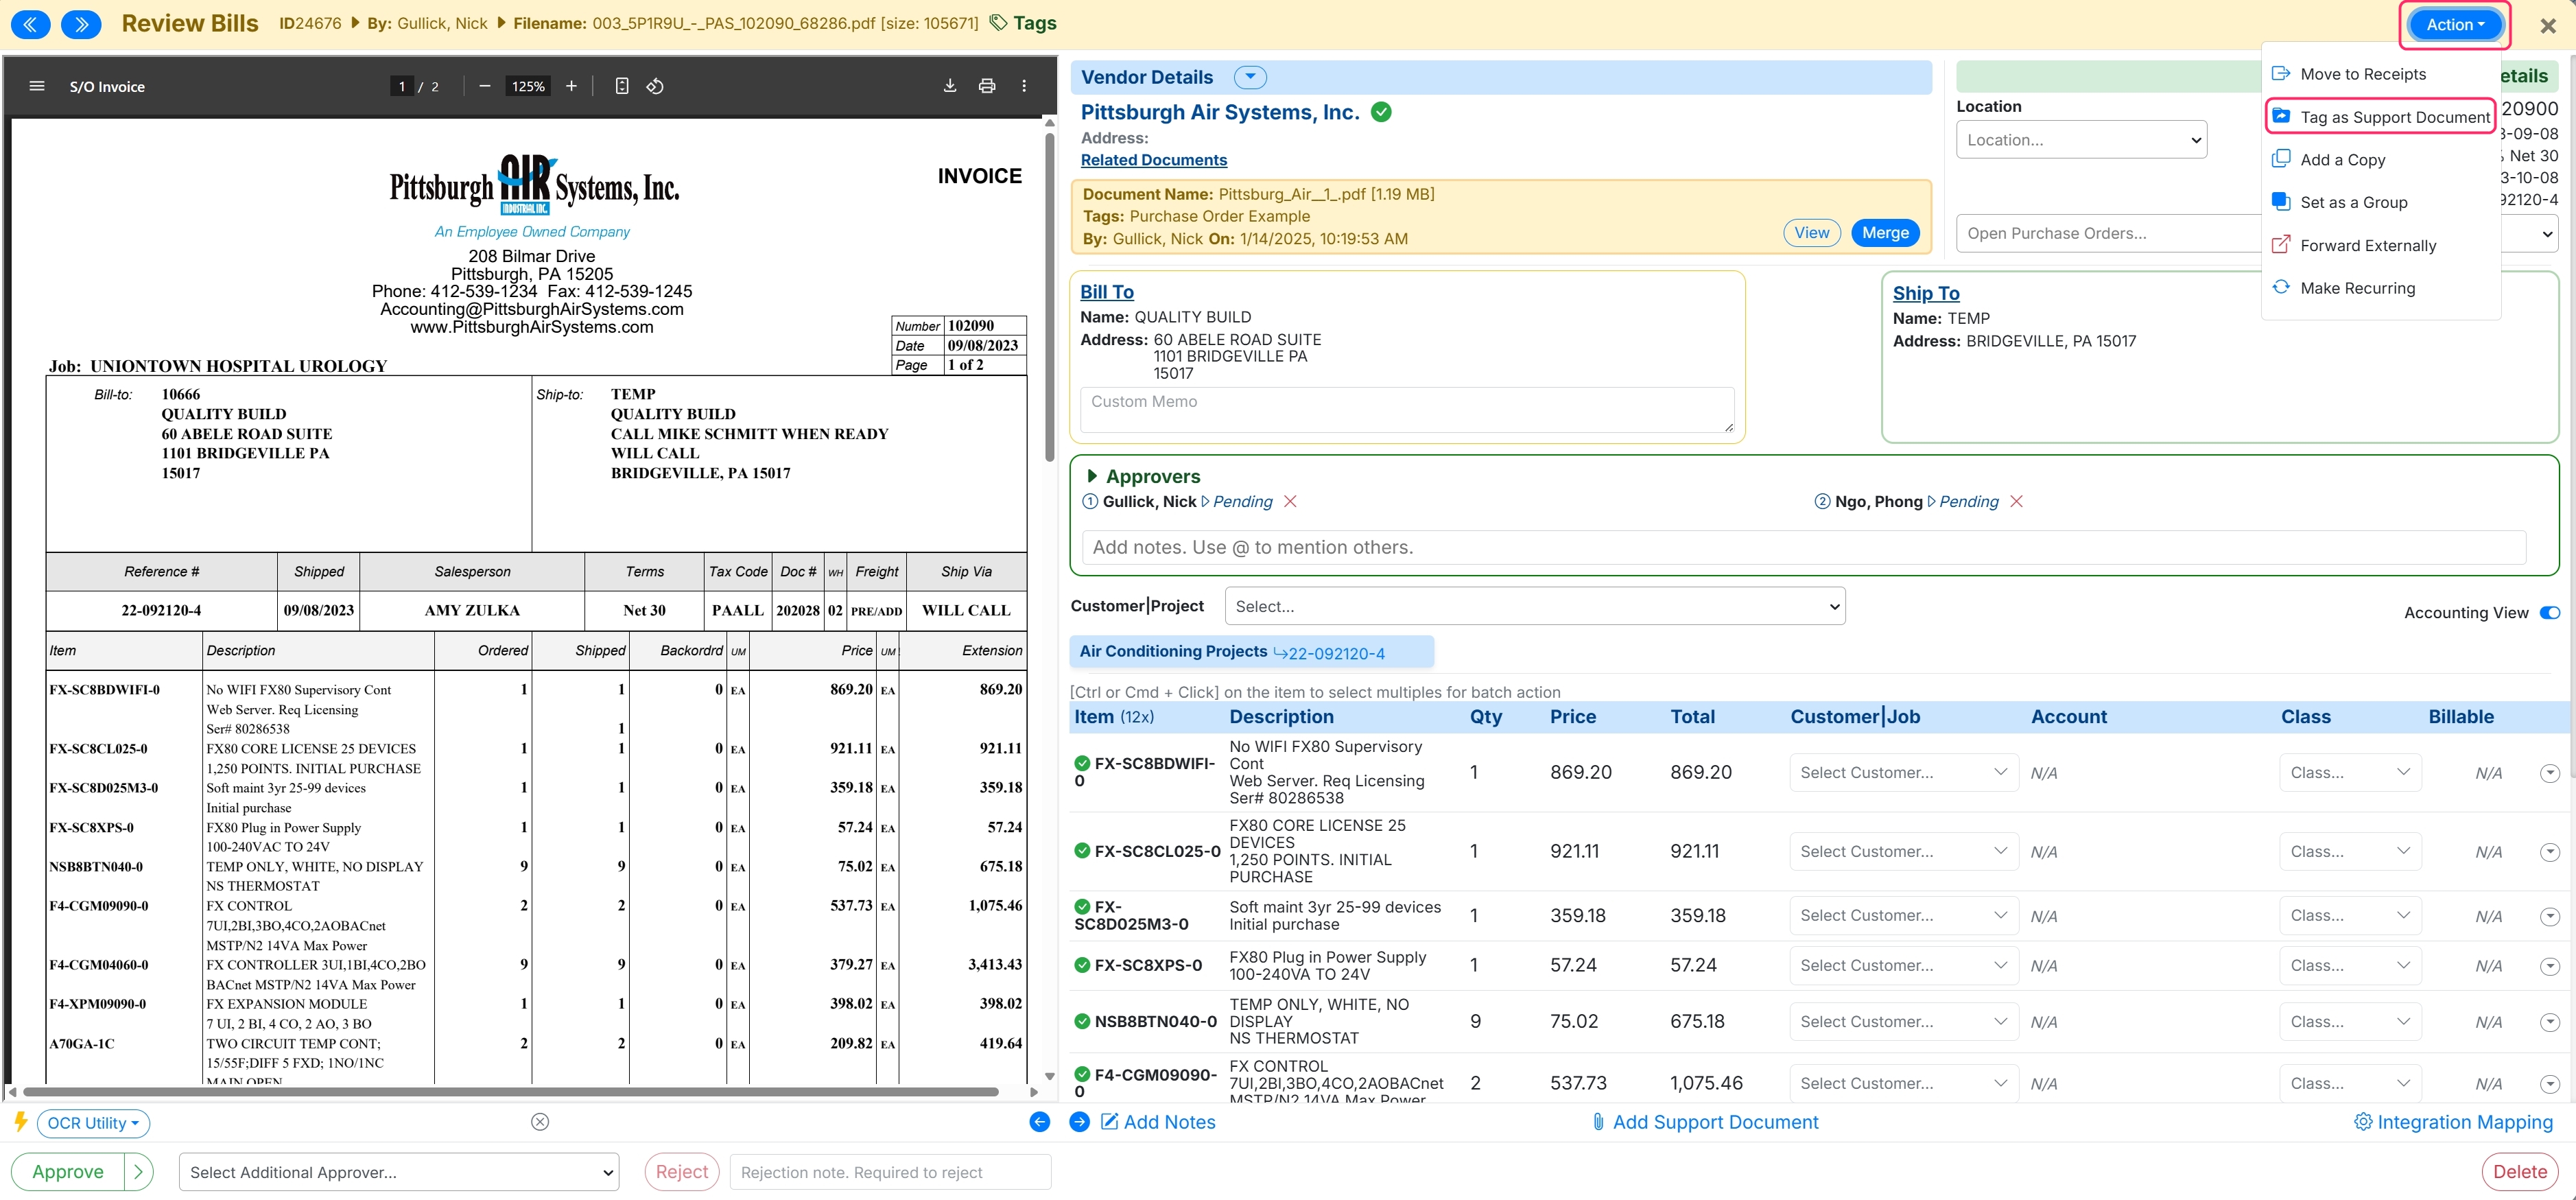
When you receive a supporting document in the Bills tab, you can mark it as such by clicking the Action button in the top right of the document and selecting Tag as Support Document.
Attaching Supporting Document
Once you have added a Supporting Document, you can open a bill from the same vendor, and a Related Documents box will appear, listing all Supporting Documents for that vendor. You can then merge the Supporting Document into the bill by clicking the Merge button.
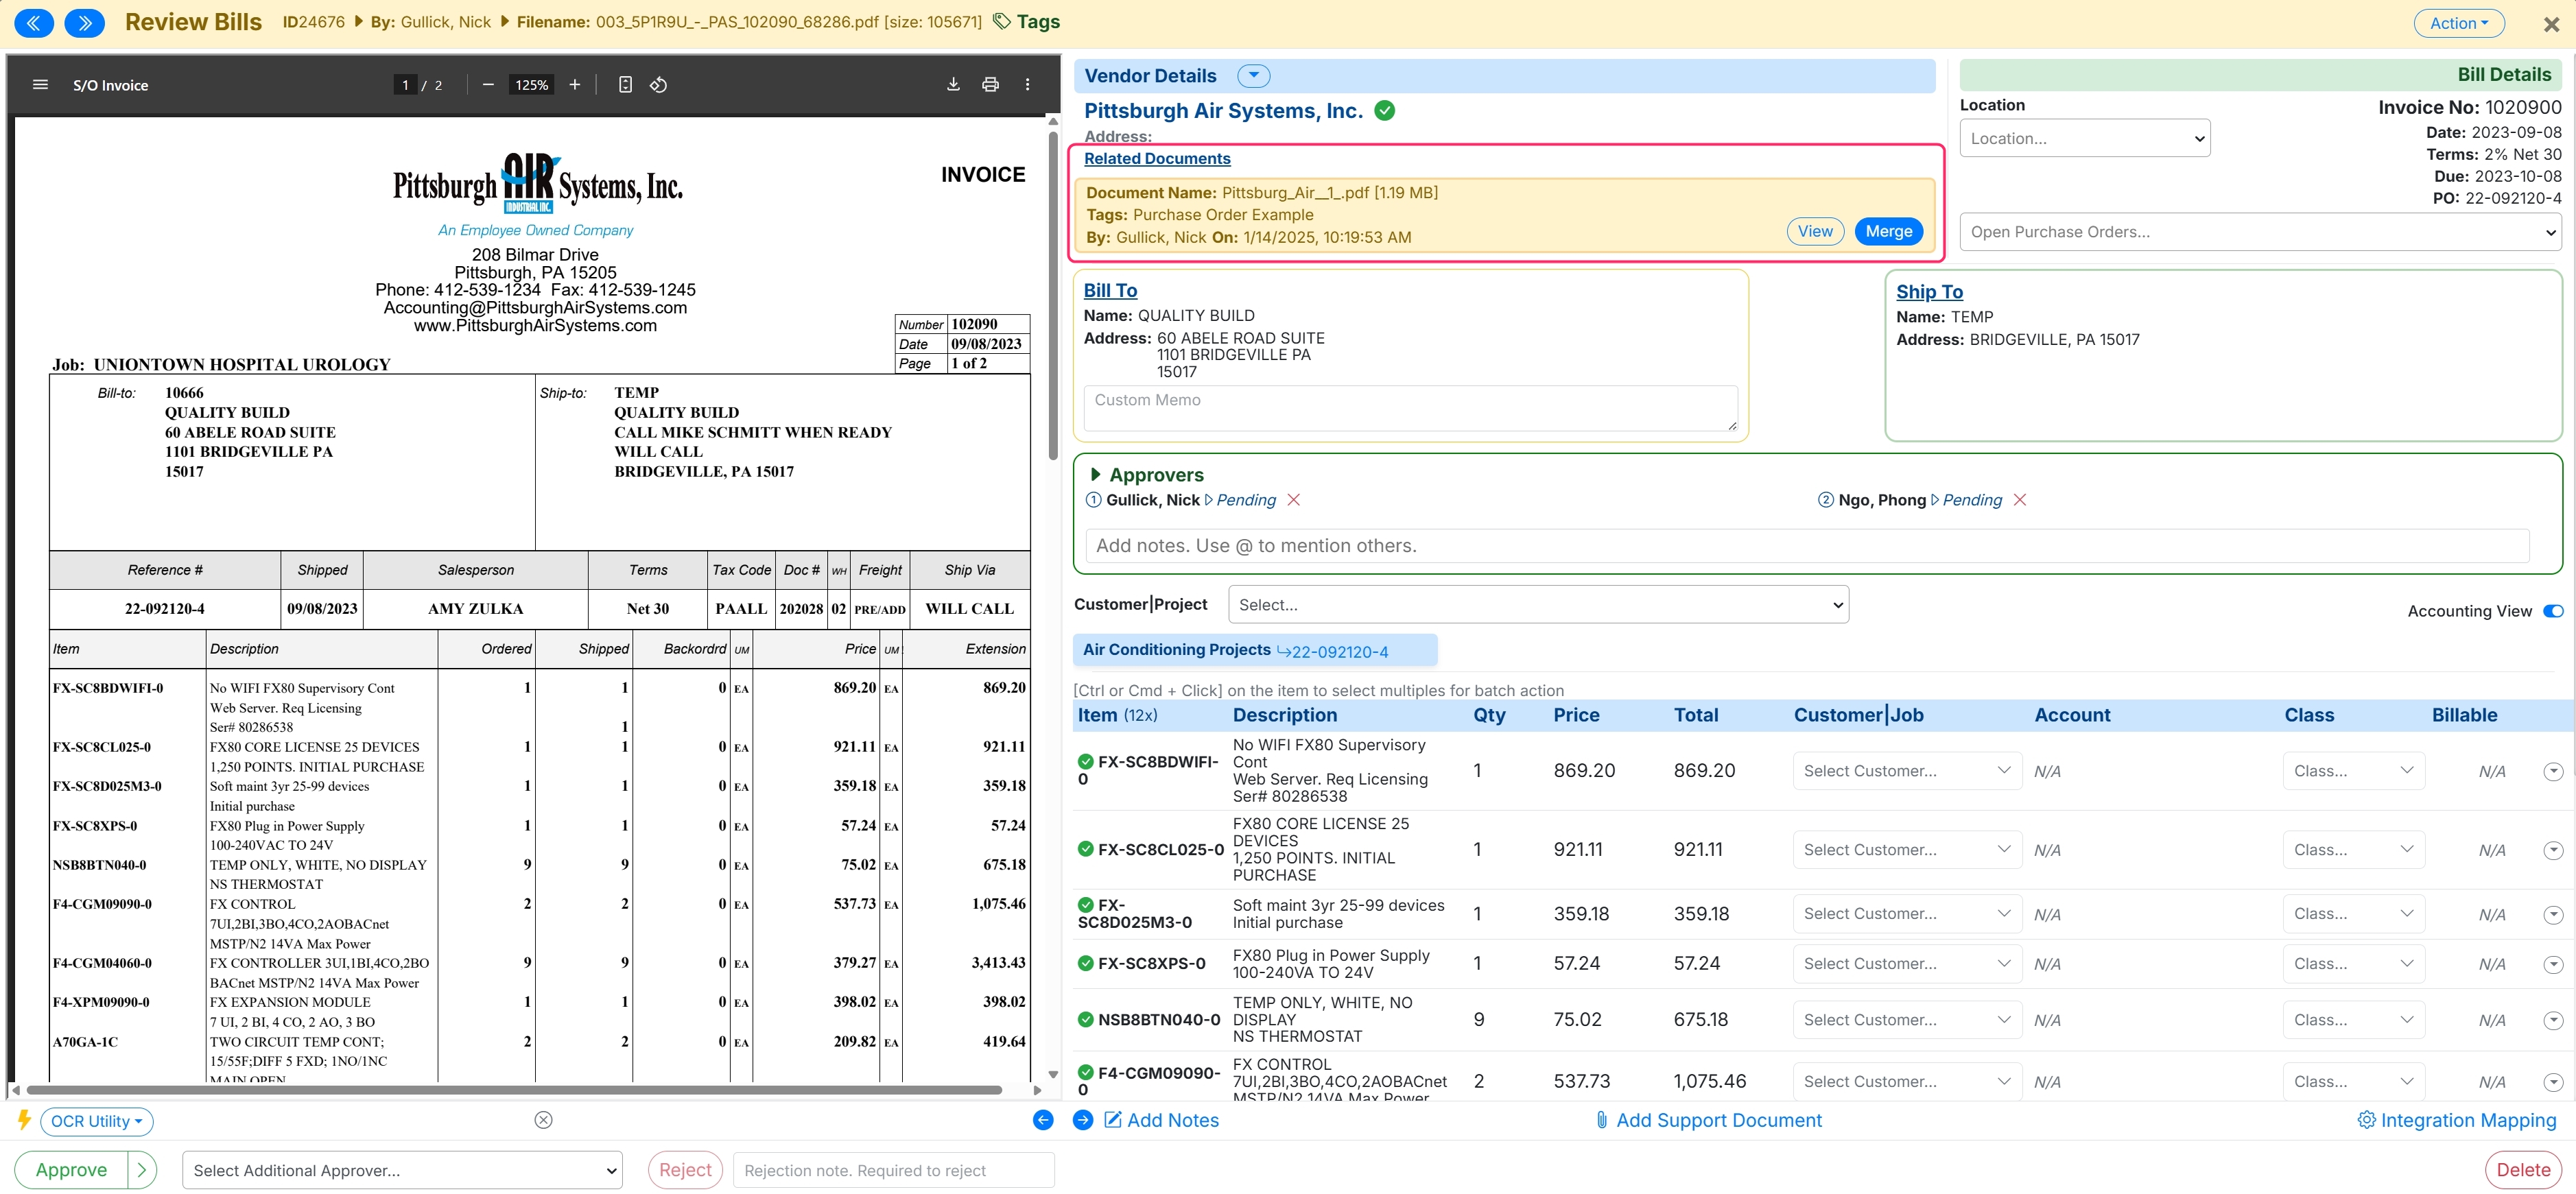
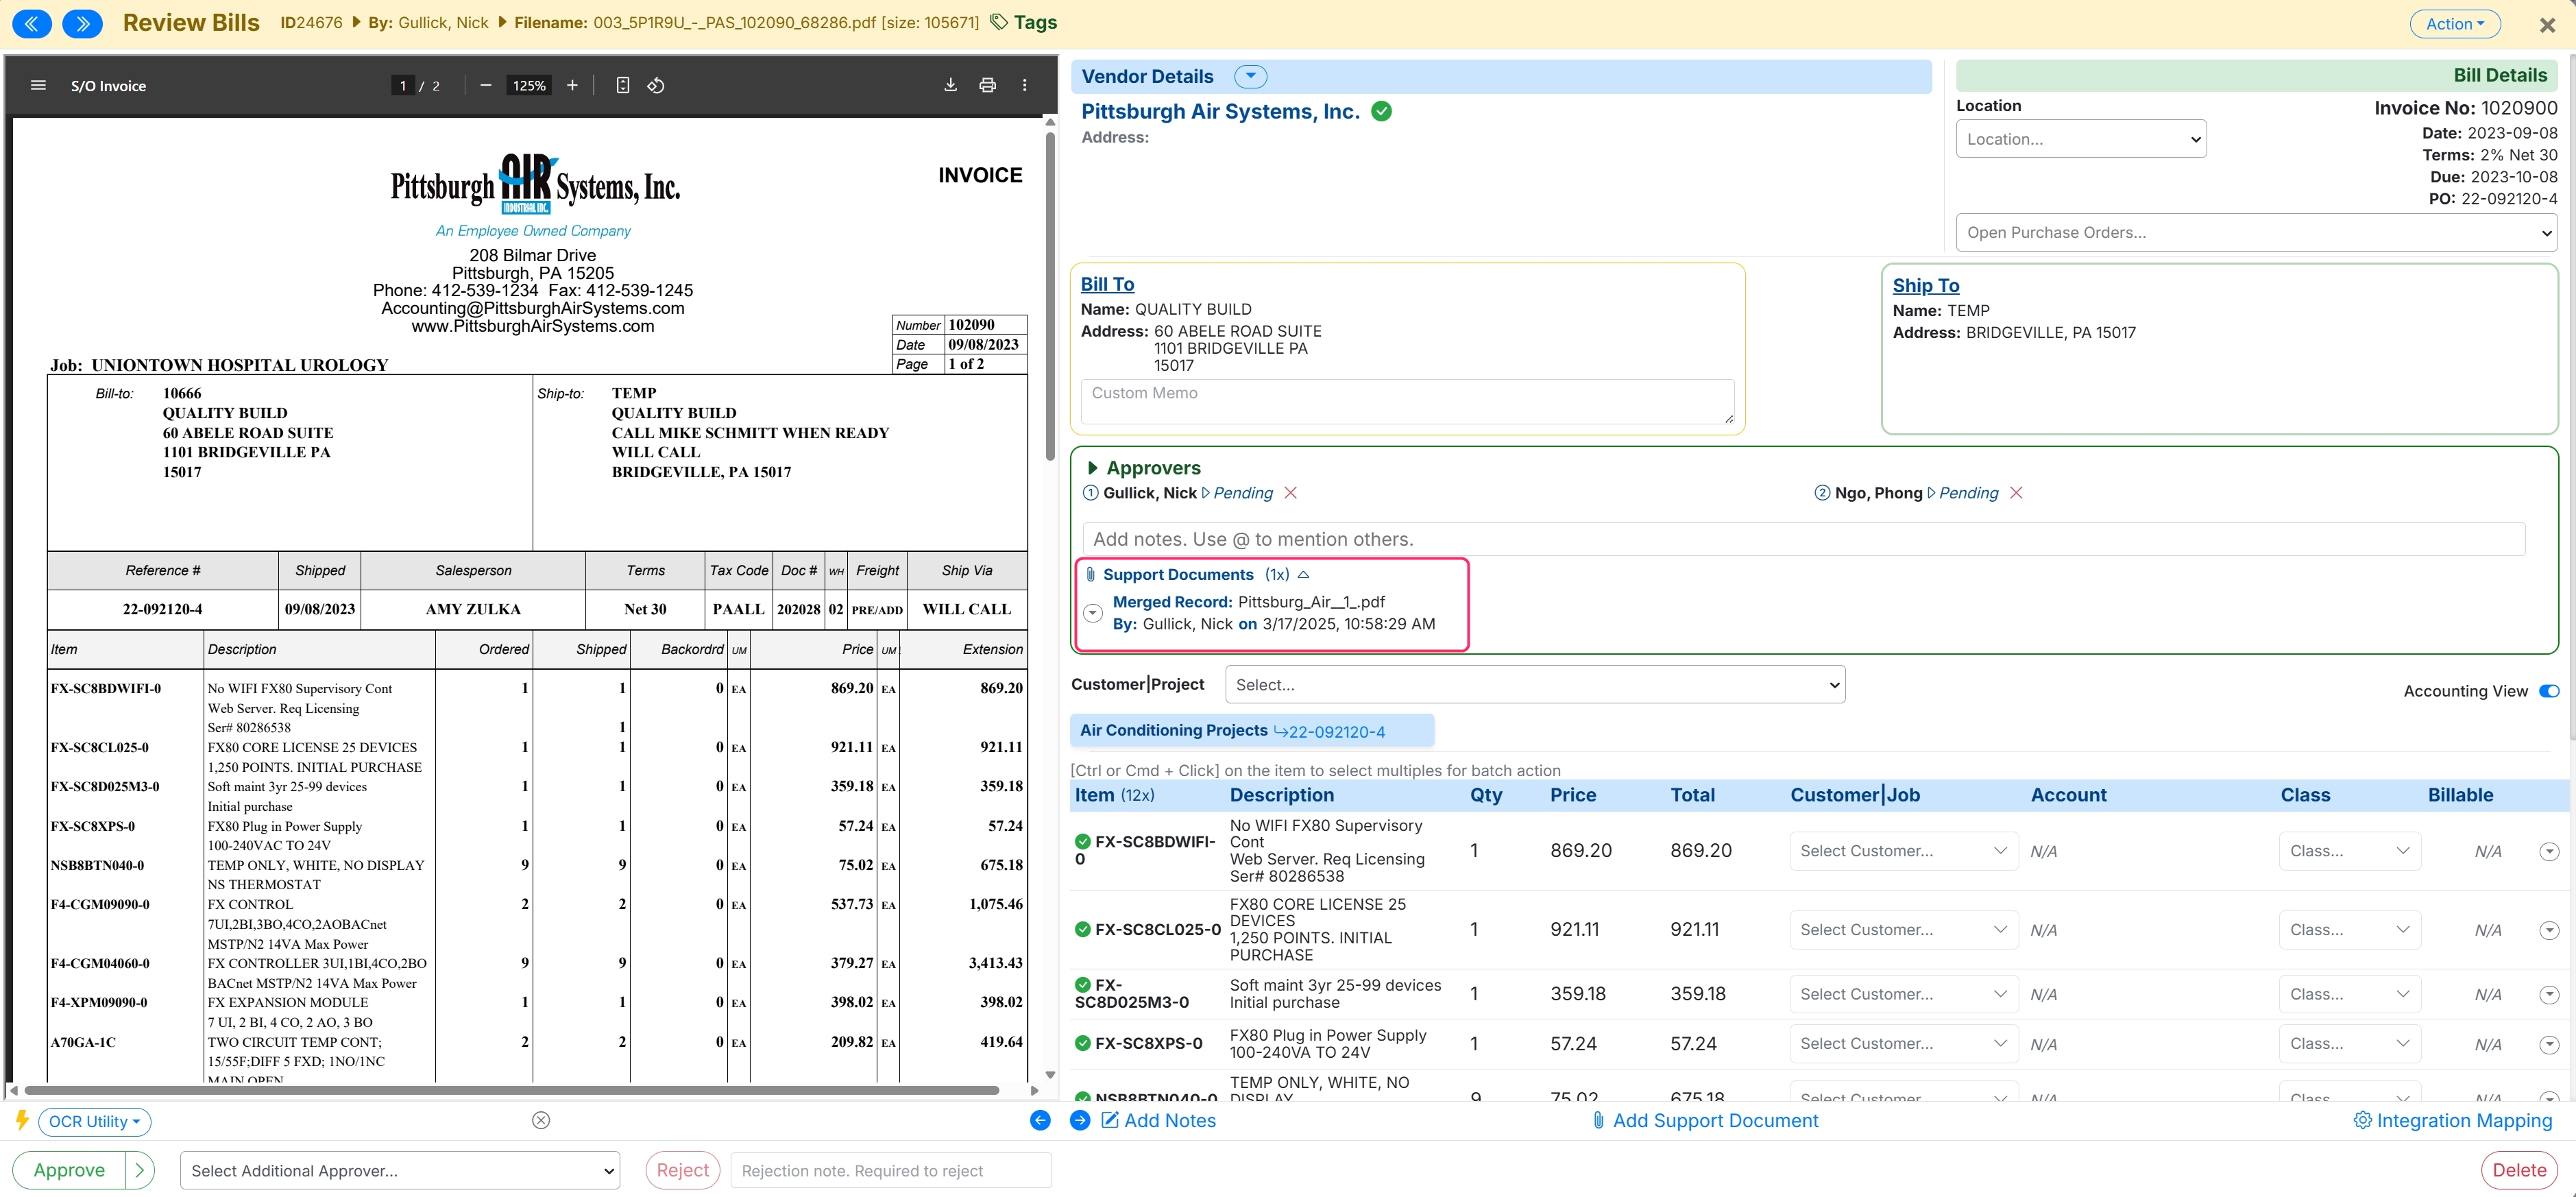
Once merged, the document will appear in the Notes section and will be attached to the bill record.
Viewing List of Supporting Documents
Users can view the total list of Supporting Documents in the bills tab by clicking on the Support Documents link in the upper right of the screen.
.jpg)
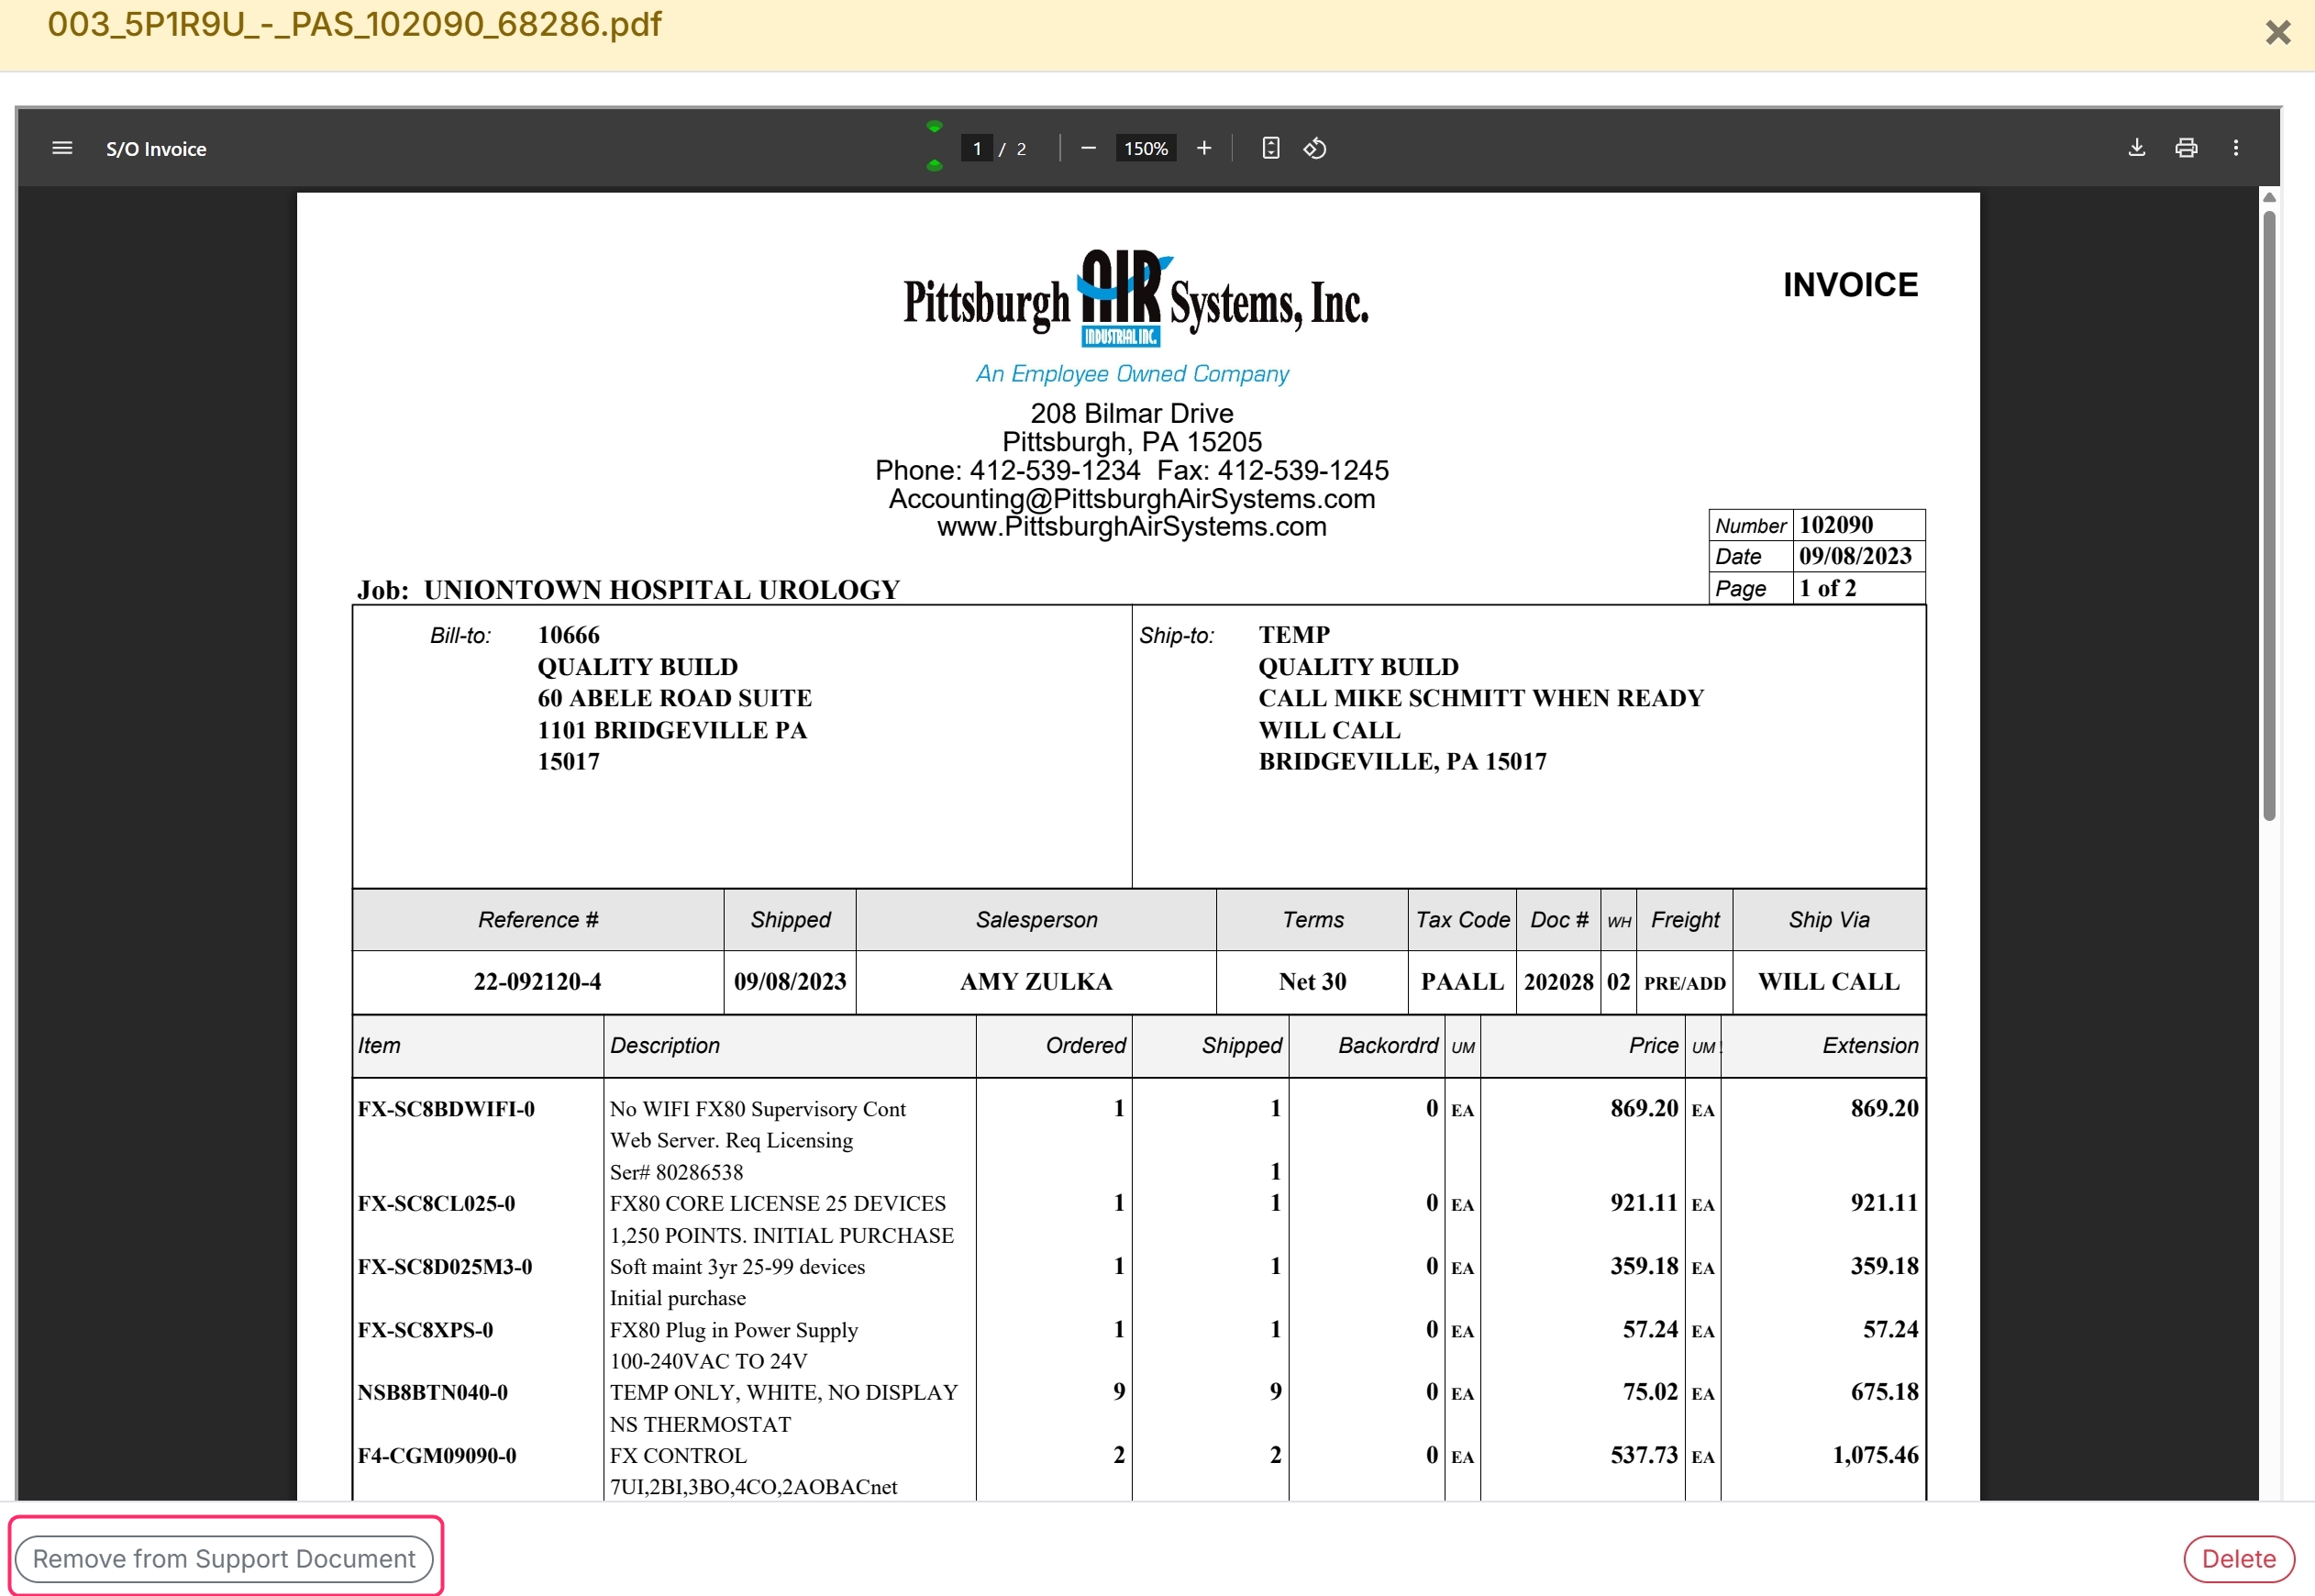
Undoing Supporting Document
If you no longer want a document to be a Supporting Document and need to change it back to a Bill, go to the Supporting Documents List, open the document you wish to update, and select Remove from Support Document. This will revert the document to a Bill.