Now that you have a verified method of payment, you can Schedule Payment in the Accounts Payable tab.
Selecting a Single Bill for Payment
To pay a single bill, click Schedule Payment.
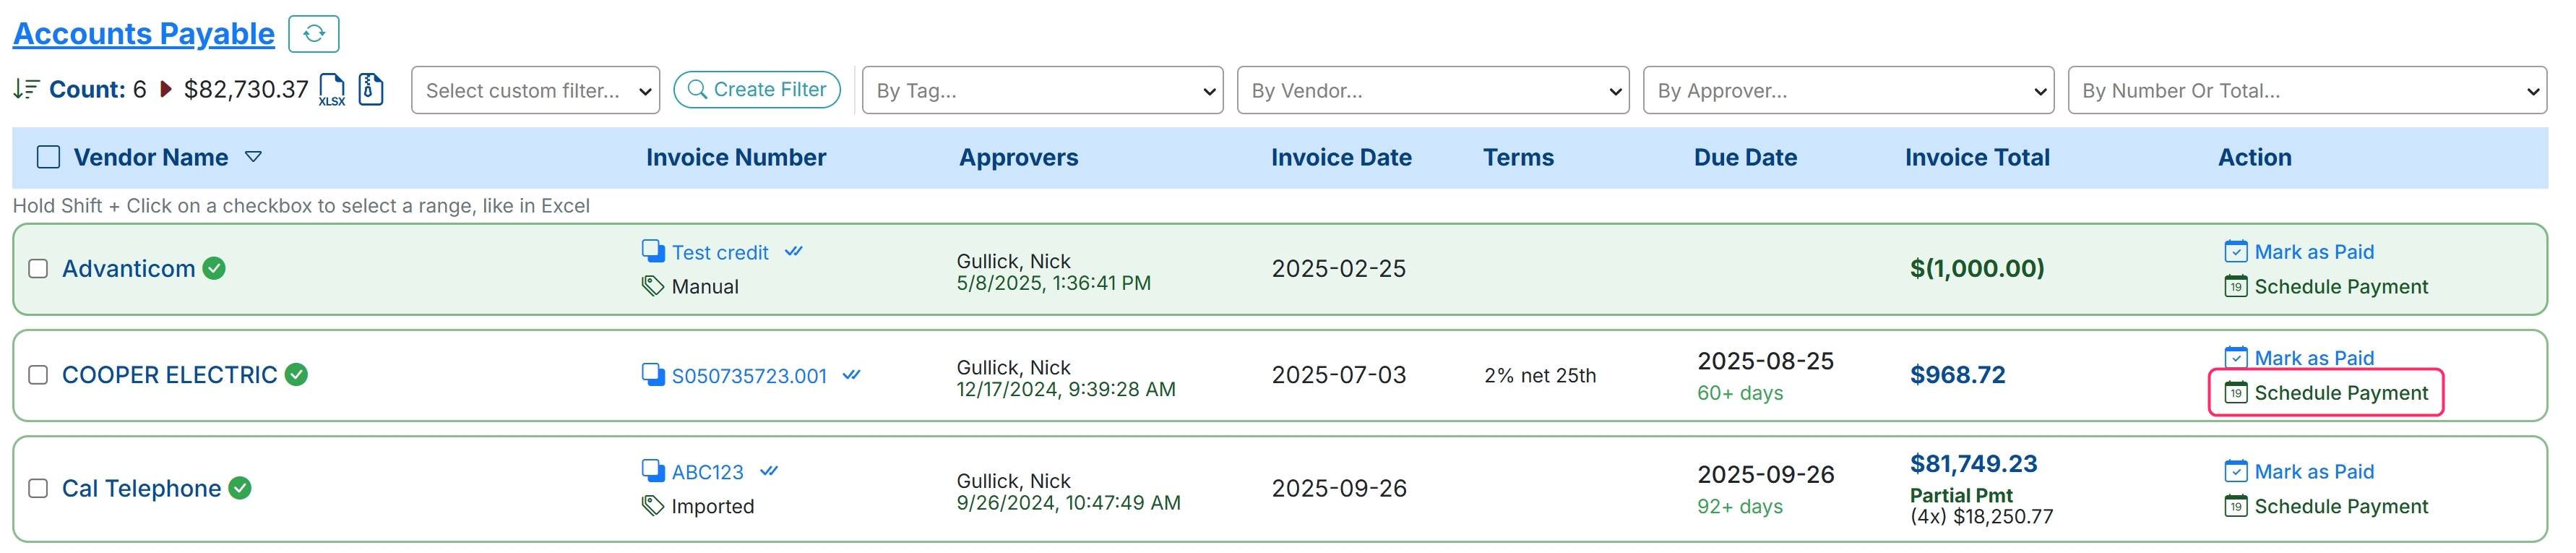
Selecting Multiple Bills for Payment
To select multiple bills you want to pay, click the check boxes to the left of their name and select Schedule Payment at the top of the screen.
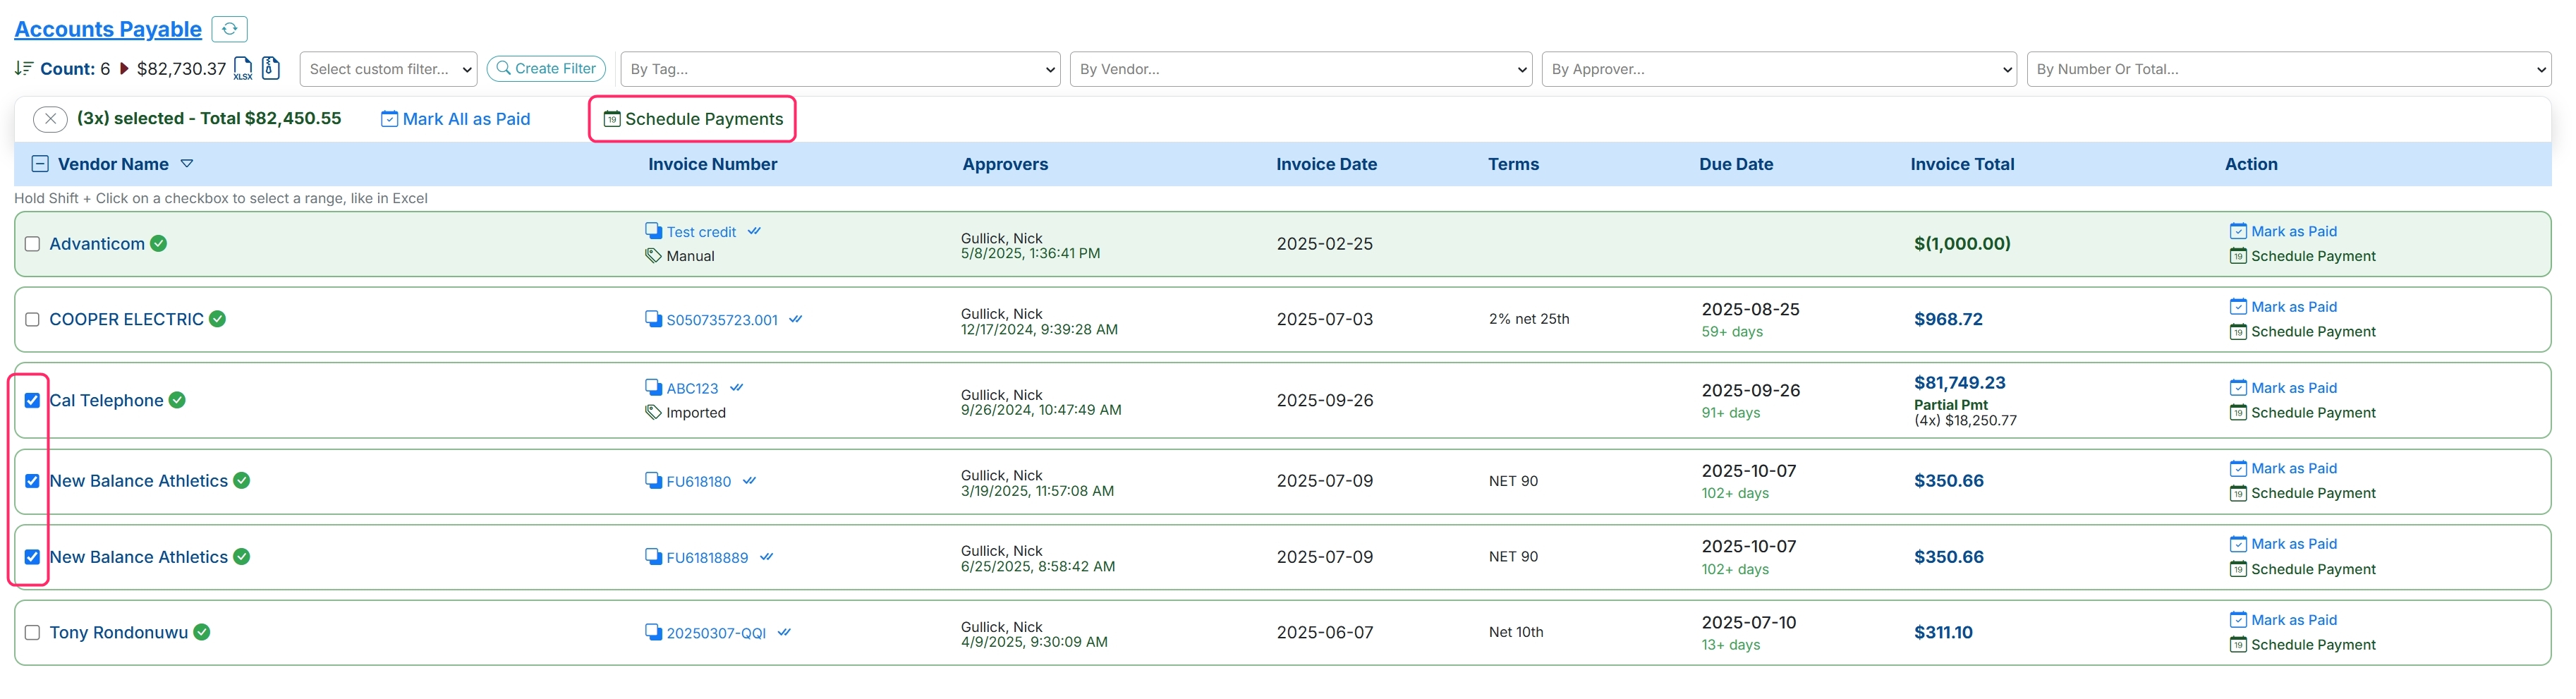
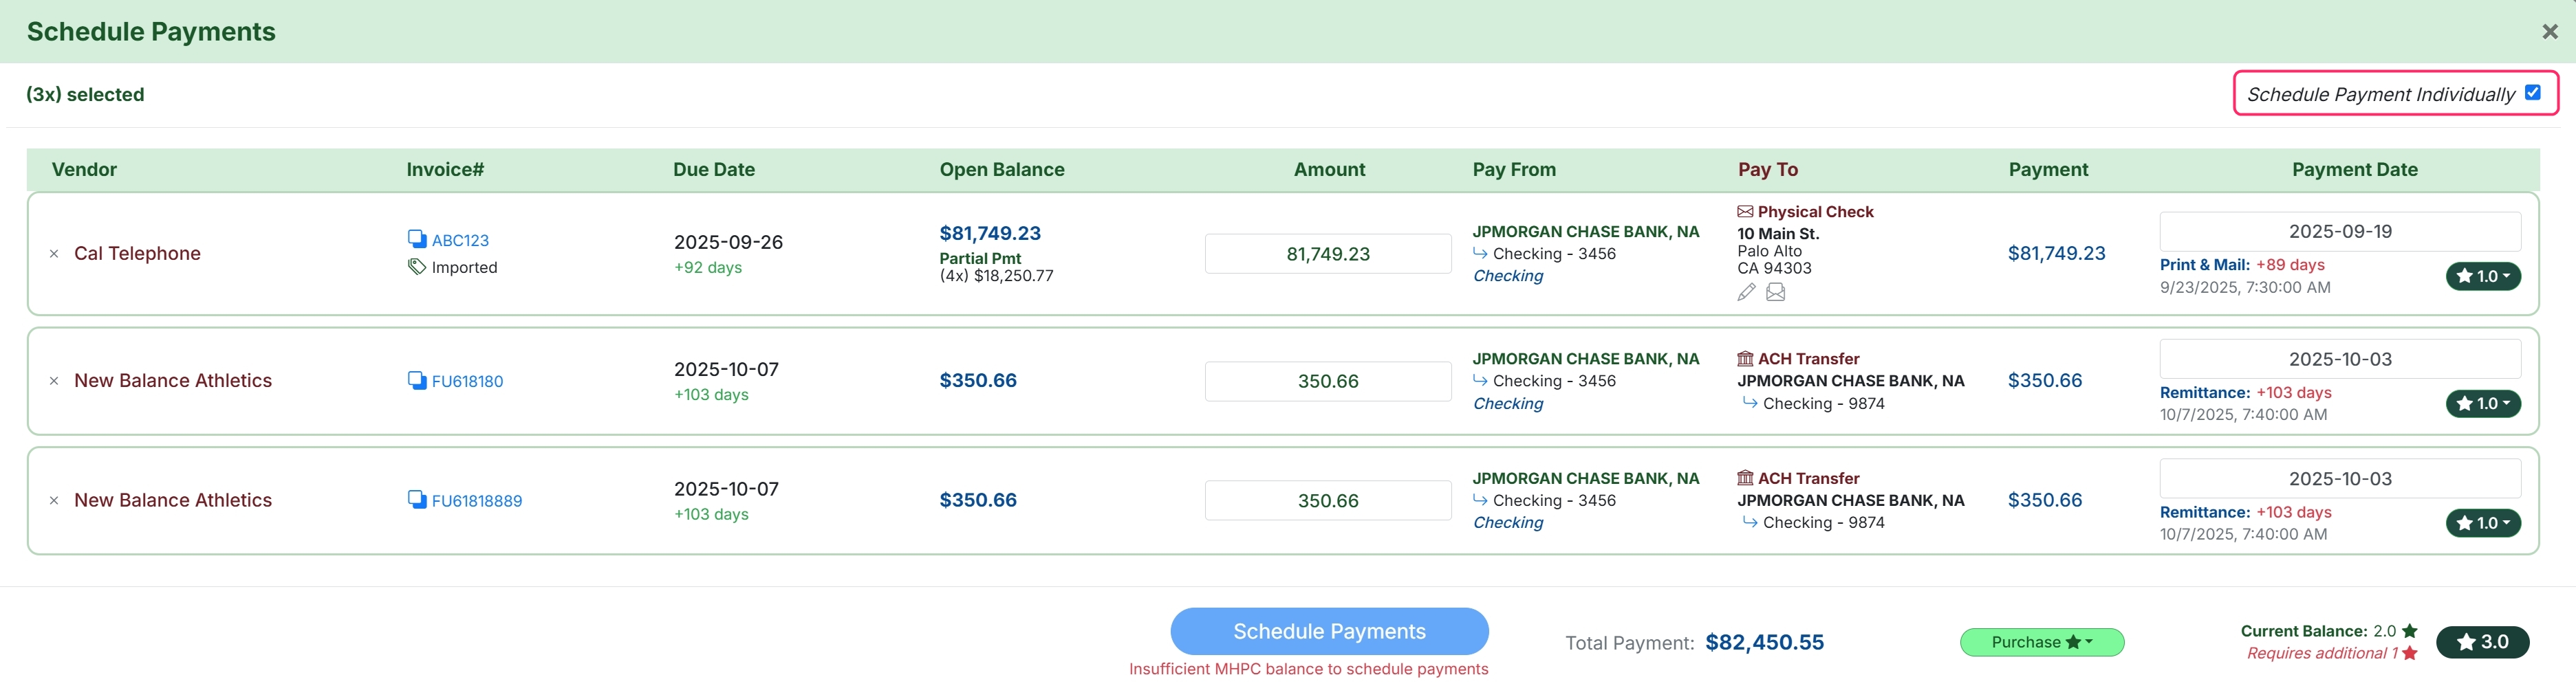
By default, payments will be consolidated together by vendor. To record separate payment transactions for each bill, select Schedule Payment Individually.
Scheduling Payments
If you want to take advantage of payment discounts, select Apply.
.jpg)
Confirm the payment amount. To change the amount, type the desired payment amount in the text box under Amount.
.jpg)
Confirm the Pay From and Pay To account. Click on the field to make changes.

Confirm when you want the payment to be processed by editing the Payment Date.

The date that the payment will be reemitted to the vendor will display underneath the Payment Date.
.jpg)
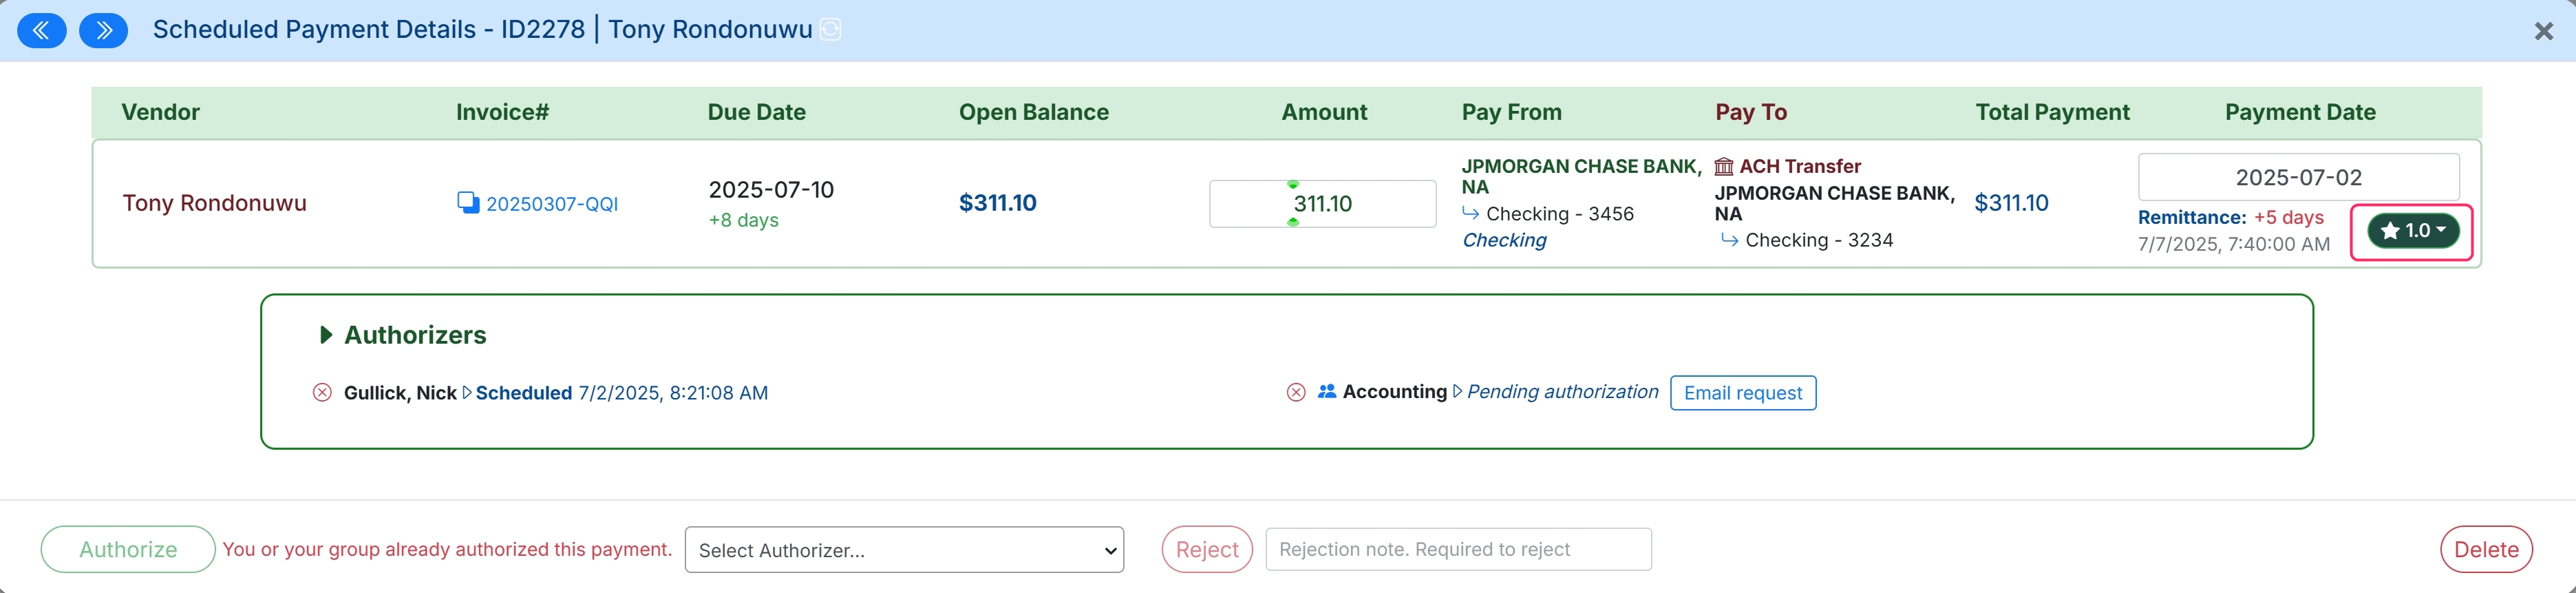
To adjust the speed of which the vendor will receive these fund click on the star next to the remittance date. Here you can adjust the speed, either slower or faster, that the vendor will receive their funds.

Please Note
The number of stars will vary based on speed and amount of transaction.
The total amount of credits that are being used by this transaction will display in the bottom right of the payments screen. If the amount of credits exceeds the amount that you already have you will not be able to schedule the payment and will be prompted to purchase more payments or can lower the speed of the payment delivery.
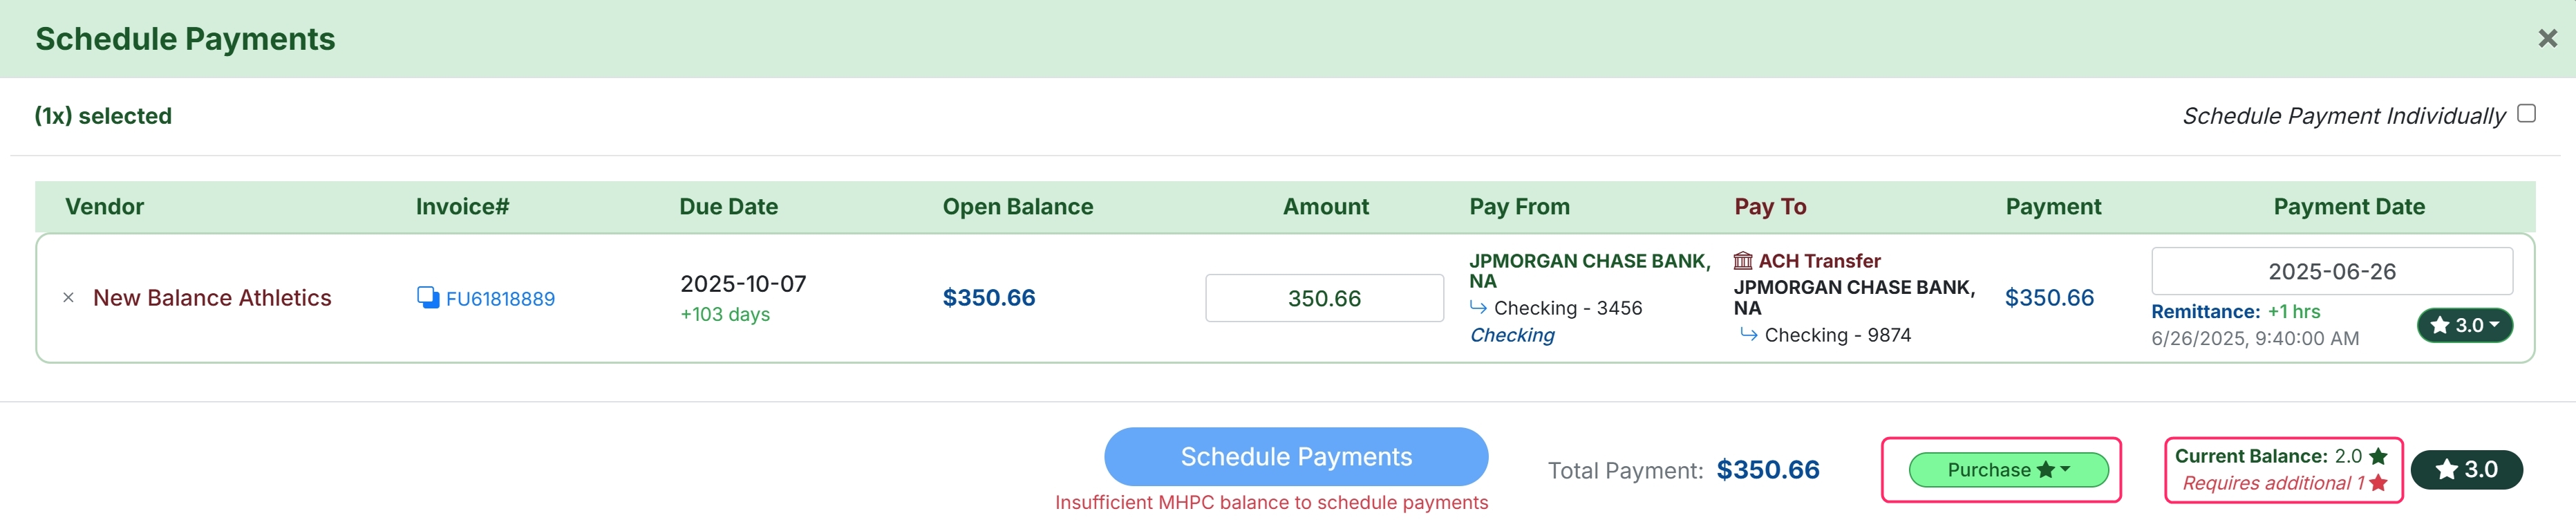
When ready, click Schedule Payments.

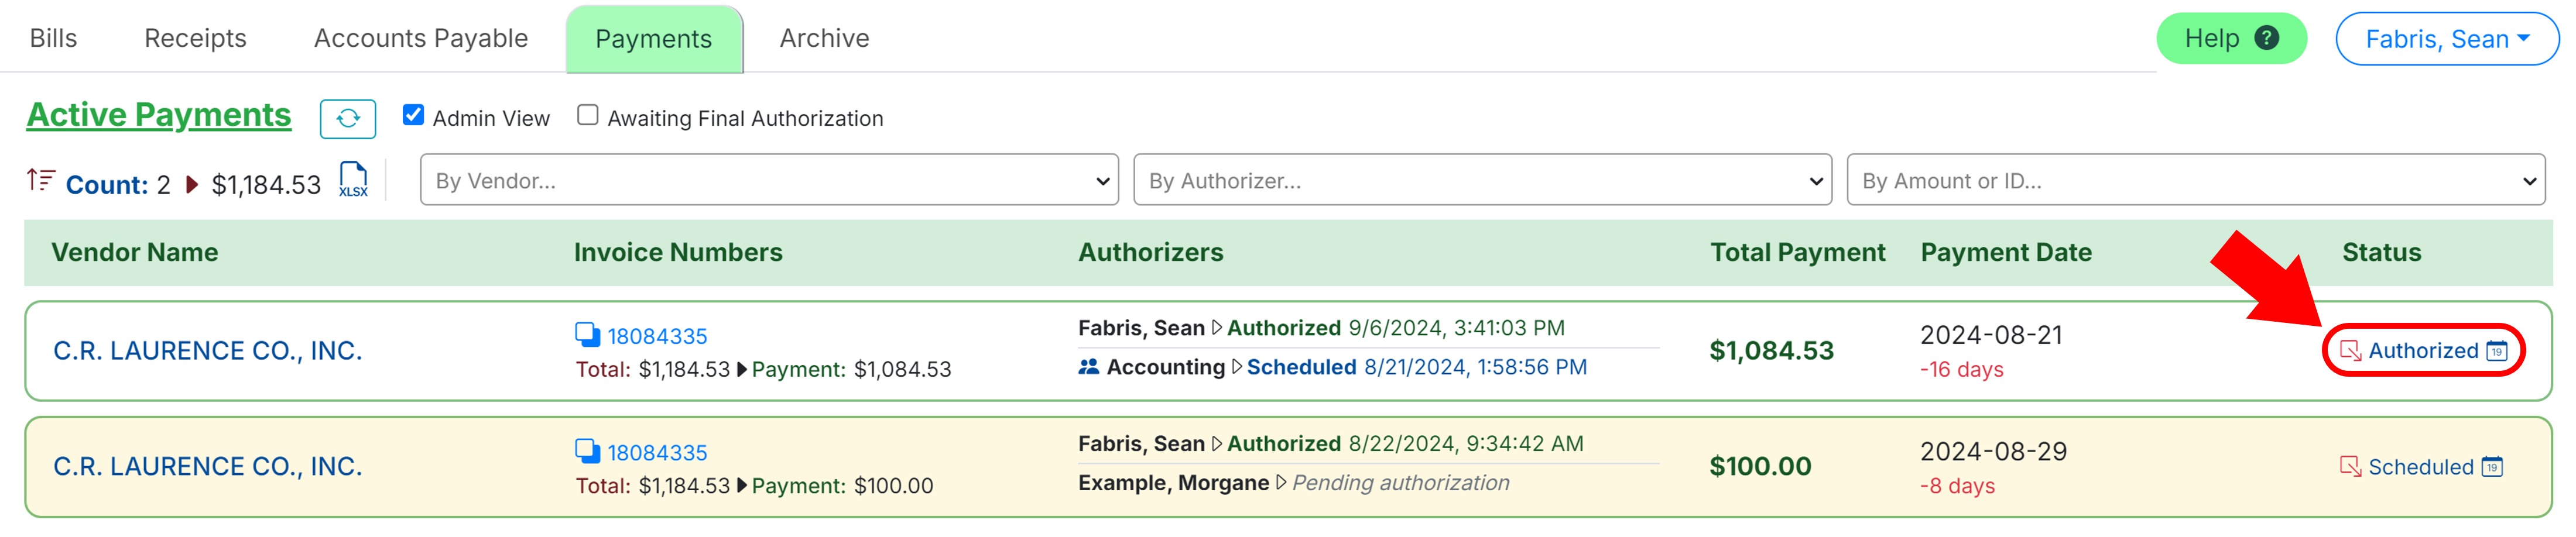
Make Changes to a Scheduled Payment
Once scheduled, the payment will appear in the Payments tab where it will be routed for authorization based on the Authorization Workflow found under Payment Settings. Users will only see payments pending their authorization unless they have Accounting Access.

Scheduling is Authorizing
By scheduling payment, a user is authorizing the payment. Should the user that scheduled the payment be the sole payment authorizer, the payment will be processed on the scheduled date.
To make changes to a scheduled payment, click on the payment and then click on the field you would like to edit. You can select the Amount Paid, Pay From, or Payment Date. Note, to change the Pay To account, you need to Delete the payment.
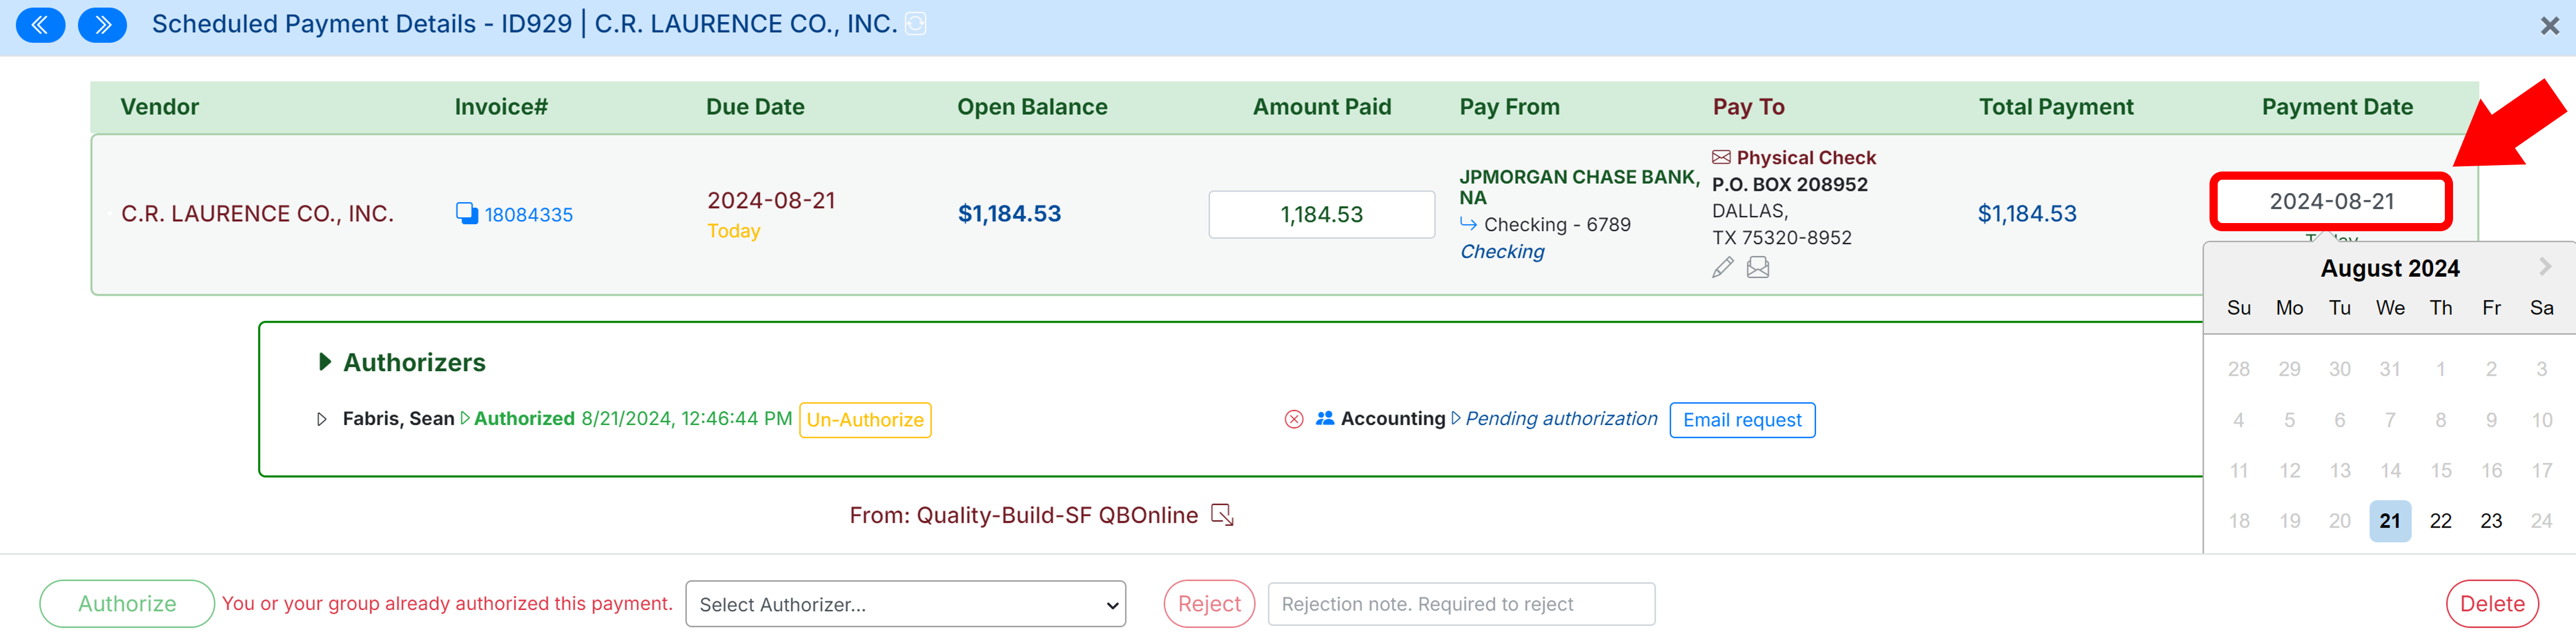
Until the payment is authorized you can adjust the payment speed by clicking the Star icon located below the payment date.
Slower Payment Speed
If you need to adjust the payment speed to be lower you will need to delete the payment and reschedule using the lower speed.
Once you make changes to the payment, select Update Payment.
.png)
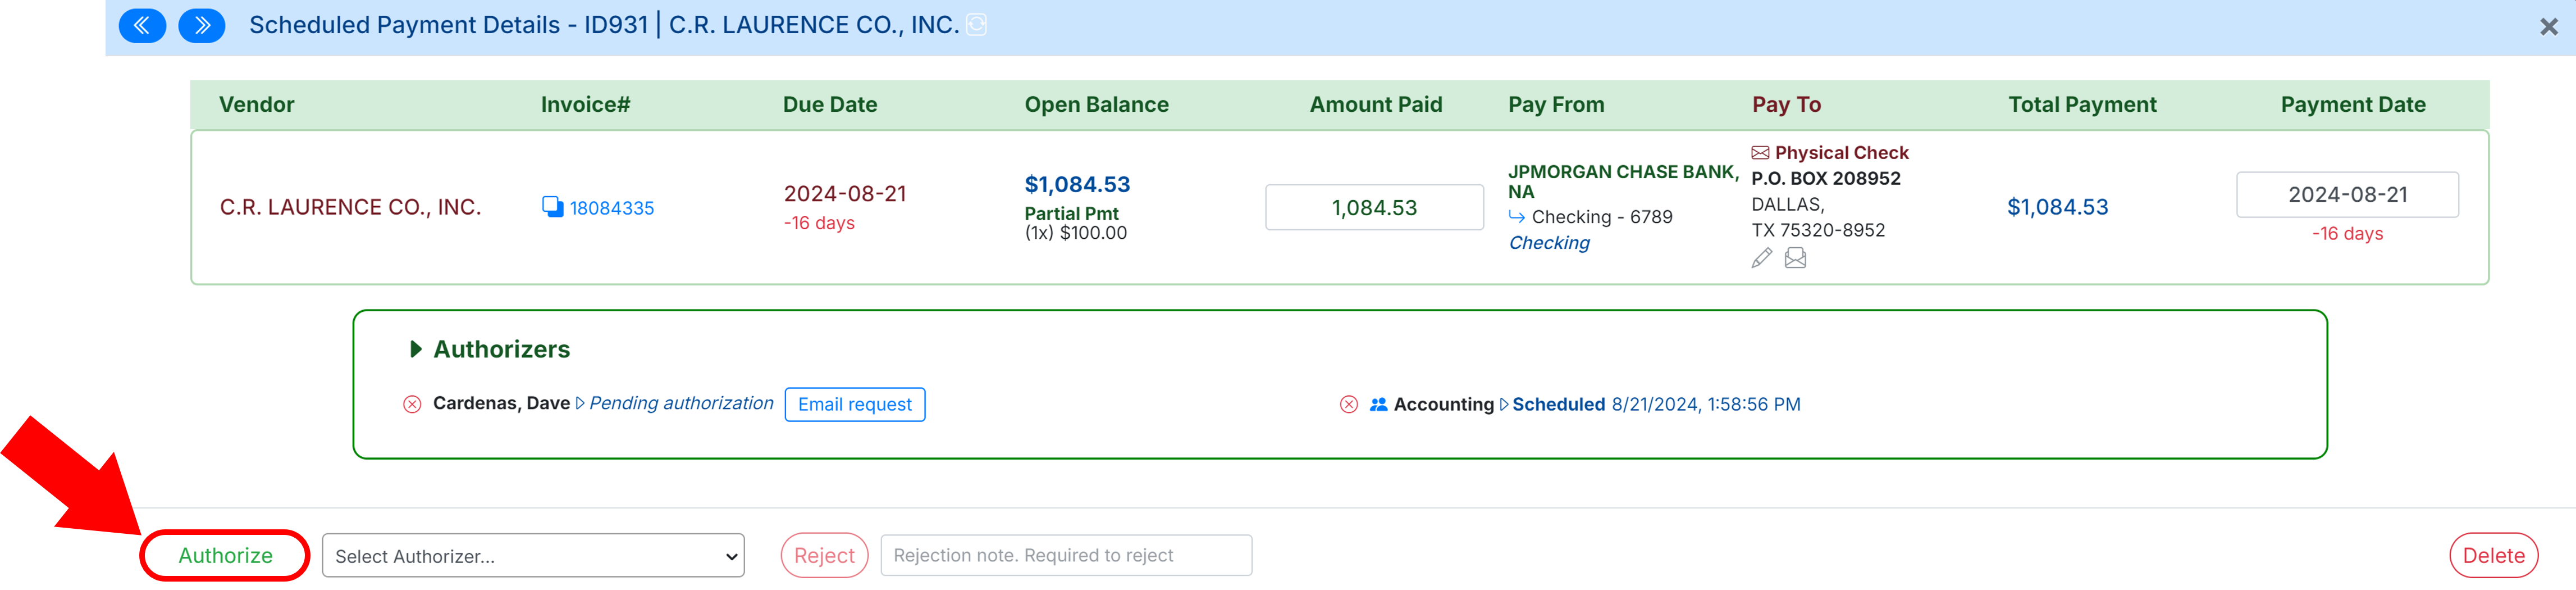
Authorize a Payment
When you are ready to authorize a scheduled payment, click on the payment and select Authorize in the bottom left corner.
This Payment is Above Your Authorization Limit
If you receive an error stating that the payment is above your authorization limit, please contact your account’s Admin requesting that they update your payment approval limit under User Settings. Learn more here.
Once all required users authorize the payment, the status will change from Scheduled to Authorized and the funds will be withdrawn from your account to pay your vendor on the Payment Date and move to the Archive tab.